Best Web Hosting in 2026 for WordPress, Framer and Static Sites
Quick answer: New WordPress blog on a tight budget: ScalaHosting Start at $5.95/month (36-month term), because it includes a real cPanel and NVMe storage that most $2-3/month plans don’t. Site with actual traffic already: skip the $2.99 tiers and go straight to a mid or top plan built for performance, not a low sticker price. Self-managed VPS or a custom app: Kamatera bills by the hour from $0.006 and never punishes you at renewal. Static site or a site built in Framer: don’t buy hosting at all, publish straight from Framer or deploy free on Vercel or Netlify.
Disclosure: this article contains affiliate links. If you buy through them, we may earn a commission at no extra cost to you. Prices were checked in September 2026.
What Is the Best Web Hosting for Each Type of Site in 2026?
The right host depends on what you’re actually running, not which brand has the loudest ad budget.
- Brand new WordPress blog: ScalaHosting Mini at $2.95/month, 10GB NVMe storage and a real cPanel, rare at that price.
- Site with real traffic or WooCommerce: a mid-tier plan built for performance, like Bluehost Business at $6.99/month. Cheap shared tiers throttle CPU the moment traffic spikes.
- Self-managed VPS (you know Linux, want root access): Kamatera’s Basic tier, $4/month for 1 vCPU, 1GB RAM, 20GB NVMe, billed by the hour.
- Static site or a site built in Framer: skip hosting entirely, see the section below, or compare no-code options in our website builders roundup.
First-Year Price vs Renewal Price: What Every Hosting Company Hides
Every hosting company on this list sells you a teaser price for the first billing term, then quietly moves you to a much higher renewal rate once that term ends. We pulled the numbers straight off each pricing page on 07/09/2026 so you can see the real math before you type your card number.
Shared and managed WordPress hosting
| Host | Plan | Year-1 price/mo | Term required | Renewal price/mo | Increase at renewal |
|---|---|---|---|---|---|
| Hostinger | Premium | $2.99 | 48 months | $10.99 | +268% |
| SiteGround | StartUp | $2.99 | 12 months | $17.99 | +502% |
| ScalaHosting | Mini | $2.95 | 36 months | $11.95 | +305% |
| Bluehost | Starter | $3.99 | 36 months | $9.99 | +150% |
| Hostinger | Unlimited | $3.99 | 48 months | $16.99 | +326% |
| SiteGround | GrowBig | $4.99 | 12 months | $29.99 | +501% |
| ScalaHosting | Start | $5.95 | 36 months | $14.95 | +151% |
| Bluehost | Business | $6.99 | 36 months | $13.99 | +100% |
| SiteGround | GoGeek | $7.99 | 12 months | $44.99 | +463% |
| ScalaHosting | Advanced | $9.95 | 36 months | $19.95 | +101% |
| Bluehost | eCommerce Essentials | $14.99 | 36 months | $21.99 | +47% |
VPS and cloud servers (no renewal trap)
| Provider | Entry plan | Specs | Price/mo | Billing | What happens later |
|---|---|---|---|---|---|
| Kamatera | Basic | 1 vCPU, 1GB RAM, 20GB NVMe | $4 | Hourly ($0.006/hr) or monthly, cancel anytime | Same price forever, no term lock |
| DigitalOcean | Basic Droplet | 1 vCPU, 1GB RAM, 25GB SSD | $6 | Pay-as-you-go | Same price forever |
| Cloudways Flexible | Micro/Small | 1 vCPU, 2GB RAM, 50GB, 2TB transfer | $11 | Monthly, cancel anytime | Same price forever |
| Ultahost VPS | Basic | 1 vCPU, 1GB DDR5 RAM, 30GB NVMe | $5.52 (40% off $9.19) | 24-month term | Ultahost does not state the post-term renewal rate on the plan page, so confirm it in writing before you commit to a long term. |
Here is the part almost nobody points out: the term length matters more than the sticker price. Hostinger locks its $2.99 rate for 48 months, so you don’t hit the $10.99 renewal until year five. SiteGround’s cheapest plan only locks the rate for 12 months, so you eat a 502% jump after your first year, even though the intro price looks nearly identical to Hostinger’s. Before you compare two hosts on price alone, check how many months that price is actually good for.
Bluehost Review: Solid for Beginners, Just Don’t Sleepwalk Into the Renewal

Bluehost is the safest default for someone who has never managed a website before. It ships with a one-click WordPress installer, a free domain for the first year, free SSL, weekly backups, and a built-in migration tool, all included on the $3.99/month Starter plan.
Where it breaks: the renewal jump on Starter is 150%, from $3.99 to $9.99/month, and you have to prepay 36 months ($143.64) up front to get that intro rate at all. The upside is that Bluehost’s percentage increase shrinks as you go up in plan tier: eCommerce Essentials only jumps 47% at renewal, the mildest increase we found across all five hosts.
Bluehost is a good pick if you want a well-known brand with 24/7 support and you’re fine paying for three years up front. Get current pricing and any active promo through Bluehost’s official page here.
ScalaHosting Review: The Best Spec-for-Dollar on Entry-Level Plans
ScalaHosting’s edge is that even its cheapest $2.95/month Mini plan includes a real cPanel, NVMe SSD storage, free SSL, and free migration, features plenty of competitors reserve for $9.99+/month plans. The Start plan ($5.95/month intro, $14.95/month renewal) removes the single-site limit and gives unlimited websites, the one we’d actually recommend if you run more than one project.
Where it breaks: like every discount host, the renewal jump is steep in percentage terms (151% to 305%), and the 36-month term means committing $215 to $358 up front depending on the plan. It also runs on its own SPanel/cPanel hybrid rather than a fully custom dashboard, less hand-holding for first-timers than Bluehost’s interface.
If you want NVMe performance and a real cPanel without paying $10+/month from day one, check ScalaHosting’s current plans and pricing here.
Ultahost Review: Managed VPS With DDR5 RAM, but Read the Fine Print on Renewal
Ultahost’s VPS lineup stands out on hardware: even the $5.52/month VPS Basic plan (40% off the regular $9.19/month rate, 24-month term) runs on DDR5 RAM with NVMe storage and includes free backups and a managed server, so Ultahost’s team handles OS-level patching instead of you. VPS Business, Professional, and Enterprise scale up to 4 CPU cores, 6GB RAM, and unlimited bandwidth for $20.69/month at the same 24-month discounted rate.
Where it breaks: the pricing page shows the discounted 24-month rate clearly but never states what you pay once that term ends. Based on the “regular” price listed next to each discount ($9.19/month regular vs $5.52/month discounted on VPS Basic), the renewal is likely close to that regular rate, roughly a 66% increase, but we couldn’t confirm it directly: Ultahost does not publish this renewal figure.. Ultahost also sells dedicated servers from $93.50/month (24-month term, 300 Mbit/s port) if you outgrow VPS, though backup pricing on that tier isn’t listed at all.
See current VPS specs and pricing on Ultahost’s site here.
Kamatera Review: The Cheapest Real VPS if You Can Manage Your Own Server

Kamatera is built for developers, not for someone who wants a control panel and an “Install WordPress” button. The Basic tier is $4/month (or $0.006/hour) for 1 vCPU, 1GB RAM, and 20GB NVMe, with 5TB of monthly traffic and a genuine 30-day free trial worth up to $100 in credit, no card required to start. No long-term contract: resize, downgrade, or cancel same day, the opposite of the 36 to 48-month lock-ins on the shared hosting side of this article.
Where it breaks: no cPanel, no one-click installer, no built-in migration tool. You’re provisioning a bare Ubuntu 24.04 server and doing the install yourself. Overage is modest: extra traffic runs $0.01/GB, extra storage $0.05/GB/month. If that setup sounds like too much, ScalaHosting or Bluehost is the right pick instead.
Run the numbers on Kamatera’s own calculator at Kamatera’s pricing page here.
What About Cloudways, Hostinger, SiteGround, and DigitalOcean?
We checked these four directly because they show up constantly in “best hosting” searches, even though they’re not part of the offers we’re recommending in this article.
- Hostinger has the lowest sticker price in our table ($2.99/month Premium), locked for 48 months, which delays the renewal shock past year four. The catch is the 268% to 326% jump when it hits, and its “unlimited” plans run on an unquantified Fair Usage Policy.
- SiteGround is well regarded for raw performance (Google Cloud infrastructure, daily backups on every plan), but has by far the worst renewal math here, roughly 500% across every tier, and the discount term is only 12 months instead of 36 to 48.
- Cloudways has no contract trap on its Flexible (DigitalOcean-based) plans, from $11/month for 2GB RAM, billed monthly, cancel anytime. Its Cloudways Autonomous line (fully managed WordPress, from $99/month) targets agencies, not budget blogs.
- DigitalOcean is raw infrastructure: $4 to $6/month Basic Droplets, pay-as-you-go, no renewal increase ever, but backups cost 20% (weekly) or 30% (daily) of the Droplet price on top.
Hidden Costs That Never Show Up on the Pricing Page
The advertised monthly price is rarely the full bill. Here’s what actually gets added on, based on what each provider states on its own site.
- Migration fees: Bluehost, ScalaHosting, and Cloudways all advertise free migration. SiteGround and Hostinger don’t spell out migration pricing on their site: Neither SiteGround nor Hostinger publishes a per-site fee beyond the free allowance, so ask support what the second site costs..
- Backups billed separately: the biggest one on VPS. DigitalOcean charges 20% extra for weekly backups or 30% for daily, on top of the Droplet price. Kamatera and Cloudways don’t bundle automated backups into the base price either, budget for snapshot storage.
- SSL: free and automatic on every host we checked (Bluehost, ScalaHosting, Hostinger, SiteGround, Ultahost, Cloudways). Not a hidden cost in 2026.
- Email hosting: Hostinger states business email is “free for 1 year” on its Unlimited and Cloud Startup plans, meaning it becomes a paid add-on in year two.
- Inode and “unlimited” limits: Hostinger ties every “unlimited” feature to a Fair Usage Policy, standard language for “we can throttle outliers,” but the exact inode or file-count ceiling isn’t published: The exact inode ceiling sits in the fair usage policy rather than the pricing page, so read that document before you migrate a large site..
- Bandwidth overage on VPS: Kamatera charges $0.01/GB past the 5TB included. DigitalOcean and Cloudways build in generous transfer (500GB to 11TB by plan) but bill overage past that cap.
When You Don’t Need Web Hosting At All
If your site is static, a portfolio, or built entirely in a no-code tool, buying a traditional hosting plan is often the wrong move. Three real options with real 2026 pricing:
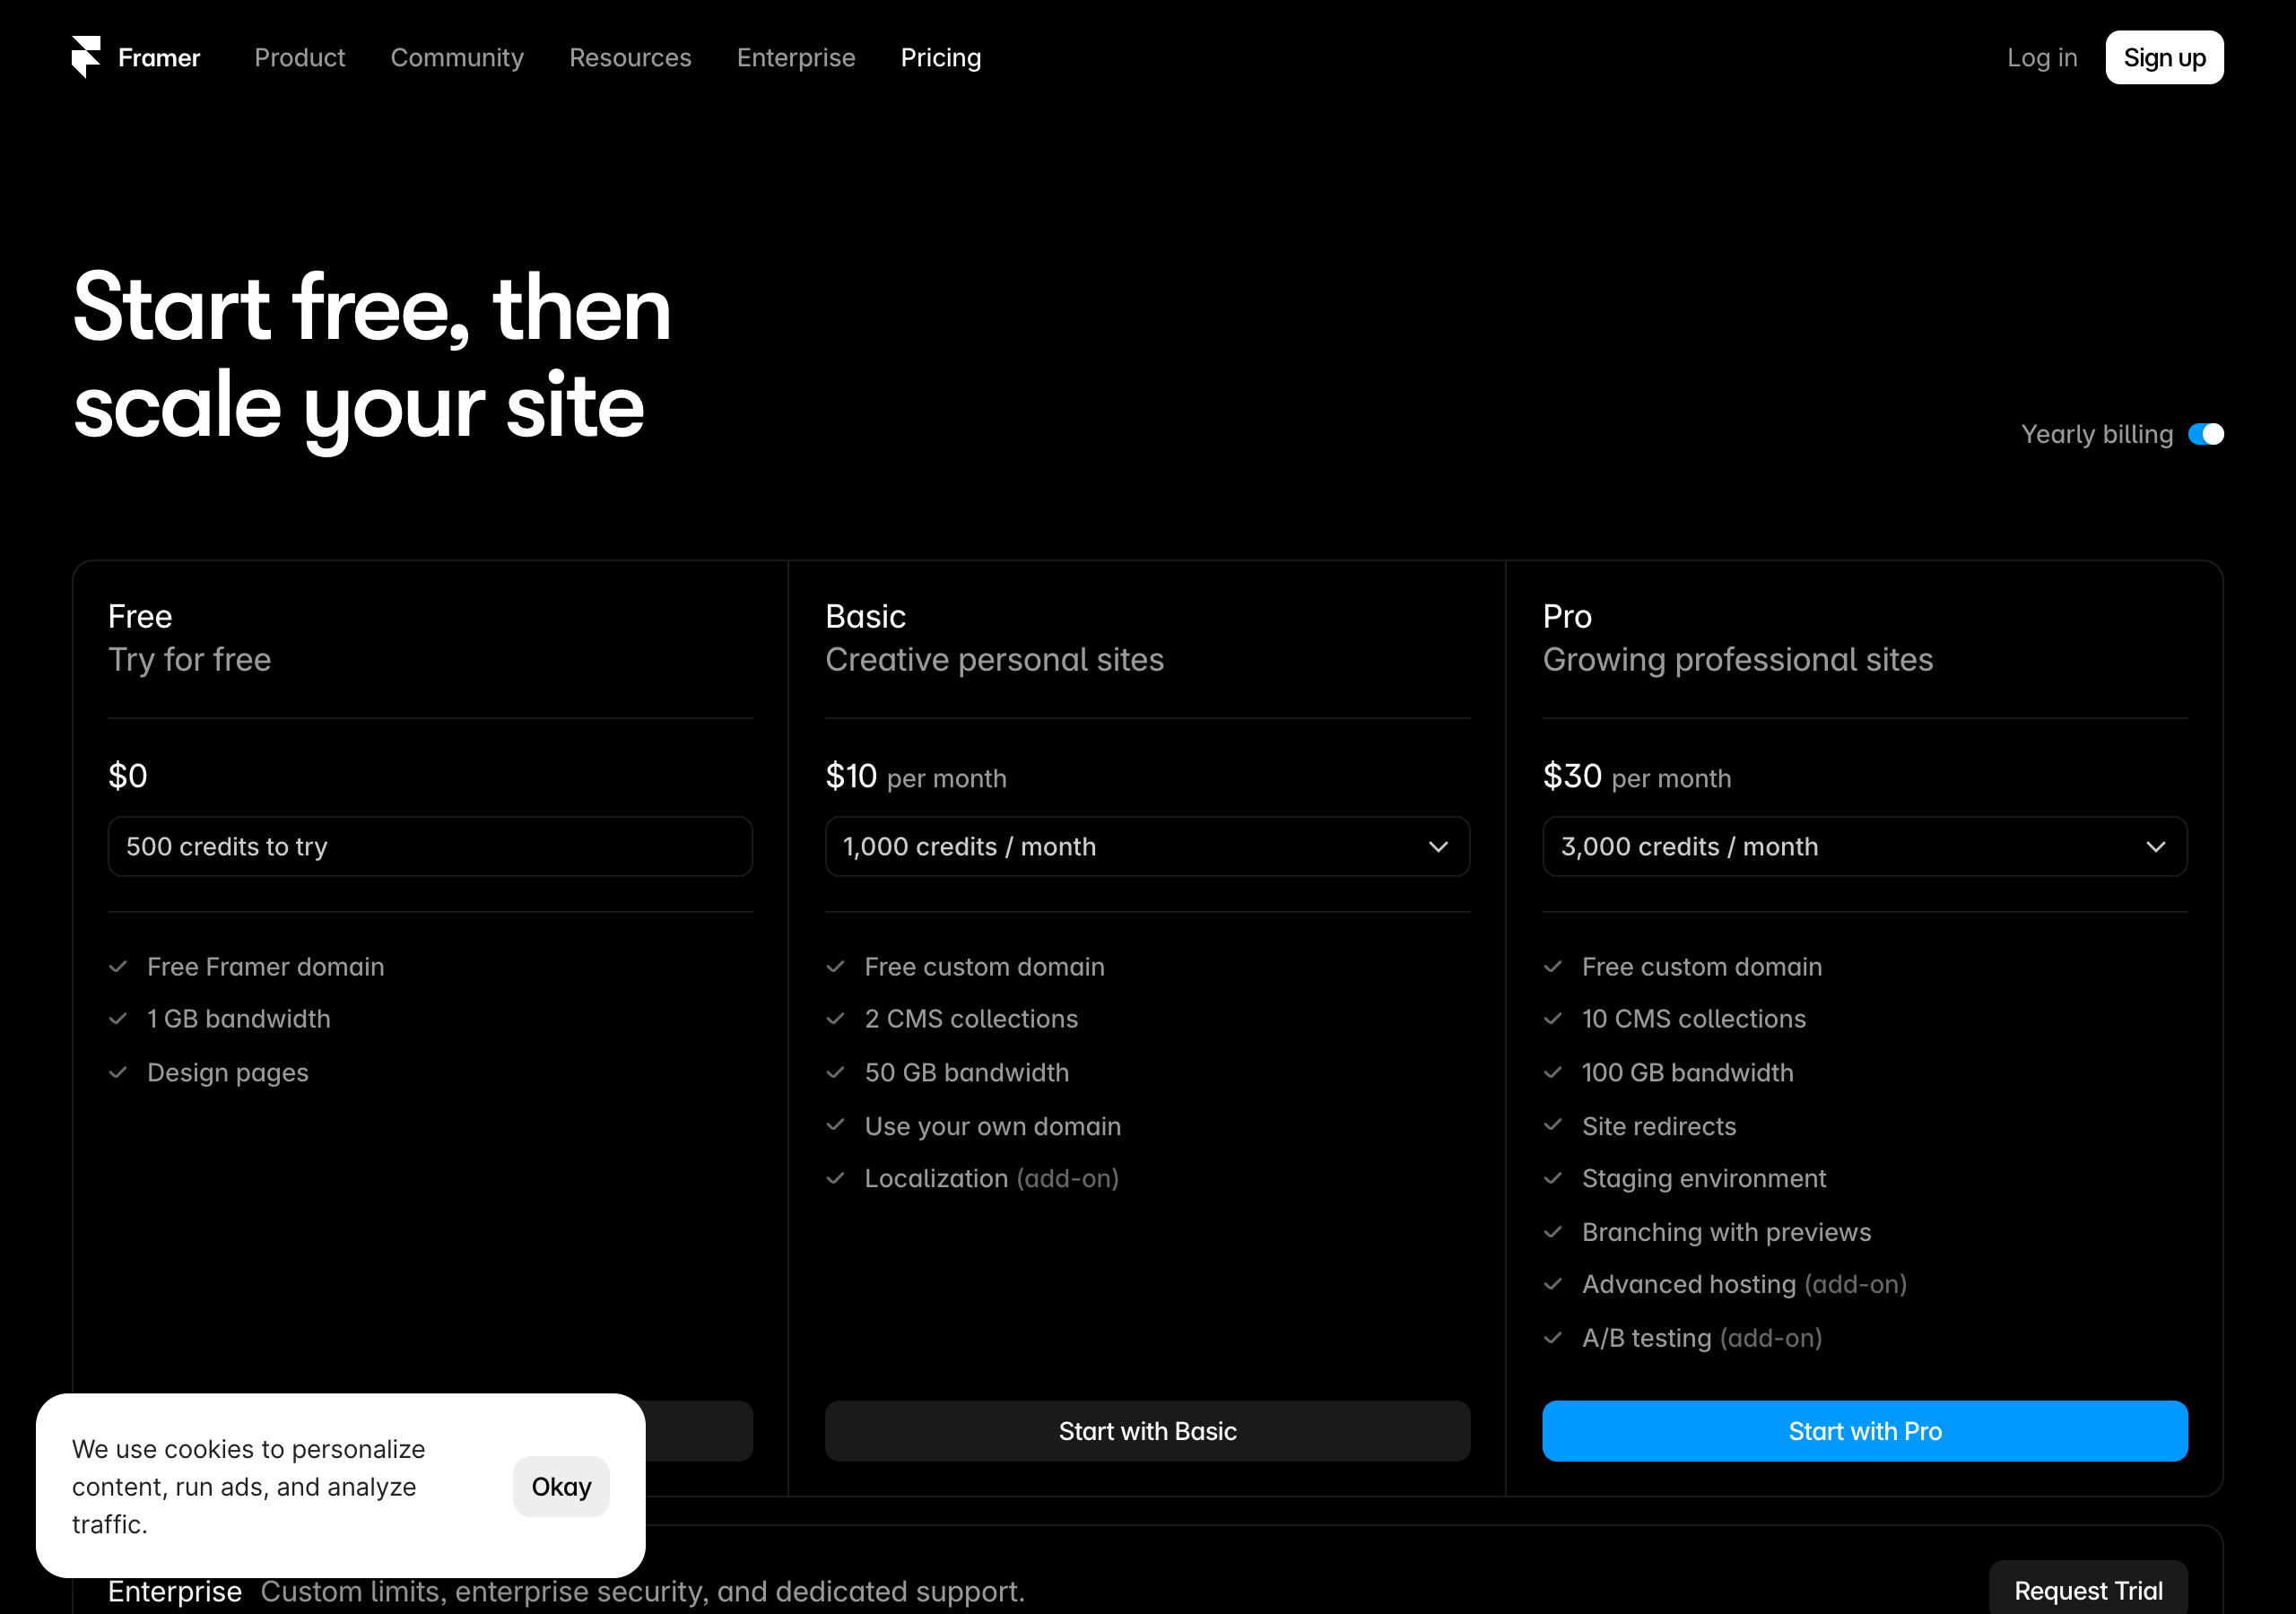
- Framer: Free plan gives a Framer subdomain and 1GB bandwidth, enough to test a design. To connect your own domain you need Basic at $10/month, which unlocks a custom domain, 2 CMS collections, and 50GB bandwidth. No server, no cPanel, no renewal trap, you’re comparing Framer against WordPress on flexibility, not hosting cost.
- Vercel: Hobby plan is free with 100GB fast data transfer/month, 1 million edge requests, automatic HTTPS, plenty for a static site or small Next.js app. Pro starts at $20/month.
- Netlify: Free plan runs on a 300-credit monthly allocation (deploys cost 15 credits each, bandwidth 20 credits/GB), enough for a low-traffic static site. Personal is $9/month with 1,000 credits.
Rule of thumb: if your site doesn’t need a database or server-side code you control, a static host or a website builder from this comparison beats any shared hosting plan in the tables above on cost and maintenance.
How to Switch Web Hosts Without Losing Traffic
Most traffic loss during a migration comes from rushing the DNS cutover, not the file transfer. Follow this order:
- Back up everything on the old host first: full file backup plus a database export, before touching anything else.
- Build the site on the new host under a temporary URL (a staging subdomain, or a local hosts-file edit) without pointing your real domain’s DNS at it yet.
- Test everything: forms, checkout if you run WooCommerce, page speed, and any custom plugins, before anyone else sees it.
- Lower your DNS TTL to 300 seconds 24 to 48 hours before the cutover, so the change propagates fast instead of taking up to 48 hours on the old TTL.
- Point the A record (or CNAME) to the new host once testing is clean, and keep the old account active for 48 to 72 hours while DNS finishes propagating.
- Check Google Search Console for crawl errors daily for the first week, and confirm SSL issues correctly on the new host.
- Cancel the old plan only after two full weeks of stability, not the day after cutover. This is the step most people skip, and the one that saves you if something breaks on day 10.
If you’re moving to Bluehost, ScalaHosting, or Cloudways, use their built-in free migration tool instead of doing steps 1 to 3 by hand, it automates the file and database copy.
Frequently Asked Questions
Is Bluehost still good in 2026?
Yes for beginners, with one caveat: intro pricing requires a 36-month prepayment, and the Starter plan’s renewal price is 150% higher than what you signed up for. Reasonable if you’re fine committing three years up front for a known brand with 24/7 support.
What’s the cheapest hosting that doesn’t spike hard at renewal?
By percentage increase, Bluehost’s eCommerce Essentials (+47%) and ScalaHosting’s Advanced (+101%) had the mildest jumps we found. Hostinger’s absolute price is lowest ($2.99/month), and since the term is 48 months, you won’t feel its 268% jump until year five.
Do I need a VPS, or is shared hosting enough?
Shared hosting is enough for a blog or small business site under roughly 20,000 to 30,000 monthly visits. Once you need root access, or WooCommerce starts timing out during sales, move to a VPS like Kamatera or DigitalOcean.
What’s the cheapest way to host a static or Framer site?
Vercel’s Hobby plan and Netlify’s Free plan are both $0/month. If you built the site in Framer itself, the $10/month Basic plan is the cheapest way to attach your own domain.
How much does site migration actually cost?
Bluehost, ScalaHosting, and Cloudways all include free migration on current plans as of September 2026. If you’re leaving a host that charges for it, expect a one-time fee: Other hosts quote migration case by case rather than publishing a rate..
Is SiteGround worth paying the higher renewal price?
If raw performance and daily backups on every tier matter more than price, SiteGround’s infrastructure is solid. But the renewal jump is roughly 500% after just 12 months, the steepest here, so run the 3-year total before committing.
“Is Framer worth it” is not really a question about Framer. It is a question about you. It means: is this the tool that finally gets my site live without swallowing my weekend, and is the monthly bill worth what I get back? So let me answer it the way I would answer a friend who is about to hand over a credit card, not the way a marketing page would.
I have built real sites in Framer. Not template demos that live for a weekend, but pages that had to load fast on a phone, get edited by someone who is not a designer, and stay up. That experience is the whole point of this review. I am going to tell you what Framer genuinely nails, where it quietly costs you, exactly what each plan gets you at 2026 prices, and the specific type of person who should skip it entirely. By the end you will not be guessing. You will know whether your money and your hours are safe here.
Short version, so you are not held hostage: for most people building a marketing site, portfolio, or landing page, yes, Framer is worth it. But there are real exceptions, and I will name them.
The 30-second verdict
If you read nothing else, read this.
Framer is worth it if you want a beautiful, fast, hosted website live in hours instead of weeks, you value design quality and smooth motion, and you do not want to learn to think like a front-end developer to get there. The free plan lets you build and feel the whole thing before you pay a cent, and paid plans start low enough that the value is obvious the moment you connect a custom domain.
Framer is probably not worth it if you are running a large store with inventory, variants, and checkout as the core of your business, or you are building a massive, deeply relational content database with thousands of interlinked records, or your entire site is a single line of text where any free one-pager would do the job. In those cases you are paying for strengths you will not use, or asking Framer to be something it is not.
Everything below is just the detailed version of those two paragraphs, with the receipts.
Curious whether it clicks for you specifically? Do not take my word for it. Start a free Framer site and try to publish one real page in the next hour. No credit card needed, and one hour of building tells you more than any review, including this one.
What Framer actually is (so we judge it fairly)
Before deciding if something is worth it, you have to be clear on what it is trying to be. Judging Framer as a store backend or a database engine is like judging a sports car for how much plywood it can haul. Wrong test.
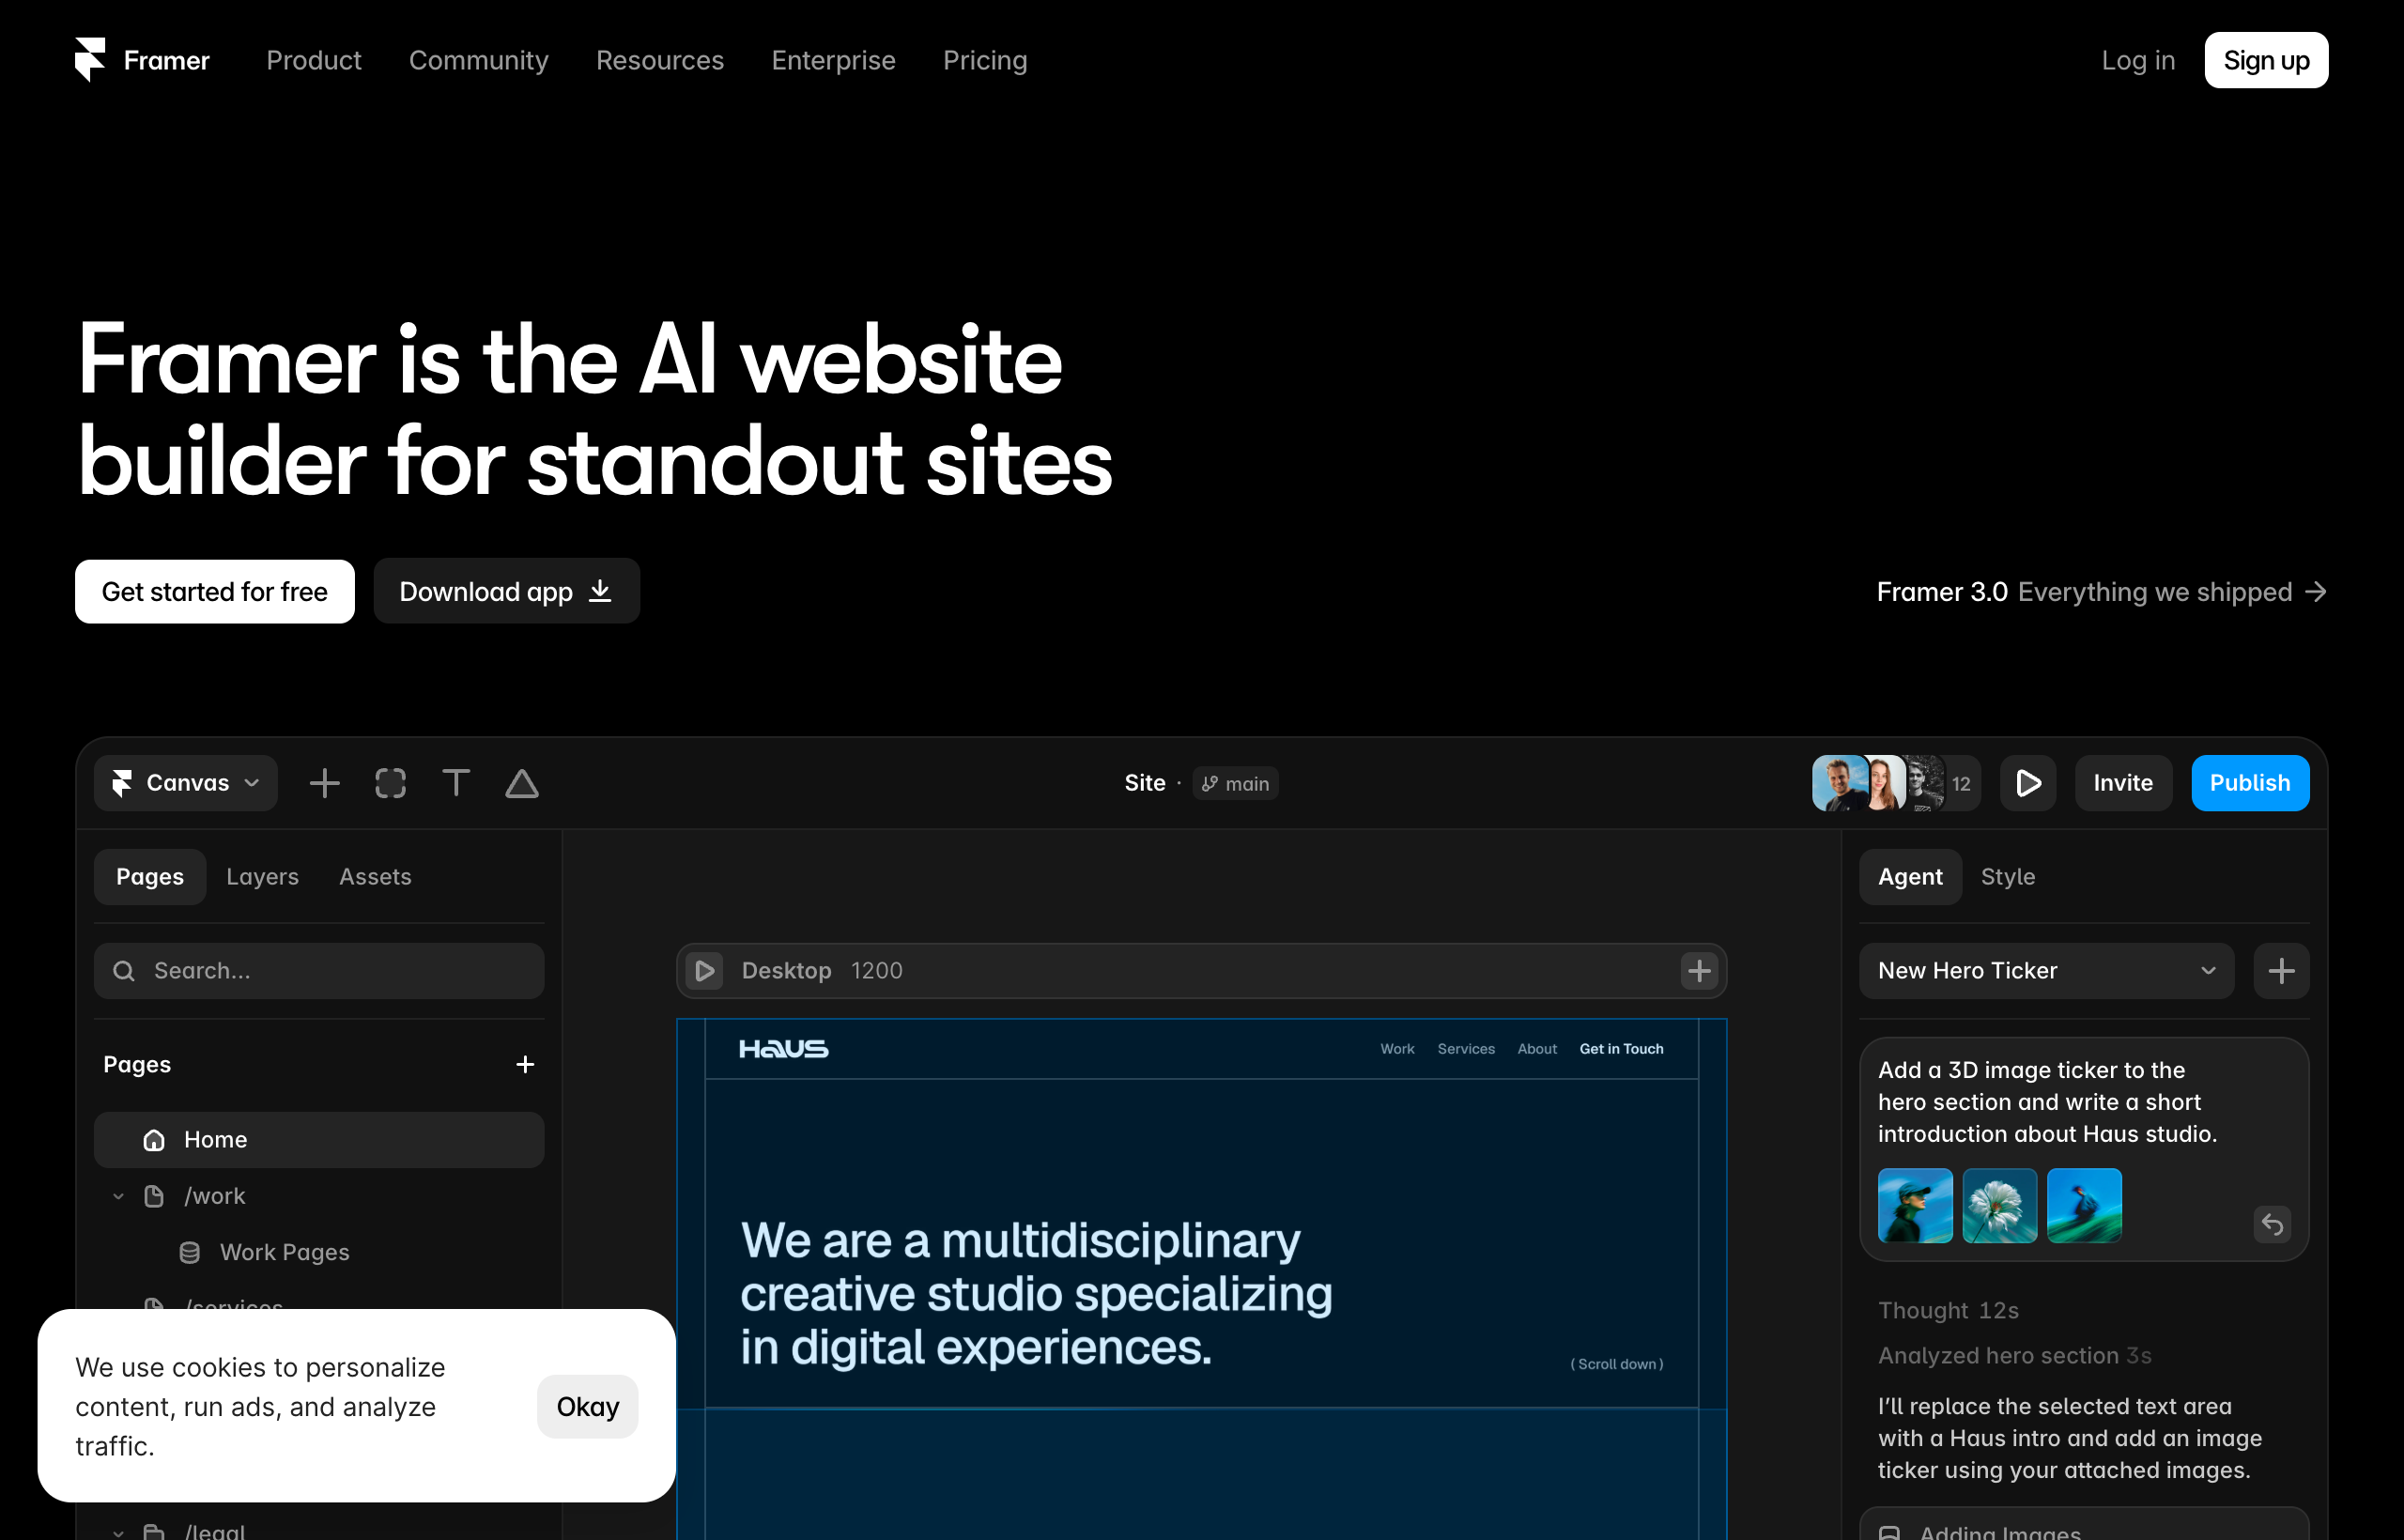
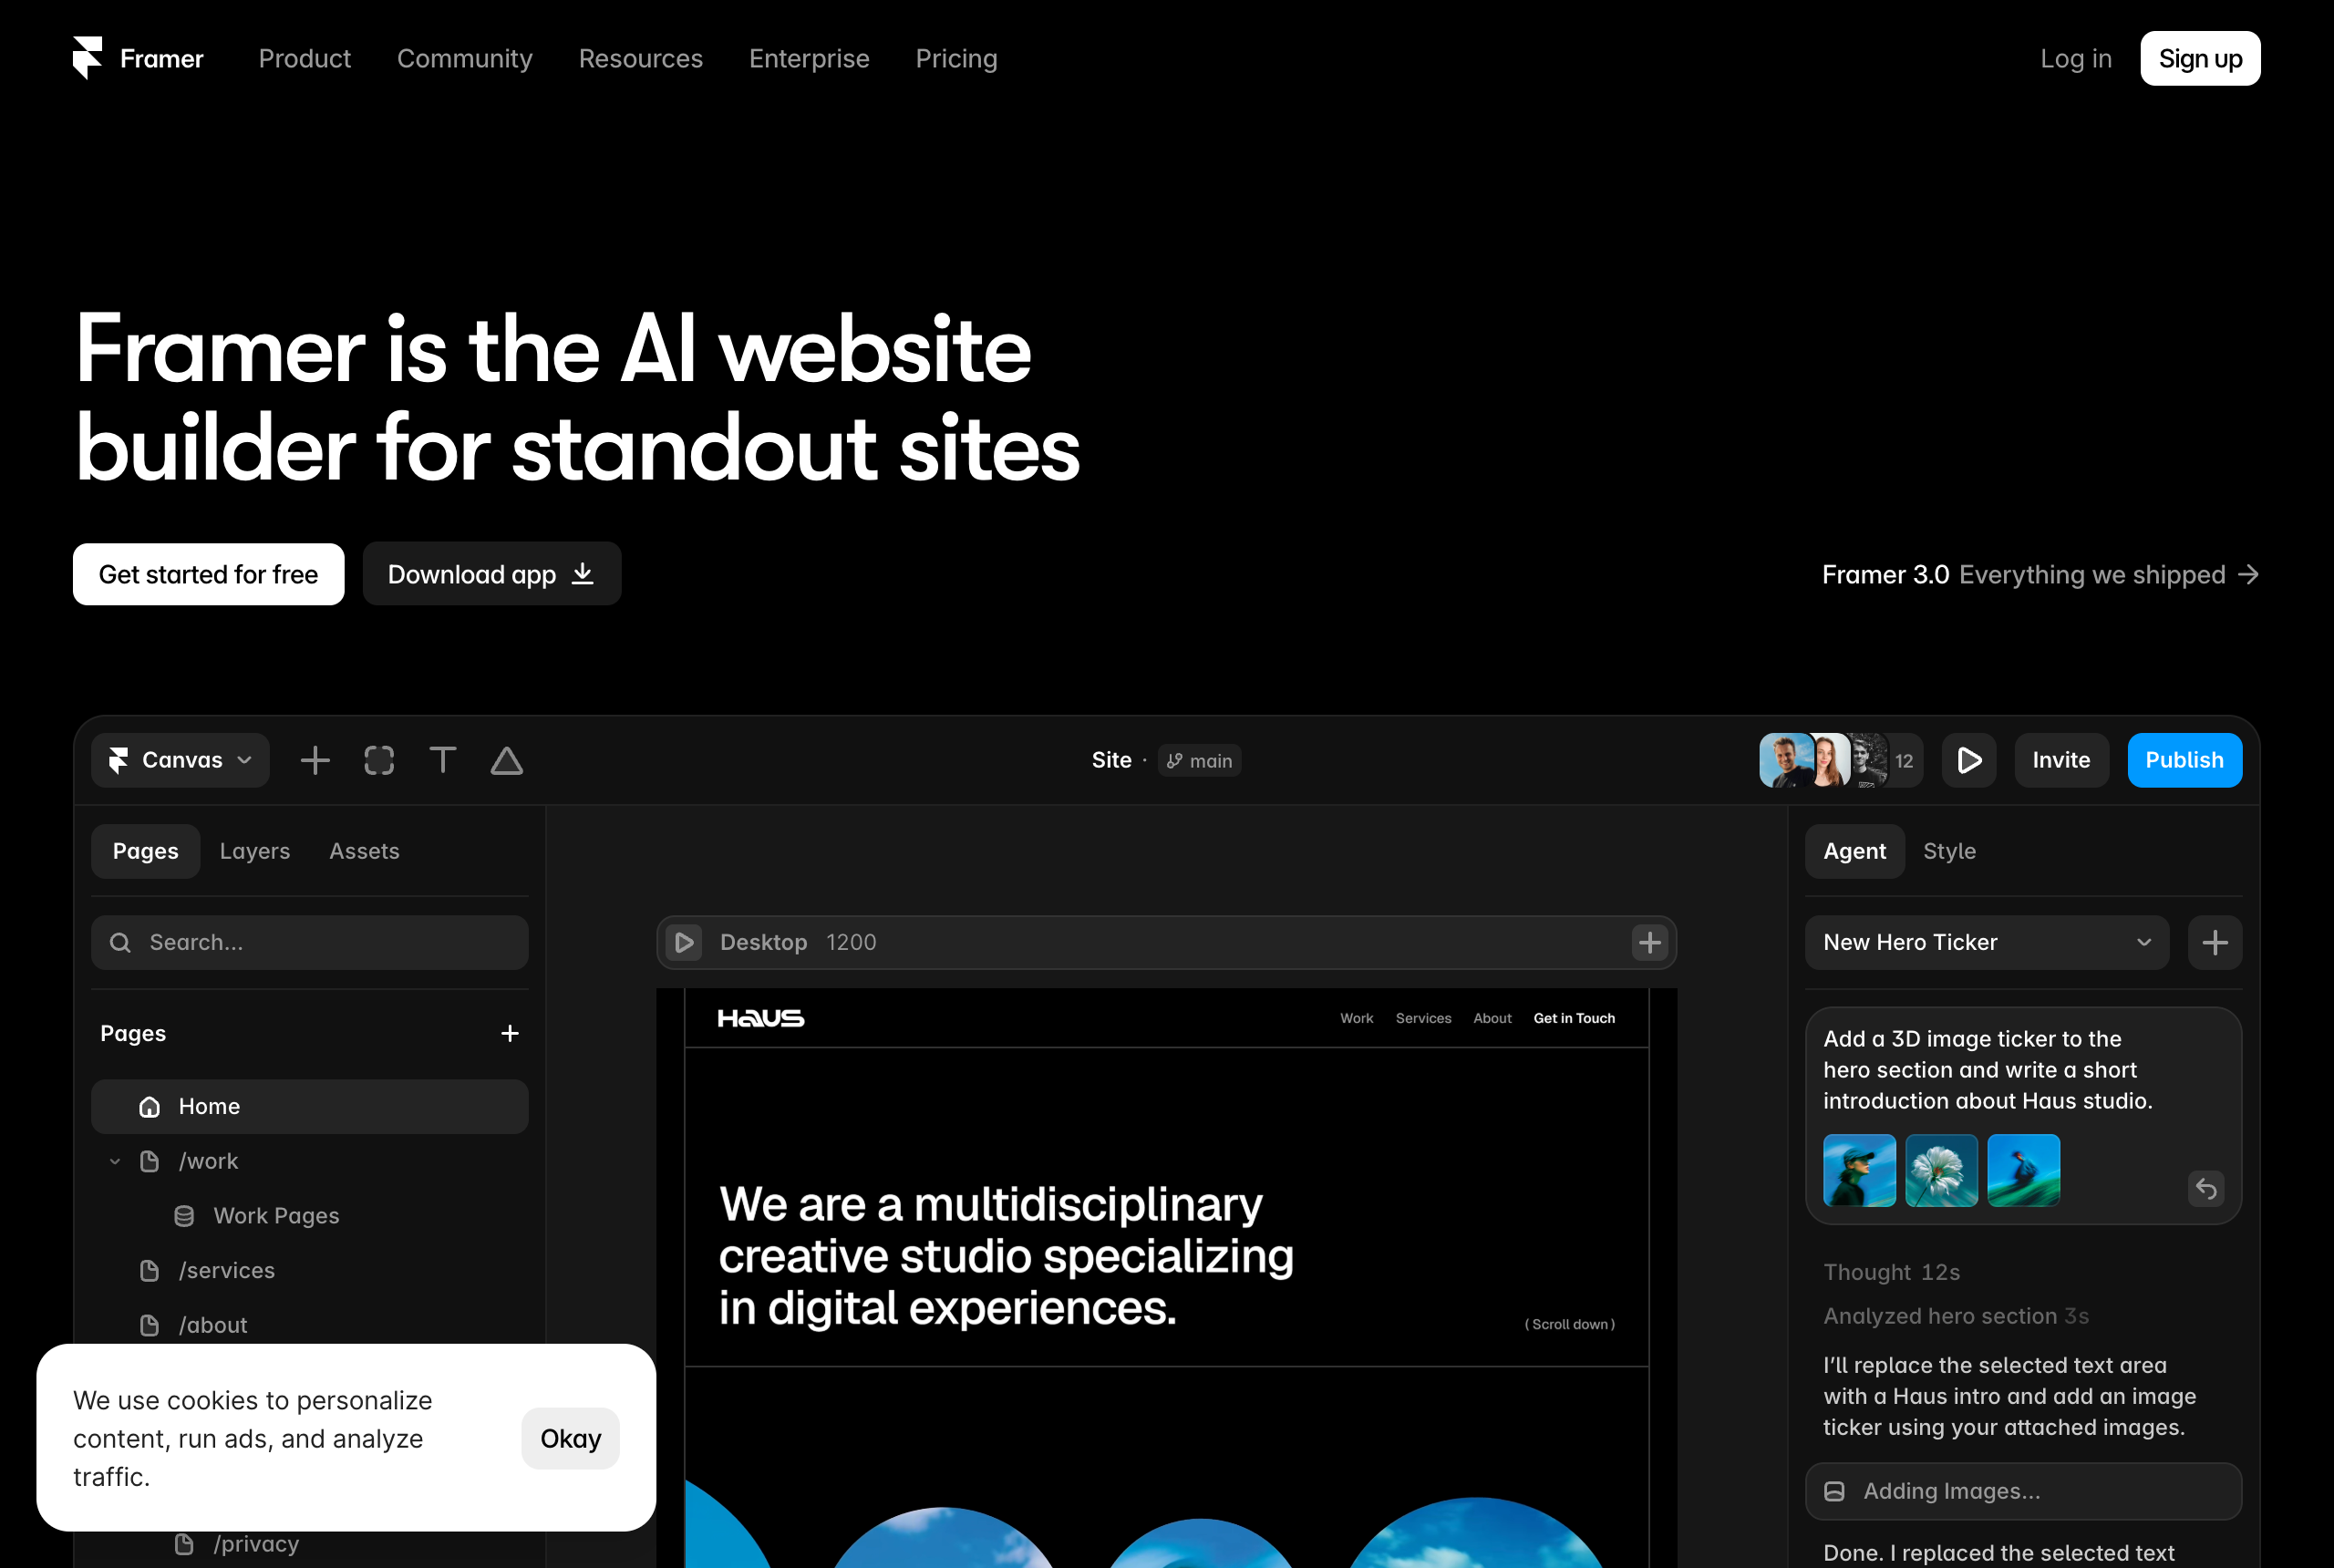
Framer is a no-code, design-first website builder. It grew out of a design and prototyping tool, so the canvas feels like Figma: you drag elements, type directly onto the page, and drop in pre-built sections. It is fully hosted on a global CDN, which means there is no server to rent, no deploys to babysit, and no security patches on your plate. You design, you hit publish, and it is live on a real domain.
It also ships with the things you would otherwise bolt on later: a CMS for blogs and dynamic pages, a template marketplace, AI features that can generate and edit, responsive breakpoints for desktop, tablet, and phone, and SEO controls for meta title, description, Open Graph image, and alt text. You can even paste Figma frames straight onto the canvas and the layers stay editable, so text stays text.
So the fair question is not “can Framer do everything.” It is “for the kind of site most people actually build, is it worth the price and the learning time.” That is the test I am running.
Where Framer is genuinely worth it
Let me be specific about the value, because “it is good” is useless when your money is on the line.
Speed from blank canvas to live URL
This is the single strongest argument for Framer being worth it. The distance between “I have an idea” and “here is the live link” is short. You pick a template or a blank canvas, edit text and images inline, drag in a few sections, connect a domain, and publish. A confident beginner can put a clean one-page site online in an afternoon. Someone experienced can do a landing page in an hour.
That speed is not a vanity metric. It is the difference between a site that ships and a project that dies in a folder called “website, final, v3.” If you have ever paid for a builder and then never actually launched, you already know that the tool that gets you to publish is the one that was worth the money.
Design quality by default
Framer looks polished before you touch anything, because the defaults were built by people who care about typography and spacing. You are not fighting the tool to make things look decent. This matters more than it sounds. Most cheap or overly simple builders make it easy to build something that looks like everyone else. Framer makes it easy to build something that looks intentional, and for a portfolio, a startup landing page, or a small business, looking intentional is a big part of what you are paying for.
Motion that reads as premium
Scroll effects, appear-on-scroll animations, hover states, and smooth page transitions are built in and mostly a matter of selecting an element and choosing an effect. This is why so many modern startup and portfolio sites you admire feel expensive. In most builders, that kind of motion is either impossible or a painful custom job. In Framer it is close to free. If a premium feel matters for your brand, this alone can justify the plan.
Hosting you never think about
Because Framer is fully hosted, you are not renting a server, configuring anything, or worrying about a plugin update taking your site down at 2 a.m. For a solo founder or freelancer, removing that entire category of problem is worth real money. The time you do not spend on maintenance is time you spend on the actual business.
It grows with you, up to a point
Need a blog, a case-study library, a changelog, or a jobs page? The CMS handles collections and generates dynamic pages from them cleanly. You are not forced to abandon the tool the moment you want a second content type. There are limits, which I will get to honestly, but for the content most marketing sites need, it is enough.
Where Framer costs you (the honest trade-offs)
A review that only lists strengths is an ad. Here is where Framer takes something from you, so you can decide if the trade is fair.
There is a learning curve, just a gentle one
Framer is much easier than developer-grade tools, but “no-code” does not mean “no learning.” If you have never used a design tool like Figma or Canva, the first hour can feel unfamiliar. The canvas, layers, and responsive stacks all have a logic you have to absorb. It is a short climb, not a cliff, but budget an afternoon to feel fluent rather than expecting instant mastery.
The free plan is a trial, not a destination
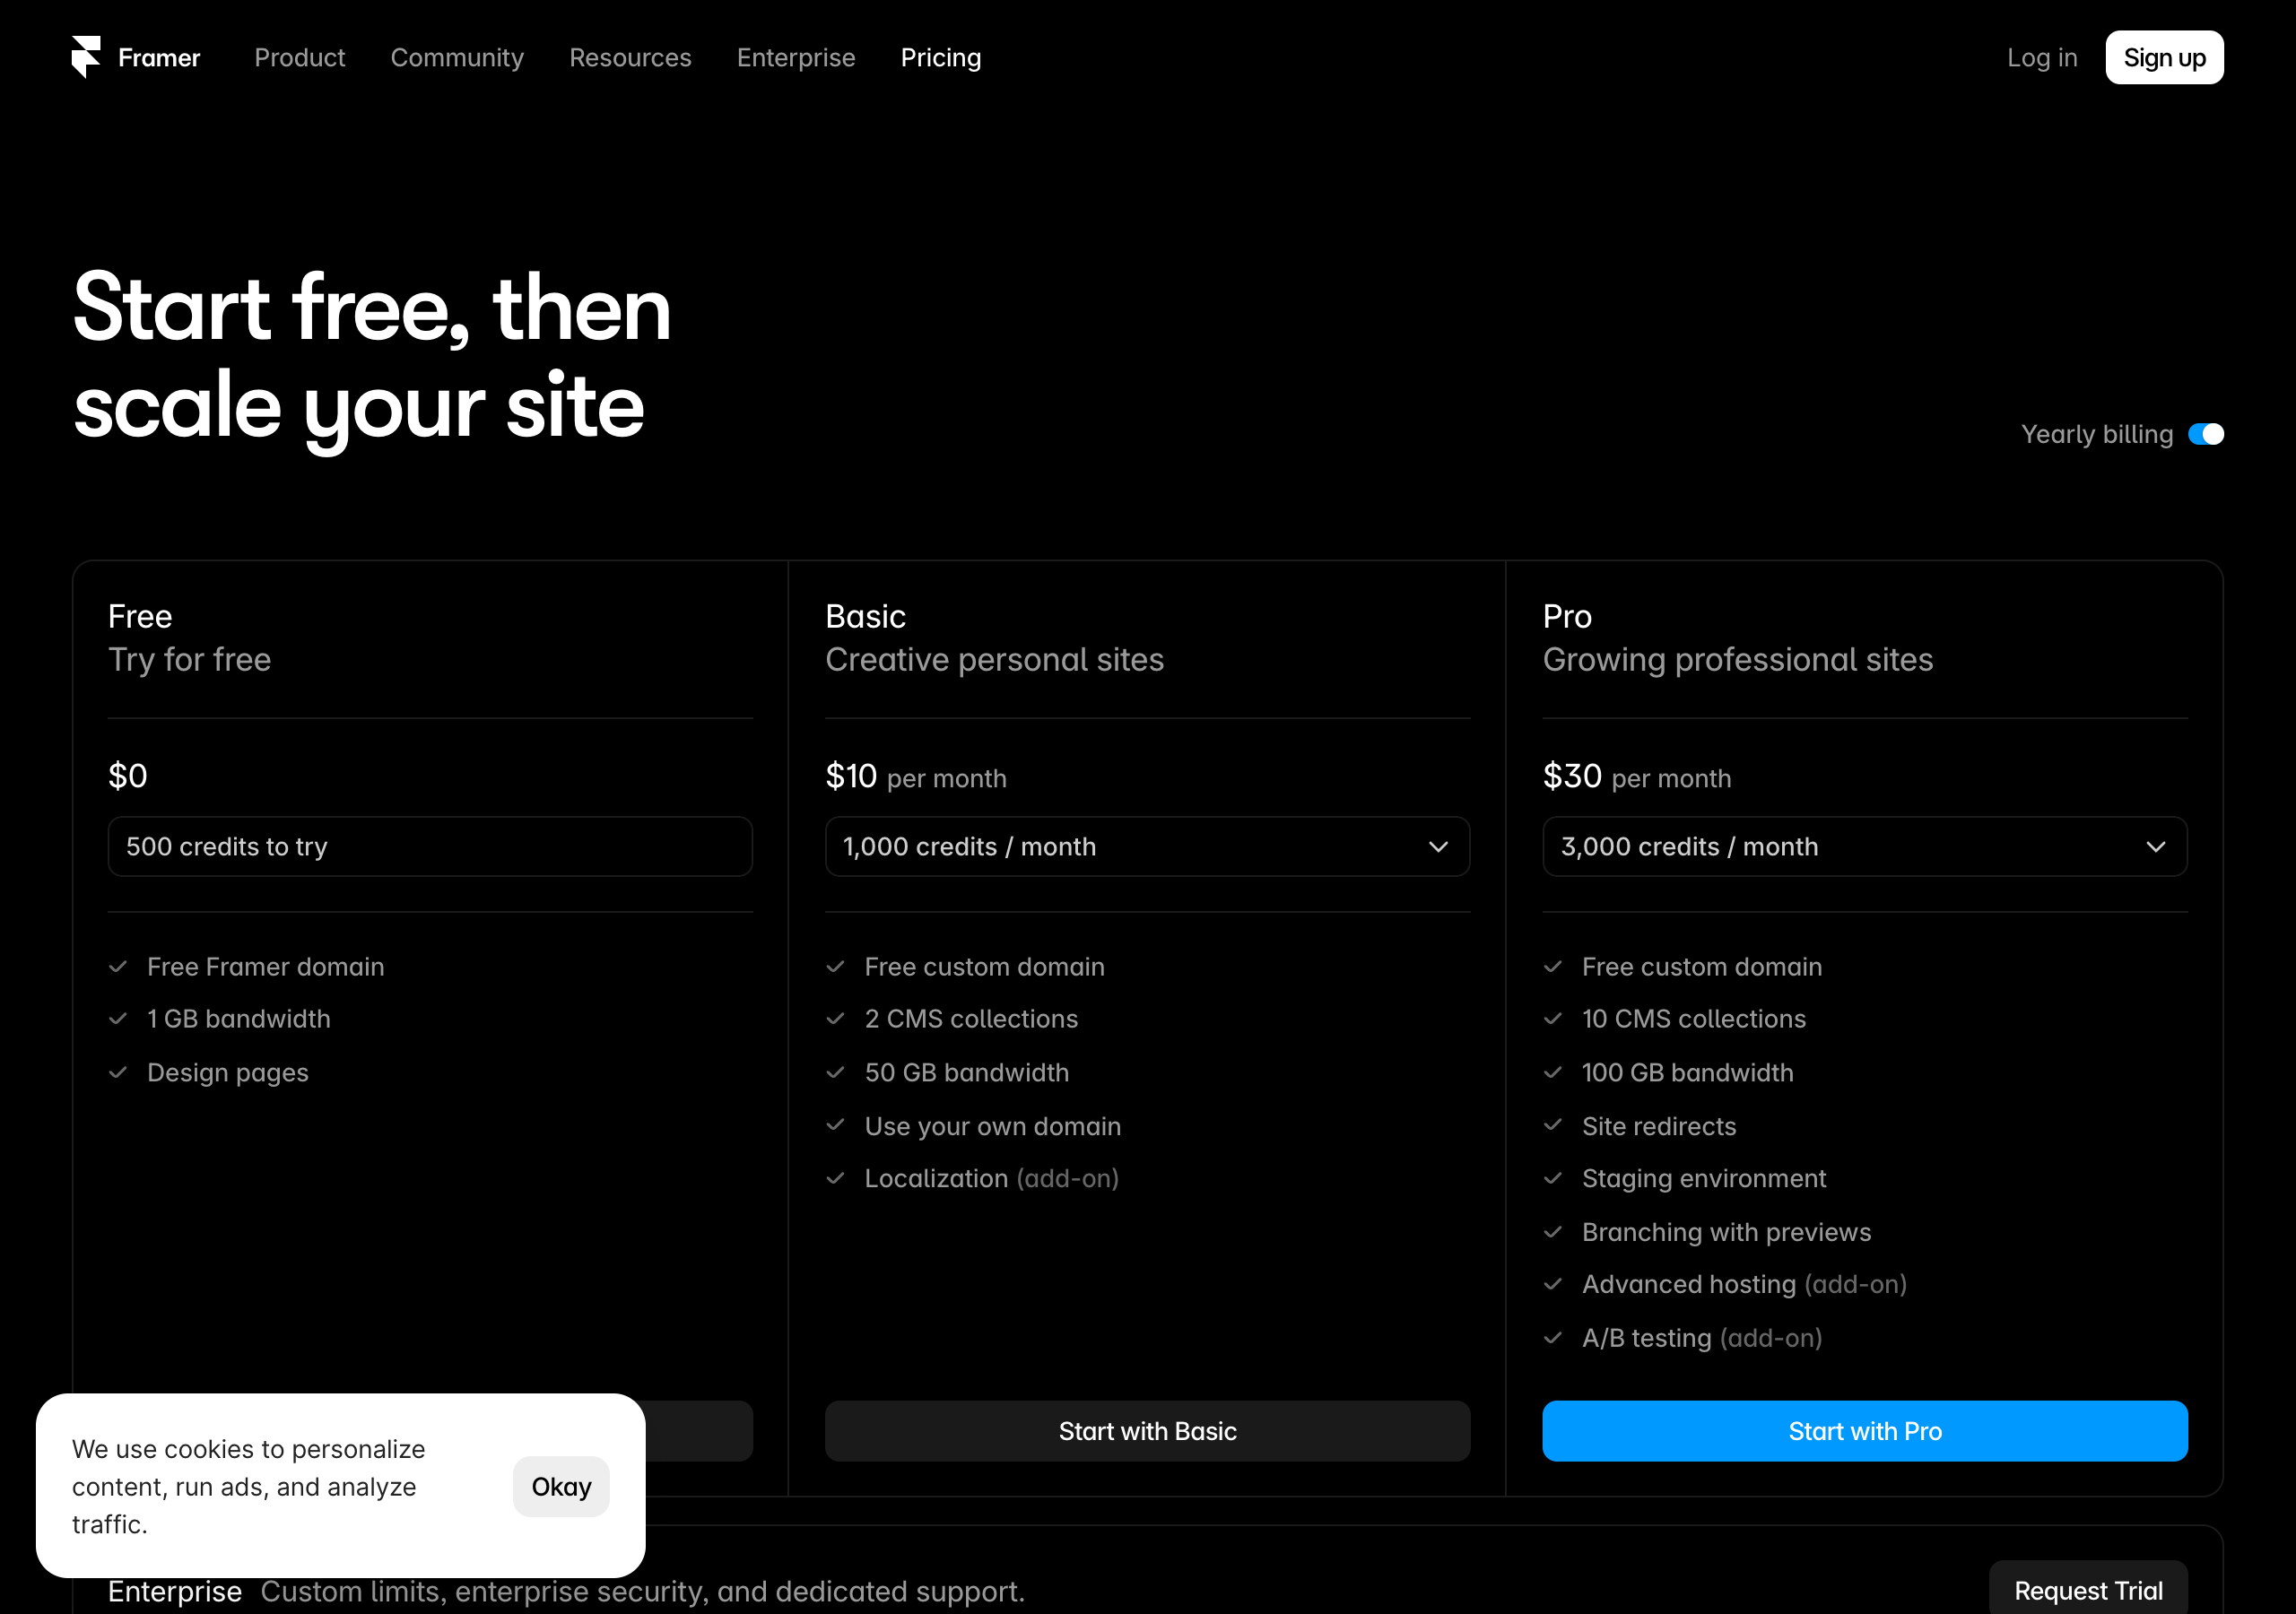
The free plan is genuinely useful for building and testing, but it is not where you live long term. It uses a framer.website subdomain, shows a Framer badge, and includes 1 GB of bandwidth. To put your site on your own domain and drop the badge, you are paying. That is fair, but do not mistake “free to build” for “free forever on your own domain.” The value question really begins at the Basic plan.
CMS collections are capped by plan
If you are planning a serious content operation with many interrelated content types, the collection limits matter. Straight from Framer’s live pricing page, the Basic plan includes 2 CMS collections and the Pro plan includes 10. For a marketing blog, that is plenty. For a complex, relational content architecture with many linked types, you need to count your collections before you commit, and possibly conclude a different tool fits better.
It is not a store, and it is not a database engine
This is the big one. Framer is not a full e-commerce backend with inventory, variants, and a checkout engine, and it is not built to be a heavy relational database with thousands of records linking to each other in complex ways. If your business is fundamentally a store or a large structured data product, asking Framer to carry that is the wrong test. It can present those things beautifully as a front end, but it is not the engine underneath. Be honest about which one you are building.
Deep structural control has a ceiling
For rich layouts, expressive typography, and most of what a marketing site needs, you will almost never feel boxed in. But if you have a developer’s mental model and a demanding, unusual design that needs pixel-level class engineering and intricate conditional layouts, you will eventually feel Framer’s ceiling. Most people never reach it. The ones who do usually know in advance, because they are building something unusually complex.
Still on the fence about whether the value fits your project? The fastest way to settle it is to build, not to read. Spin up a free Framer project and publish one real page today. If it feels this fast and this good on the first try, you already have your answer.
Framer pricing in 2026: what you actually pay
You cannot answer “is it worth it” without the real numbers, so here they are. This is straight from Framer’s live pricing page, on yearly billing, captured July 2026.
| Plan | Price | What you actually get |
|---|---|---|
| Free | $0 | 500 credits to try, free framer.website domain, 1 GB bandwidth, design pages, Framer badge |
| Basic | $10/mo | Free custom domain, 2 CMS collections, 50 GB bandwidth, use your own domain |
| Pro | $30/mo | 10 CMS collections, 100 GB bandwidth, site redirects, staging environment, branching with previews, A/B testing (add-on) |
| Enterprise | Custom | Custom limits, enterprise security, dedicated support |
One thing I appreciate about Framer’s model: it prices per site, so the math is simple. One site, one predictable bill, no separate “workspace” charge stacked on top that surprises you at checkout. That clarity is part of the value.
Now the worth-it read on each tier.
Free is worth it for everyone, because it costs nothing and lets you build the whole thing before deciding. Use it as an extended test drive.
Basic at $10/mo is the real entry point and, for most people, the moment Framer becomes clearly worth it. You get your own custom domain and the badge goes away, which is the difference between a hobby link and something you put on a business card. For a portfolio, a personal site, or a simple business page, this is a small monthly number for a professional, hosted, maintenance-free site.
Pro at $30/mo is worth it when you have a reason for it, and those reasons are concrete: more CMS collections, more bandwidth, a staging environment, branching with previews, and A/B testing as an add-on. If more than one person edits the site, or you run a real content operation, or you want to test variations, Pro earns its price. If you are a solo creator with a five-page site, you probably do not need it yet.
Enterprise is a “call them” situation and only relevant if you already know you need it.
The honest summary: Framer is not the cheapest builder on the market, and it is not trying to be. It is priced like a design-quality, fully hosted tool, and for the sites it is good at, that price buys back your time and makes you look professional. That is usually a trade worth making.
Who Framer is worth it for
Averages are useless when you have one specific situation. So here is the direct call by type of person.
- Freelancers and solo founders: yes. You need to look professional and ship fast without a training project. Framer is built for exactly this. The per-site pricing and zero maintenance fit how you actually work.
- Designers moving to the web: strongly yes. If you already think in Figma, Framer will feel like home, and you will produce better-looking sites faster than in almost anything else.
- Small businesses: yes. A restaurant, studio, clinic, or local service gets a fast, professional site live in a day, and the owner can edit text later without a course.
- Startups and SaaS: yes. Fast iteration, a premium feel, easy A/B testing on Pro, and simple pricing match how startups move.
- Bloggers and content marketers: yes, within reason. For a normal marketing blog, the CMS is more than enough. For a massive, deeply relational editorial database, look harder before you commit.
Who should skip Framer
Trust comes from telling you when not to buy. Here is who I would steer away, at least for now.
- Serious e-commerce sellers. If inventory, variants, and checkout are the heart of your business, a dedicated store platform is the right engine. Framer is not built to be that backend, and forcing it will cost you more than it saves.
- Teams building a large, complex relational content site. Directories, marketplaces, and databases with thousands of interlinked records will run into the collection limits and the structural ceiling. A tool built for heavy relational CMS work fits better.
- Anyone who needs pure, cheap, one-page simplicity and nothing else. If your entire site is a name, a sentence, and a link, you may not need Framer’s power or its price. An ultra-simple one-pager tool can do that for less.
- Developers who want to hand-engineer every class and structure. If your happiness depends on granular control over the box model and utility classes, you will feel the ceiling and be happier in a more developer-oriented builder.
If you are in one of these groups, Framer being “good” does not make it worth it for you specifically. Buy the tool that fits the job.
How Framer compares to the alternatives (quick and honest)
You are not choosing in a vacuum, so here is where Framer sits against the usual names, kept fair and general.
- Webflow is more powerful and structural, with a full class system and a strong relational CMS, but it has a steeper learning curve and split pricing that can add up. Worth it over Framer when you are building a large, complex, content-heavy site and have the time or the developer to unlock it.
- Wix and Squarespace are beginner-friendly all-in-one builders with polished templates, but they offer less design finesse and weaker animation than Framer. If design quality and motion matter to you, Framer usually pulls ahead.
- WordPress is massively flexible with a huge plugin ecosystem, but it needs hosting, maintenance, and security work. Framer trades that flexibility for a hosted, no-maintenance experience, which many people find is worth it.
- Figma is a design tool, not a website builder or host. You design there and bring it to a builder like Framer to actually publish, and Framer’s Figma-paste workflow makes that handoff smooth.
- Shopify is a dedicated e-commerce platform. If you are running a real store, that is the honest pick for the store engine, even if you love Framer for the marketing pages.
The pattern: Framer wins on design quality per hour, speed, motion, and pricing clarity. It concedes to specialists when your project is fundamentally a store, a database, or a deeply engineered structural build.
Common mistakes people make deciding on Framer
- Judging it on the free plan alone. The free plan is a trial with a subdomain and a badge. The real value shows up at Basic, when you connect your own domain. Do not conclude “not worth it” from the trial limits.
- Buying Pro before you need it. If you have a small solo site, Basic is likely enough. Do not pay for staging, branching, and extra collections you will not touch yet.
- Asking Framer to be a store or a database. This is the biggest one. If your business is e-commerce or heavy relational data, that is a specialist job. Framer can be the beautiful front end, not the engine.
- Never actually building anything before deciding. An hour in the free version settles more than a week of comparison articles. The people who agonize longest are usually the ones who have not touched the canvas.
- Ignoring the CMS collection limits. If you are planning many content types, count your collections against the plan before you commit, not after.
Frequently asked questions
Is Framer worth paying for, or is the free plan enough? The free plan is enough to build and test, but not to launch professionally, because it uses a framer.website subdomain and shows a badge. To use your own domain and drop the badge, the Basic plan at $10/mo (yearly billing) is the real starting point, and for most people it is clearly worth it.
Is Framer good for beginners? Yes, with a small caveat. It is one of the easier serious builders to learn, especially if you have used any design tool. Expect to spend an afternoon getting comfortable rather than mastering it in five minutes.
Is Framer worth it for a portfolio? Strongly yes. It is one of the fastest ways to a beautiful, live portfolio, the motion effects make your work look premium, and a portfolio never hits the CMS limits.
Is Framer worth it for e-commerce? Usually no, if the store is the core of your business. Framer is not a full store backend with inventory, variants, and checkout. It can present products beautifully as a front end, but a dedicated e-commerce platform is the right engine for a real store.
How much does Framer cost per month? On yearly billing in 2026: Free is $0, Basic is $10/mo, Pro is $30/mo, and Enterprise is custom. Framer prices per site, so there is no separate workspace charge stacked on top.
Is Framer better than Wix or Squarespace? For design quality and animation, most people find Framer produces a more premium result. Wix and Squarespace are friendly all-in-one tools, but Framer gives you more creative finesse and smoother motion, which is often what you are really paying for.
Do I need to know how to code to use Framer? No. It is a no-code visual builder. You design on a canvas and publish, with no code required, though you can add custom code if you want to.
Can I try Framer before I pay? Yes. The free plan lets you build a real site, use templates, and publish to a framer.website subdomain with no credit card, so you can feel the whole experience before deciding.
The bottom line
Strip away the feature lists and it comes down to one sentence. If your goal is a beautiful, fast, hosted website that you can launch this week and maintain without stress, Framer is worth it, and for most people reading this, comfortably so. The free plan lets you prove that to yourself before you pay, and the Basic plan turns it into a real, professional, custom-domain site for a small monthly number.
Where it is not worth it is equally clear, and I would rather you hear it from me than learn it after paying: if you are building a serious store, a heavy relational database, or the simplest possible one-liner, buy the tool that fits that job instead. Matching the tool to the project is the whole game.
The best part is that this is one of the few “is it worth it” questions you can answer for free, in under an hour, with your own two hands.
Create your free Framer site now, drop in a template, make it yours, and publish it to a live URL. If it feels this fast and this good on the first try, you already know your answer, and you did not spend a dime to find it.
Pricing, plan names, and CMS limits cited from Framer’s live pricing page, captured July 2026. Tiers and numbers change over time, so confirm the current details on framer.com/pricing before you buy.
Most articles about Framer pricing do the same lazy thing: they retype the four numbers off the pricing page, add a paragraph of filler, and leave you exactly as confused as when you arrived. You still do not know whether the $10 Basic plan is enough for your site, whether you are about to pay for a Pro feature you will never touch, or what those “credits” on the Free plan actually buy you.
I have built and shipped real sites in Framer, on the free plan and on paid plans, for a portfolio, for a startup landing page, and for a small content site. That means I have hit the actual walls: the moment the free subdomain stopped being acceptable, the moment two CMS collections was not enough, the moment I needed staging because a second person was editing. This guide is written from those walls, not from a marketing page.
Here is the promise. By the end you will know exactly which Framer plan fits the site you are building right now, what each tier really includes, how the credit system works, where people overpay, and how to spend the least money to get a professional result. Let us make the decision simple.
The quick answer: which Framer plan should you pick?
If you want the one-glance version, here it is.
- Free ($0): Pick this to learn Framer, build a design, or test an idea. You publish to a
framer.websitesubdomain with a small Framer badge, and you get 1 GB of bandwidth plus 500 credits to try the AI features. It is a real, usable free tier, not a broken trial. You just cannot use your own domain. - Basic ($10/mo, billed yearly): Pick this the moment you want a live site on your own custom domain. It is the “I am serious about this one site” plan: your domain, 2 CMS collections, and 50 GB of bandwidth. For a portfolio, a small business site, or a single landing page, Basic is usually all you need.
- Pro ($30/mo, billed yearly): Pick this when a site grows up or a team touches it. You get 10 CMS collections, 100 GB of bandwidth, site redirects, a staging environment, and branching with previews, plus access to A/B testing as an add-on. This is the plan for a real content operation or for anything more than one person edits.
- Enterprise (custom pricing): Pick this only if you are a larger company that needs custom limits, advanced security, and dedicated support. If you have to ask whether you need it, you do not.
The honest headline: the vast majority of individuals and small businesses reading this should be on Basic, and most of the rest belong on Free while they learn or on Pro once they scale. Everything below explains why, and how to be sure.
Not sure which tier fits yet? The fastest way to find out is to build. Start a free Framer site right now and see how far the free plan takes you before you ever reach for a card. You will know within an hour whether you need to upgrade.
The full Framer pricing table (verified, July 2026)
Before we dig into each plan, here is the whole picture in one table. These figures come straight from Framer’s live pricing page on yearly billing, captured July 2026.
| Plan | Price (yearly billing) | Custom domain | CMS collections | Bandwidth | Standout features |
|---|---|---|---|---|---|
| Free | $0 | No (uses framer.website) |
Design pages only | 1 GB | 500 credits to try, free subdomain, Framer badge |
| Basic | $10/mo | Yes, free custom domain | 2 | 50 GB | Use your own domain, remove reliance on subdomain |
| Pro | $30/mo | Yes | 10 | 100 GB | Site redirects, staging environment, branching with previews, A/B testing (add-on) |
| Enterprise | Custom | Yes | Custom | Custom | Enterprise security, dedicated support, custom limits |
Two things about this table matter more than the numbers themselves.
First, Framer prices per site. Each published website sits on its own plan. This is a genuinely important detail, and we will come back to it, because it changes how you budget when you have more than one project.
Second, the yearly prices above are the ones Framer advertises as the headline. Paying month to month costs more per month. If you are committing to a site for a year, yearly billing is the cheaper path, and it is the price most people should compare against.
The Free plan: what you really get, and what stops you
Framer’s free plan is more generous than most, and it is not a countdown timer. You can design, build, and publish a working website without paying anything.
What the Free plan gives you:
- A published, live site on a
framer.websitesubdomain, so people can actually visit it. - 1 GB of bandwidth, which is fine for a low-traffic personal page or a project you are testing.
- 500 credits to try Framer’s AI features, so you can experiment with generating and editing content.
- The full design canvas: you build with the same Figma-like editor paying users get. The design experience is not crippled.
Where the Free plan stops you:
- No custom domain. Your URL is
yourname.framer.website, and there is a small Framer badge on the site. For a hobby, a test, or a school project, that is fine. For a business, a client, or anything you want taken seriously, the subdomain and badge are the ceiling. This is the single most common reason people upgrade. - 1 GB of bandwidth is modest. A simple site with light traffic will not notice, but a page with big images and real visitors can bump into it.
- CMS is limited on free. The free tier is built around design pages, so if your whole plan is a database-driven blog or directory, you will need a paid plan to unlock CMS collections properly.
My honest take: the free plan is the correct place to start, always. Build your site for free, get it looking right, and only pay when you are ready to attach your own domain. There is no reason to pay before you have something worth publishing. The move I recommend to everyone is to build the whole thing free, then upgrade only when you love it, letting the finished result tell you whether it is worth $10 a month to put it on your own domain.
The Basic plan ($10/mo): the sweet spot for most sites
If I had to bet on which plan you personally need, I would bet on Basic. It is the plan that turns a free experiment into a real, professional website.
The single biggest thing Basic unlocks is a free custom domain. You connect your own domain, the Framer badge and the framer.website subdomain go away, and your site looks like it belongs to a real business, because it does. That one change is what most people are actually paying for, and $10 a month for a fully hosted, fast, professional site on your own domain is a strong deal when you compare it to hiring anyone to build the same thing.
What Basic includes:
- A free custom domain and the ability to use your own domain, no subdomain, no badge.
- 2 CMS collections, which is enough for something like a blog plus a projects list, or a services list plus a testimonials list.
- 50 GB of bandwidth, a large jump from the free tier’s 1 GB, comfortable for a normal small-business or portfolio traffic load.
- The full design and publishing workflow on a global CDN, so the site is fast and you never manage a server.
Who Basic is perfect for:
- A freelancer or creative with a portfolio site on their own domain.
- A small business, studio, restaurant, or local service that needs a professional, fast website they can update themselves.
- Anyone launching a single landing page or a simple marketing site who wants it to look legitimate.
Where Basic runs out: the 2 CMS collection limit is the wall. The moment you need a third content type, say a blog, a case-study library, and a team-members list all at once, you have to look at Pro. Basic is also missing the team and workflow features (staging, branching, redirects) that matter when a site gets bigger or gains collaborators. For one person building one site, none of that is a loss.
The Pro plan ($30/mo): for scale, teams, and serious content
Pro is where Framer stops being “a nice site builder” and becomes a tool you run a real content operation on. You should upgrade to Pro for specific reasons, not by default. Here is what those reasons are.
What Pro adds on top of Basic:
- 10 CMS collections instead of 2. This is the headline. If your site is content-heavy, a blog with authors and categories, a resource library, a directory, several distinct content types, Pro gives you the room Basic cannot.
- 100 GB of bandwidth, double Basic, for higher-traffic sites.
- Site redirects. Essential if you are migrating an existing site or restructuring URLs and need old links to point to new pages without dropping SEO.
- A staging environment. You can preview changes on a staging version before they go live, instead of editing directly on the published site.
- Branching with previews. You work on a draft branch, preview it, and merge it into the live site when it is ready. This is the feature that matters the most once more than one person edits the site, because it stops people from breaking the live page while they work.
- A/B testing as an add-on, so you can test different versions of a page and let the data pick the winner.
Who Pro is for:
- Anyone running a content-driven site: a real blog, a publication, a directory, a resource hub.
- A small team or an agency where more than one person edits and you cannot afford accidental changes to the live site.
- A business that is migrating an existing site and needs redirects to preserve rankings.
- Anyone who genuinely wants to A/B test their landing pages to improve conversion.
The honest caution: do not jump to Pro just because it sounds more capable. If you are one person building one portfolio or one small-business site, the staging, branching, and redirect features are power you will not use, and the extra 8 CMS collections will sit empty. Pay for Pro when you feel Basic’s limits, not before.
The Enterprise plan: when custom pricing makes sense
Enterprise is Framer’s custom-priced tier, and it exists for organizations, not individuals. It brings custom limits, enterprise-grade security, and dedicated support. If you are a large company with compliance requirements, many stakeholders, and a need for guaranteed support, this is the conversation to have with Framer’s sales team.
For everyone else, this plan is not a decision you need to make. If you are reading a general guide to Framer pricing to build your own site or your business’s site, you are not an Enterprise customer, and that is completely fine. Skip it.
How Framer credits work (and why the AI features cost them)
The word “credits” trips up almost everyone, so let us make it plain. Credits are Framer’s currency for its AI features. When you use Framer AI to generate a layout, rewrite copy, translate content, or make other AI-assisted edits, you spend credits. They are not a limit on how many pages you can build by hand, and they are not bandwidth. Building and publishing a normal site with your own two hands does not burn credits.
What you need to know about credits:
- The Free plan includes 500 credits so you can genuinely try the AI tools before deciding whether they matter to you.
- Paid plans include larger monthly credit allotments, so heavier AI users get more room to work. The exact monthly credit amounts per paid plan are the kind of number that changes, so confirm the current figures on Framer’s live pricing page before you count on a specific total. [VERIFY]
- If you run out, credits are the sort of thing you can typically top up, but the practical reality is that most people who build sites manually rarely hit the ceiling.
The takeaway: do not choose your plan based on credits unless AI generation is central to how you work. For most people, credits are a nice bonus on top of a plan they are buying for the domain, CMS, and bandwidth. Choose the plan for those, and treat the credits as extra.
Monthly versus yearly billing: the discount is real
Framer, like most SaaS tools, charges less per month if you commit to a year up front. The headline prices you see (Basic $10, Pro $30) are the yearly-billing rates. If you pay month to month instead, the monthly cost is higher.
The practical advice is simple. If you are building a site you intend to keep for the foreseeable future, which is most sites, yearly billing is the cheaper choice and worth it. If you are genuinely unsure whether the project will survive past a couple of months, pay monthly to stay flexible, accept the higher rate, and switch to yearly once the project proves itself. Do not lock into a year for something you might abandon in three weeks.
Ready to put your site on your own domain and stop paying for nothing? Go to Framer, pick the plan that matches your project, and publish. Start free, and upgrade to Basic the day your site is good enough to deserve your name on it.
Per-site pricing: the detail that changes your budget

Here is the pricing mechanic people miss, and it can either save you money or surprise you.
Framer charges per published site. Each live website you want on a custom domain sits on its own plan. One Basic plan covers one site on one custom domain. If you want two separate business sites live on two separate domains, that is two plans.
Why this matters in both directions:
- If you have one site, this is a gift. Your bill is dead simple. One site, one plan, one predictable monthly number. There are no confusing “workspace seats” stacked on top of “site plans,” which is a common source of billing shock on some competing builders. With Framer, the price you see is close to the price you pay.
- If you run many sites, plan for it. An agency or a builder with five client sites on five domains is looking at five plans, not one. That can still be reasonable, but you should model it before you commit, not discover it on the invoice. In some cases the math favors a higher tier or an Enterprise conversation once the number of sites grows.
For the single-site owner, which is most readers, per-site pricing is the reason Framer’s total cost is so easy to reason about. What you see is what you pay.
Add-ons and extras: what can raise your bill
Beyond the base plan, a few optional things can add to your cost. Knowing them upfront means no surprises.
- A/B testing (Pro add-on). A/B testing is available on Pro as an add-on rather than a bundled freebie, so if you want to run split tests, budget for it on top of the Pro price. For a serious landing-page optimizer, it is worth it. For a portfolio, you do not need it.
- Extra AI credits. If you lean hard on Framer AI and exhaust your monthly credits, topping up costs extra. Most manual builders never reach this point.
- Higher tiers for more bandwidth or collections. If you outgrow your plan’s bandwidth or CMS limits, the “add-on” is really just moving up a tier. Watch your bandwidth if your site gets popular and heavy on media.
The general rule: the base plan price is the honest core of what you pay, and add-ons are opt-in for specific needs. Nothing here is a hidden trap, but A/B testing being a Pro add-on is the one detail worth remembering before you assume it is included.
Which Framer plan is right for you? A pick-by-situation guide
Averages are useless when you have one specific site to build. So here is the direct call for the situations people ask about most.
- “I am learning Framer or testing an idea.” Free. Build the whole thing, publish to the subdomain, pay nothing until you are ready for a real domain.
- “I am a freelancer or creative and I need a portfolio on my own domain.” Basic. It is the exact plan this was designed for, and $10 a month is nothing against the value of a professional portfolio.
- “I run a small business, restaurant, studio, or local service.” Basic. A fast, professional site on your domain that you can update yourself, for the price of a couple of coffees a month.
- “I have one marketing landing page for a product.” Basic, and upgrade to Pro only if you specifically want A/B testing to optimize conversion.
- “I am building a real blog or content site with many content types.” Pro. The jump from 2 to 10 CMS collections is the whole reason to be here.
- “A team of us will edit the site.” Pro. Staging and branching with previews keep people from breaking the live site, and that safety is worth the price the first time it saves you.
- “I am migrating an existing site with lots of URLs.” Pro, for the site redirects that protect your SEO.
- “I am an agency running many client sites.” Model the per-site math first. Several sites means several plans, and at scale it may be worth talking to Framer about Enterprise.
- “I am a large company with security and support requirements.” Enterprise.
If you scan that list and land on Basic, you are in good company. It is the right answer for the largest share of people who ask this question.
How to spend the least and still get a professional result
You do not have to overpay to get a great Framer site. Here is how to keep the bill as low as it should be.
- Start on Free and stay there while you build. Never pay for a plan before your site is finished and you love it. The free tier gives you the full design canvas, so there is zero reason to upgrade early.
- Upgrade to Basic only when you attach your domain. The domain is the real trigger. The day you want your own URL and no badge, pay for Basic, and not a day sooner.
- Choose yearly billing for anything you plan to keep. The per-month discount is real, and most sites are keepers.
- Do not buy Pro for features you will not use. Count your CMS collections honestly. If two is enough, Basic is enough. Staging, branching, and redirects are worth real money, but only if you actually need them.
- Only add A/B testing when you have traffic to test. A split test on a page nobody visits tells you nothing. Add it once you have enough visitors for the results to mean something.
- Watch bandwidth, not just the plan name. Big unoptimized images eat bandwidth. Right-size your images and you will stay comfortably inside your tier’s allowance instead of being pushed to upgrade for the wrong reason.
Follow those and you will pay for exactly what you use, which for most people is $0 while building and $10 a month once live.
Common Framer pricing mistakes (and how to avoid them)
- Upgrading too early. Paying before your site is done wastes money. Build free, pay when you publish to your domain.
- Buying Pro when Basic would do. The extra CMS collections and team features are power most single-site owners never touch. If two collections cover your content, do not pay triple for eight empty ones.
- Ignoring the per-site model when you have multiple projects. Two sites on two domains is two plans. Budget for it before you commit, not after.
- Assuming A/B testing is included on Pro. It is a Pro add-on. If split testing is core to your plan, factor the extra cost in.
- Comparing month-to-month prices to yearly prices from other tools. Compare like for like. Framer’s headline prices are yearly-billing rates; make sure you are comparing the same billing basis when you weigh it against another builder.
- Choosing a plan based on credits. Unless AI generation is central to your workflow, credits should not drive the decision. Pick for domain, CMS, and bandwidth.
Frequently asked questions
How much does Framer cost? On yearly billing, Framer’s paid plans start at $10 a month for Basic and $30 a month for Pro, with a genuinely usable Free plan at $0 and custom Enterprise pricing above that. Prices are per site.
Is Framer’s free plan actually free forever? Yes. The Free plan is not a trial with a countdown. You can design and publish a real site to a framer.website subdomain indefinitely at no cost. You just cannot use your own custom domain or remove the Framer badge without upgrading.
What is the difference between Basic and Pro? Basic ($10/mo) gives you a custom domain, 2 CMS collections, and 50 GB of bandwidth, which suits most single sites. Pro ($30/mo) adds 10 CMS collections, 100 GB of bandwidth, site redirects, a staging environment, branching with previews, and A/B testing as an add-on. Upgrade to Pro for content-heavy sites, teams, or migrations.
Do I need a paid plan to use my own domain? Yes. A custom domain starts at the Basic plan. The Free plan publishes only to a framer.website subdomain. Connecting your own domain is the main reason most people move from Free to Basic.
What are Framer credits used for? Credits power Framer’s AI features, like generating layouts, rewriting copy, and translating content. Building and publishing a site by hand does not use credits. The Free plan includes 500 to try, and paid plans include more each month.
Is Framer cheaper than other website builders? For a single custom-domain site, Framer’s per-site pricing is usually simple and competitive, because there are no separate workspace-seat charges stacked on top of a site plan the way some competitors bill. Always compare the same billing basis (yearly to yearly) and your exact setup before deciding.
Can I pay monthly instead of yearly? Yes, but the per-month price is higher than the yearly-billing rate. If you plan to keep the site, yearly billing saves money. If the project is uncertain, pay monthly for flexibility and switch to yearly once it proves out.
Which Framer plan is best for a portfolio? Basic. A portfolio needs a professional custom domain and rarely needs more than one or two CMS collections, which is exactly what Basic covers for $10 a month.
The bottom line
Framer’s pricing is refreshingly honest once you cut through the jargon. There are four tiers, they are priced per site, and the right one is almost always obvious once you know what triggers each upgrade.
Start on Free while you build. Move to Basic ($10/mo) the day you want your own domain. Step up to Pro ($30/mo) only when a content-heavy site, a team, or a migration makes you feel Basic’s limits. Talk to sales about Enterprise only if you are a large organization. For the overwhelming majority of people reading this, Basic is the answer, and it is a genuinely good deal for a fast, hosted, professional site on your own domain.
The best part is that you risk nothing to find out. You can build your entire site for free, look at the finished result, and only then decide whether it is worth $10 a month to make it truly yours.
Stop comparing plans on a spreadsheet and go feel it for yourself. Create your free Framer site now, build it out, and upgrade only when it is good enough to put your name on. That is the cheapest, smartest way to buy Framer, and it starts at zero.
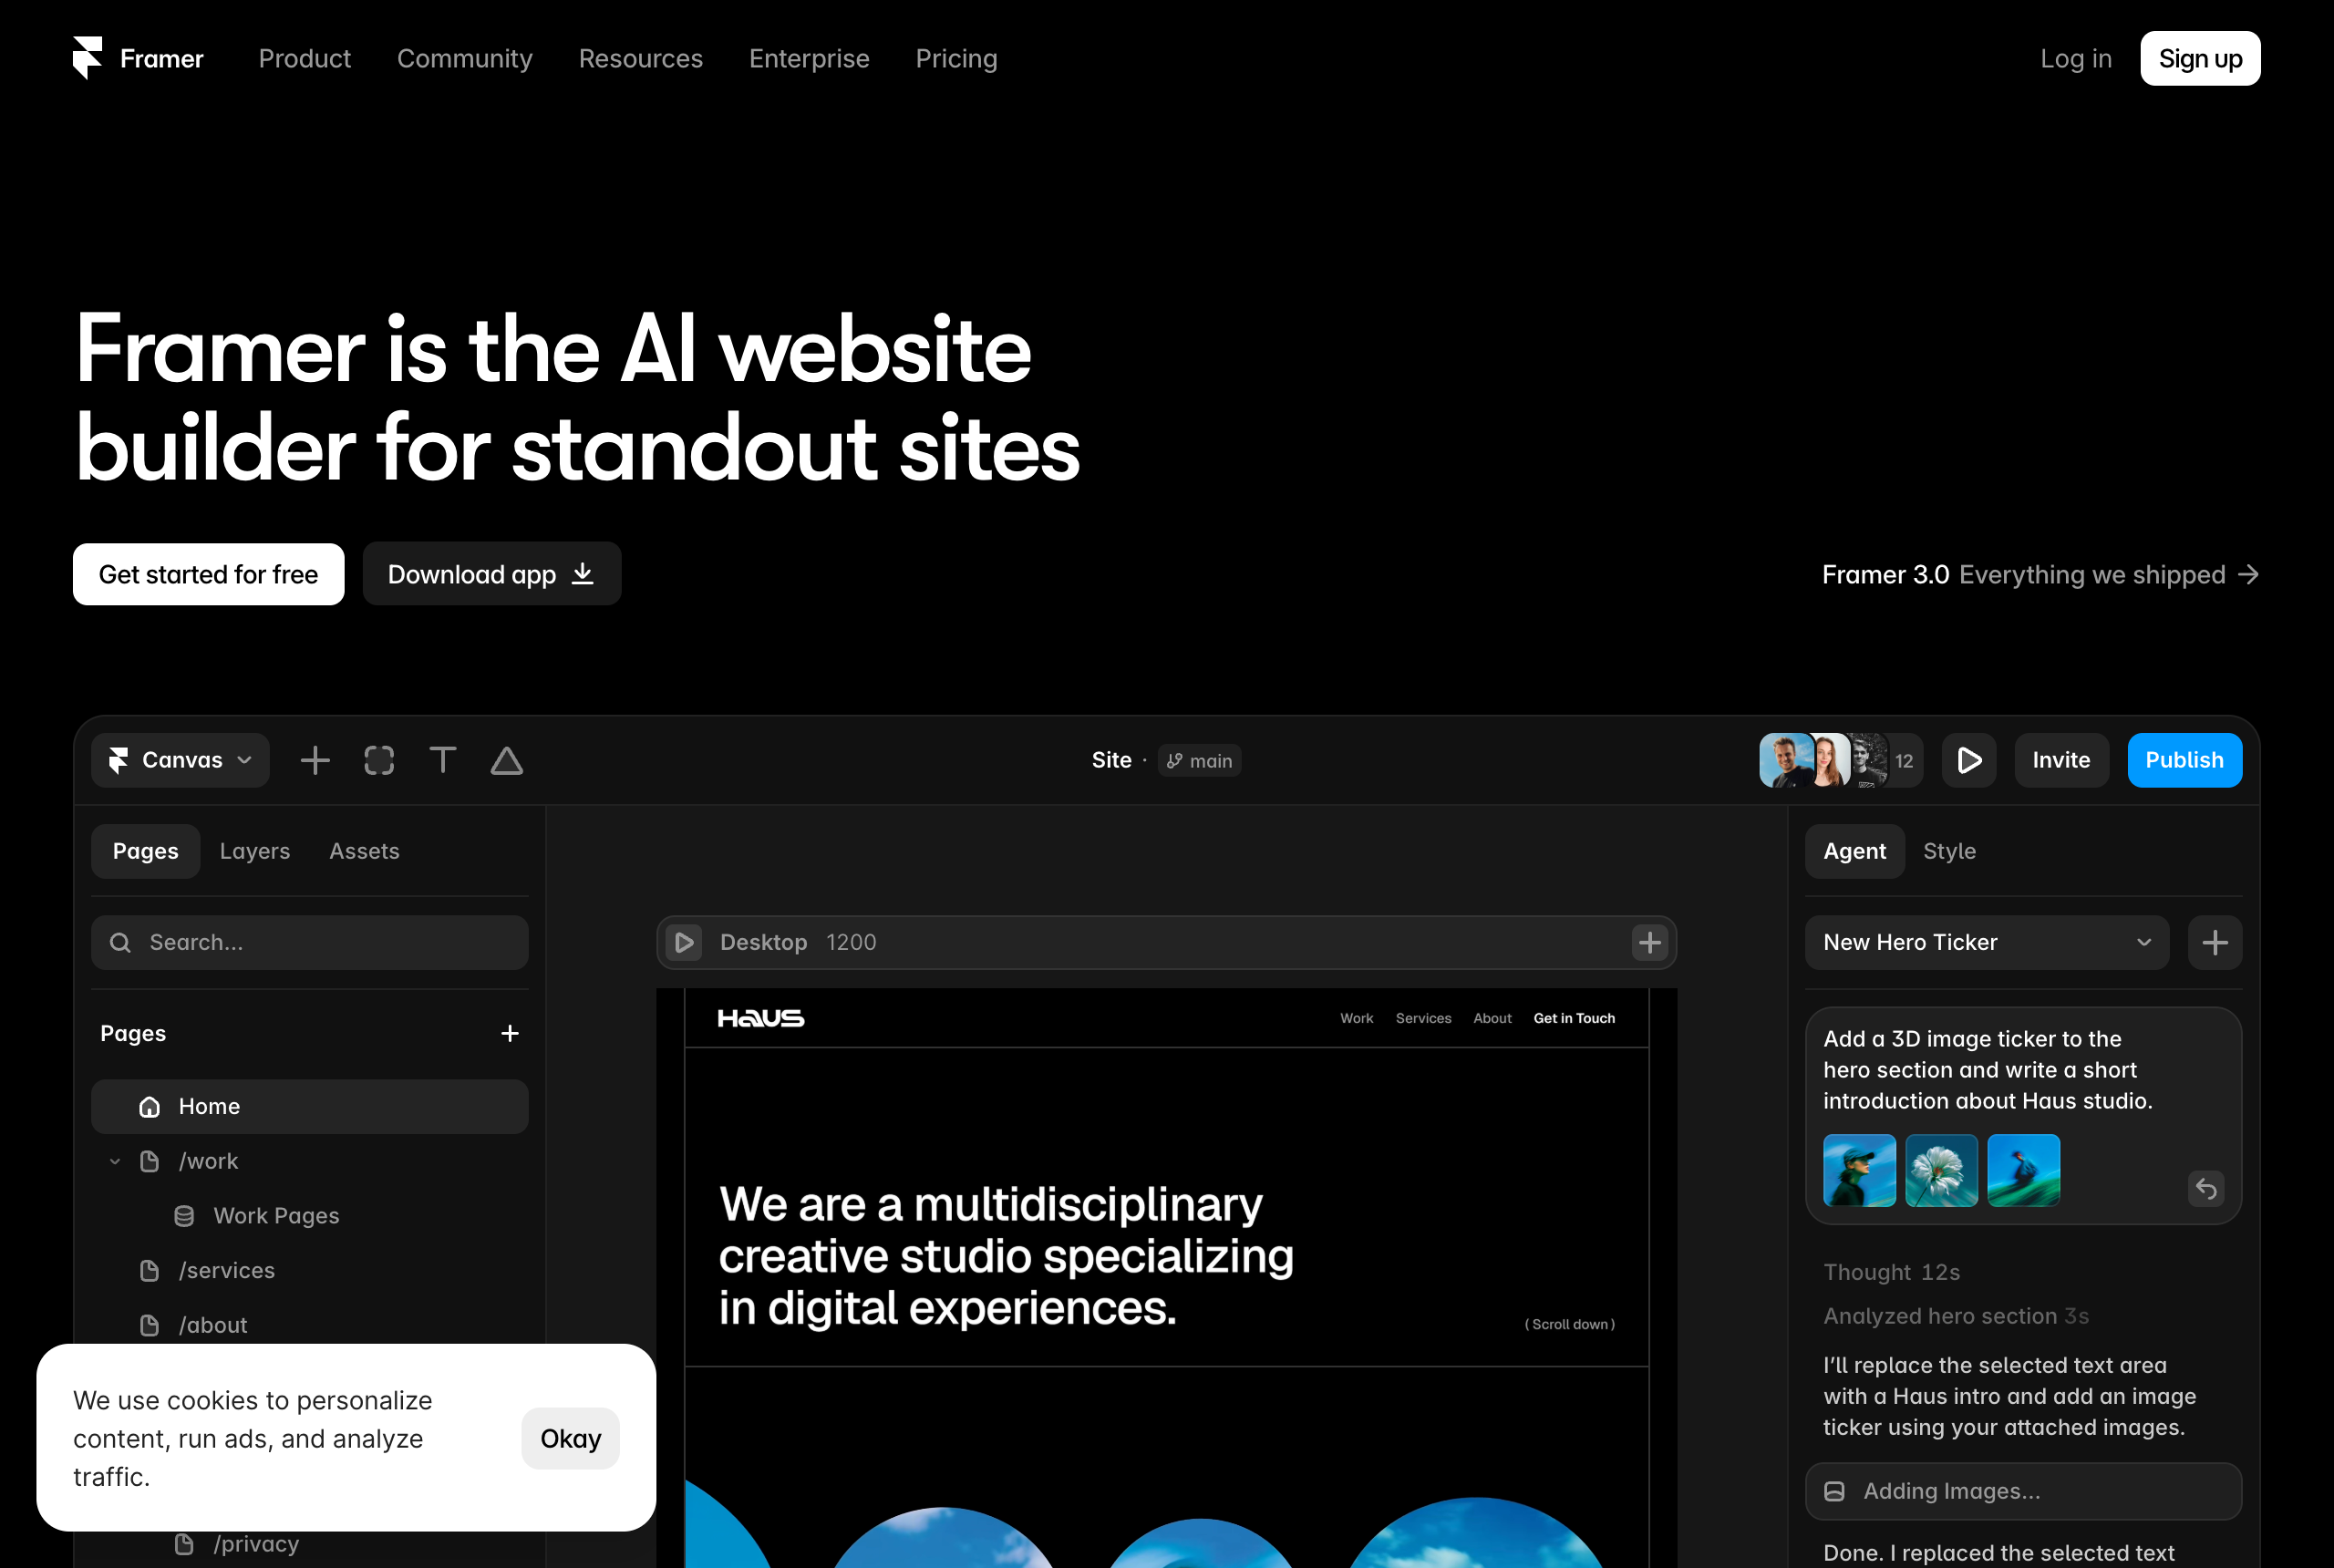
Pricing, plan names, credit amounts, bandwidth, and CMS limits cited from Framer’s live pricing page, captured July 2026. Tiers and numbers change over time, so confirm the current details on framer.com/pricing before you buy.
If you are searching for a “figma to framer plugin,” you almost certainly have a design sitting in Figma that you love, and you want it living on a real URL without redrawing every rectangle by hand. That is a completely reasonable thing to want. It is also the exact moment where a lot of people get sold a complicated plugin workflow they never actually needed.
I have moved dozens of Figma designs into Framer, from single landing pages to multi-page marketing sites, and I am going to tell you the thing most tutorials bury: for the majority of designs, you do not need a plugin at all. Framer has native Figma paste built in. You select frames in Figma, you copy, you paste onto the Framer canvas, and your layers arrive as editable Framer layers, with text that is still text you can type into. That single feature handles most real-world imports better than any third-party plugin I have tried.
So why does this article exist and why does it talk about plugins? Because “most” is not “all.” There are specific situations where a plugin, or a plugin-style workflow, genuinely saves you time, and there are traps where a plugin makes things worse. This guide gives you the honest map: the fast native method that works for most people, the plugin path and when it is worth it, and every fix for the things that go wrong.
Let us get your design onto the internet.
The quick answer
Here is the whole decision in a few lines, so you can act right now.
- For most designs, skip plugins entirely. Use Framer’s built-in Figma paste: select your frames in Figma, copy, and paste directly onto the Framer canvas. Layers stay editable, text stays text, and you finish the rest inside Framer. This is the fastest reliable path in 2026.
- A plugin or plugin-style helper is worth it when you are moving a large, tightly organized design system, when you want to batch many frames at once, or when your team already lives inside a specific handoff plugin. Even then, you still rebuild the interactive and responsive parts in Framer.
- No method is a magic “one click and it is a live site” button. Figma is a design file. Framer is a website that publishes and hosts. Importing gets your visuals across. You always finish the site (links, responsiveness, animation, SEO, publish) in Framer. Anyone promising a perfect automatic conversion is overselling.
Keep that framing and the rest of this guide is just execution detail.
Want to feel how close Framer already is to Figma before you import anything? Open a free Framer canvas and paste in a frame right now. No credit card, and thirty seconds of pasting will tell you more than an hour of reading about plugins.
First, understand what actually transfers (and what never does)
Before you touch a plugin, you need a correct mental model, because it prevents ninety percent of the frustration people report. Importing a Figma design is not the same as importing a website, because a Figma file is not a website. It is a static picture of one.
Here is what comes across cleanly, in any method:
- Visual layout. Frames, groups, positions, and the overall arrangement of your sections.
- Text as real text. This is the big one. In Framer’s native paste, a headline stays an editable text layer, not a flattened image, so you can retype and restyle it.
- Basic styling. Fills, colors, corner radius, and simple shapes generally arrive intact.
- Images. Placed images come over as images you can swap.
Here is what does not transfer, no matter what any plugin claims, because it does not exist in the Figma file to begin with:
- Interactivity and links. A button in Figma is a rectangle with a label. It has no destination. You add real links in Framer.
- True responsiveness. Figma auto layout is close in spirit to Framer Stacks, but they are different systems. Your desktop frame will not automatically become a perfect phone layout. You set breakpoints in Framer.
- Animation and scroll effects. Any motion you prototyped in Figma is a prototype, not production code. You rebuild motion with Framer’s native effects, which are one of the main reasons to be in Framer at all.
- CMS, forms, and logic. A “blog” in Figma is a drawing of a blog. Real dynamic content comes from Framer’s CMS.
- Hosting. Figma does not host a public site. Framer does, on a global CDN, the moment you publish.
Read that list twice, because it reframes the whole task. Your import is not the finish line. It is a head start. The design gets you a beautiful skeleton fast, and then the real work, the part that makes it an actual website, happens inside Framer regardless of how the pixels arrived.
Method 1: Native Figma paste, the fast path for most designs
This is the method I use for the large majority of imports, and it requires zero plugins. Framer supports pasting Figma frames directly onto the canvas, and the layers stay editable. If your design is one page or a handful of sections, start here and you will probably never need anything else.
Do it in this order:
- Prep the Figma file first. This one step saves you the most cleanup later. In Figma, make sure the section you want is inside a proper frame, not a loose group of scattered layers. Name your layers sensibly. Flatten any decorative effects that you do not need to keep editable. Detach components you do not plan to rebuild as Framer components. A tidy Figma frame pastes into a tidy Framer structure.
- Select the frame in Figma. Click the top-level frame you want to move. Start with one section, like your hero, rather than the entire multi-page file. Smaller, focused pastes are easier to verify and fix than one giant paste.
- Copy it. Use Command C on Mac or Control C on Windows. You are copying the Figma selection to your clipboard.
- Open your Framer project. Create a new project or open an existing one, and go to the page and spot on the canvas where this section should live.
- Paste onto the Framer canvas. Use Command V or Control V. Your Figma frame appears on the Framer canvas as native Framer layers. Text layers are still text. Shapes are still shapes. Nothing is a flattened screenshot.
- Verify text and images. Click into a headline and try typing. It should behave like a normal Framer text layer. Click an image and confirm it is a real image you can replace, not baked into a background.
- Repeat section by section. Paste your next frame below the first. Building the page in sections keeps everything clean and lets you catch problems early instead of untangling one enormous paste.
At this point you have your visual design living inside Framer. It looks like your Figma file, but now it is made of real, editable Framer elements. That is the entire “import.” Everything after this is finishing the website, which I cover below and which you would do no matter how the design got in.
The reason I lead with this method is simple honesty: it is free, it is native, it does not depend on a third party staying updated, and for typical marketing pages it produces the cleanest result. If you take nothing else from this article, take that.
Method 2: The plugin path, and when it earns its place
So where do plugins fit? A Figma-to-Framer plugin, or a plugin-assisted export workflow, is a tool that tries to translate larger chunks of a Figma file into Framer-ready structure in a more automated, batch way than pasting frame by frame. The plugin ecosystem around both tools shifts over time, so I am going to describe the workflow and the judgment call rather than promise that a specific plugin name will exist and behave a certain way next month. [VERIFY] the exact current plugin availability in the Figma and Framer plugin directories before you rely on any one of them, because these come and go.
Here is the honest positioning: a plugin is a convenience multiplier for scale, not a magic converter. It does the same fundamental thing paste does, moving visual structure across, just potentially in bigger batches with some extra mapping. It still cannot invent interactivity, responsiveness, or animation that never existed in the source file.
Consider the plugin path when:
- You are moving a large, highly organized design. If you have twenty consistent frames built on a strict system, a batch approach can beat pasting each one by hand.
- Your design system is disciplined. Plugins reward clean files: consistent auto layout, well-named layers, shared styles. The tidier your Figma, the better any automated tool performs.
- Your team standardizes on a specific handoff tool. If your workflow already runs through a particular plugin and everyone knows it, staying consistent has real value.
Skip the plugin path when:
- Your design is small. One landing page pastes faster than it takes to install, authorize, and learn a plugin.
- Your Figma file is messy. A plugin will faithfully carry the mess across. Clean-up-then-paste is often faster than clean-up-then-plugin-then-clean-up-again.
- You would rather rebuild the tricky parts natively anyway. Experienced Framer users often paste the visuals and then rebuild structure with Stacks and components on purpose, because the native result behaves better than an auto-generated one.
The general plugin workflow looks like this, and the shape is similar across tools:
- Prepare the Figma file exactly as you would for pasting: proper frames, clean names, consistent auto layout. This matters more for plugins, not less.
- Install the plugin from the Figma plugin directory (or the Framer side, depending on the tool), and grant it access to your file.
- Select what you want to move, whether that is specific frames or a full page, following the plugin’s selection rules.
- Run the conversion and let it generate Framer-ready structure or an importable package.
- Bring it into Framer and, critically, audit everything. Check text is still editable, spacing survived, images mapped correctly, and nothing flattened.
- Rebuild the dynamic parts natively. Add links, set breakpoints, apply animation, and wire up any CMS or forms in Framer, exactly as you would after a paste.
Notice that steps 1, 5, and 6 are nearly identical to the paste method. That is the point. The plugin only really changes the middle. For most people, the middle was not the hard part, which is why I keep steering you back to paste unless you are genuinely operating at scale.
If you are still deciding between plugin and paste, stop theorizing and test on one real section. Create your free Framer project and paste in a single frame. If it lands clean, and it usually does, you just saved yourself an entire plugin setup.
After the import: turning a pasted design into a real website
This is the section most “figma to framer plugin” tutorials skip, and it is the section that actually matters, because import is maybe twenty percent of the job. Whichever method you used, here is the finishing work that turns a beautiful static layout into a site that links, adapts, moves, and ranks.
Rebuild structure with Stacks
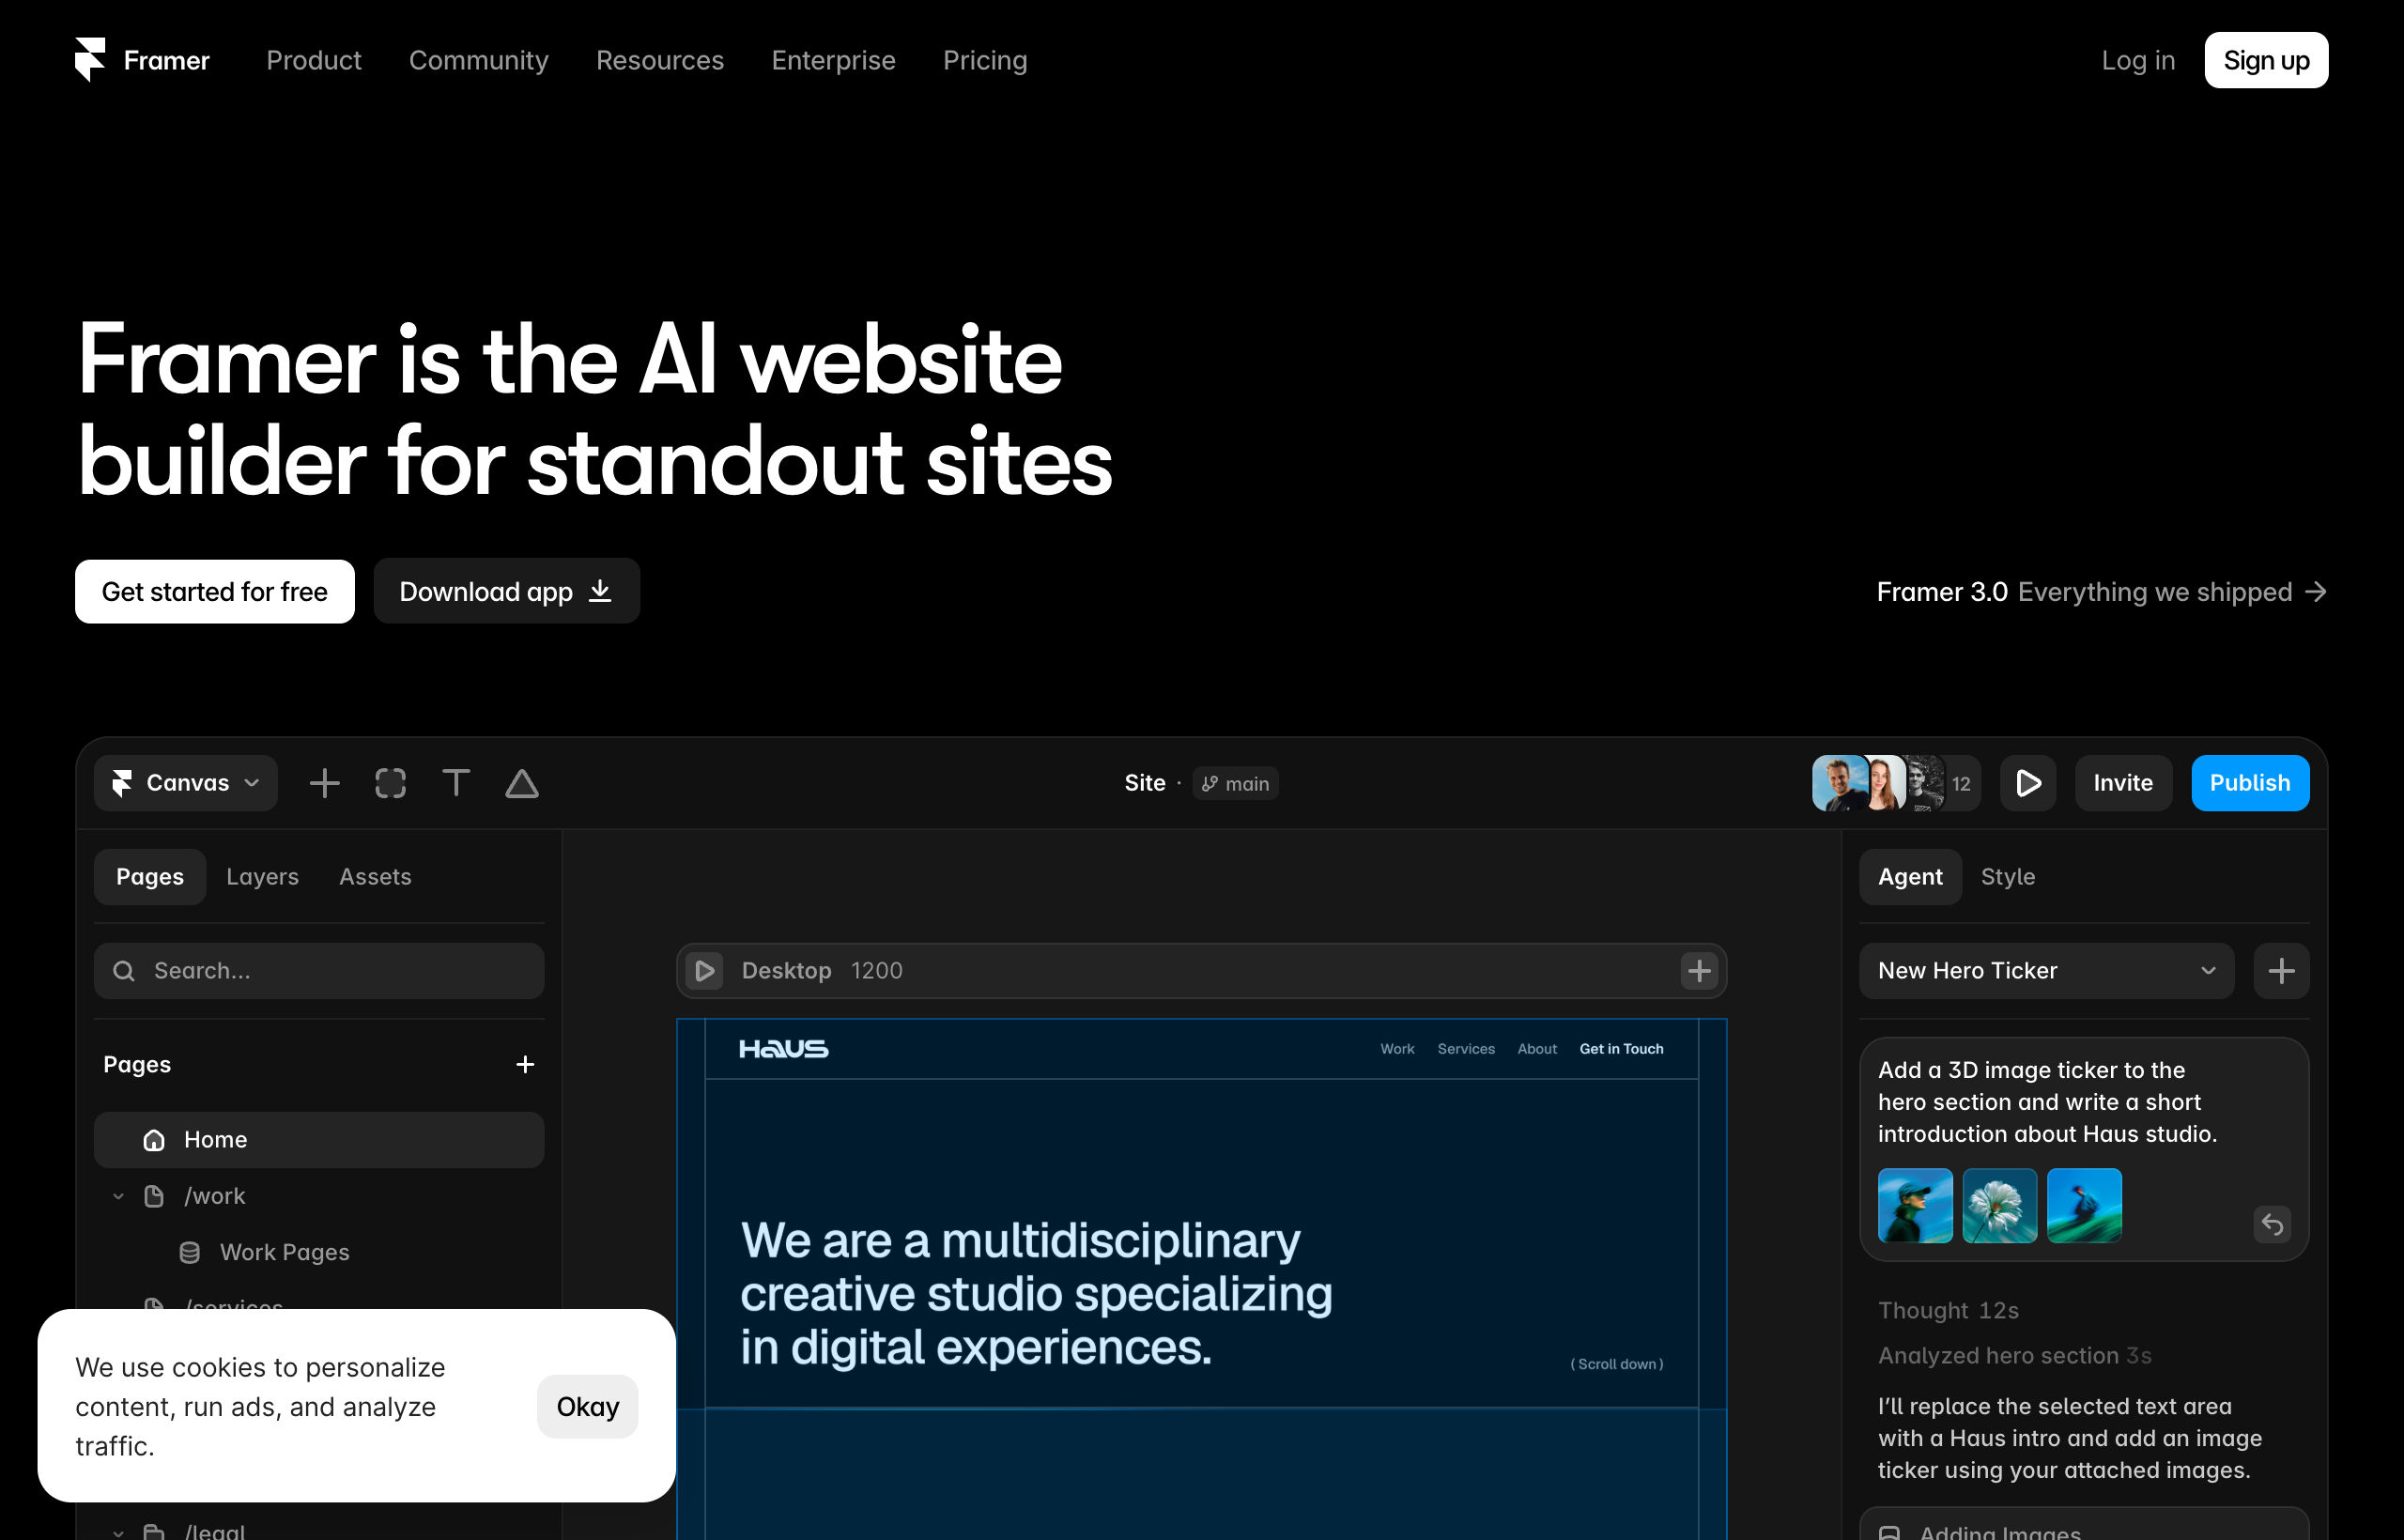
Figma auto layout and Framer Stacks are cousins, not twins. Your pasted design will hold together on desktop, but to make it flex properly you want the important sections wrapped in Stacks, which are Framer’s flexbox-style layout containers. Group a row of feature cards into a horizontal Stack, a vertical section into a vertical Stack, and set the gaps and alignment. This is what lets the layout breathe when the screen size changes, and it is the foundation for the responsive step next.
Make it responsive across breakpoints
Framer gives you desktop, tablet, and phone breakpoints. Your import arrives as the desktop view. Switch to the tablet breakpoint and adjust anything that looks cramped, then do the same for phone: stack columns vertically, bump up font sizes for thumbs, shrink oversized hero images, and make sure buttons are tappable. This is unavoidable in every method because responsiveness was never in the Figma file. It is also fast once your sections are in Stacks. Budget real time here, because a design that looks perfect on desktop and broken on a phone is worse than no import at all.
Add the links and interactivity
Every button, nav item, and call to action that was a pretty rectangle in Figma needs a real destination now. Select each interactive element in Framer, and set its link, whether that is a URL, another page in your project, or a scroll-to-section anchor. This is quick, but it is easy to forget one, so click through your own page like a visitor and press everything.
Layer in animation, the Framer way
Here is where being in Framer pays off. Any motion you faked in a Figma prototype gets rebuilt with Framer’s native effects, and the native versions are better: appear-on-scroll reveals, hover states, parallax, smooth page transitions, all applied by selecting an element and choosing an effect. Do not try to import animation. Recreate it here, where it becomes real production motion instead of a prototype illusion. Keep it restrained. A couple of tasteful scroll reveals read as premium; a page drowning in effects reads as slow.
Wire up SEO before you publish
A gorgeous imported page that no one can find is a waste. Framer gives you SEO controls: set the meta title and meta description for each page, add an Open Graph image so links preview nicely when shared, and fill in alt text on your images for accessibility and search. Check your heading structure too, because a paste can leave you with the wrong heading levels. This takes ten minutes and it is the difference between a page that can rank and one that is invisible.
Connect your domain and publish
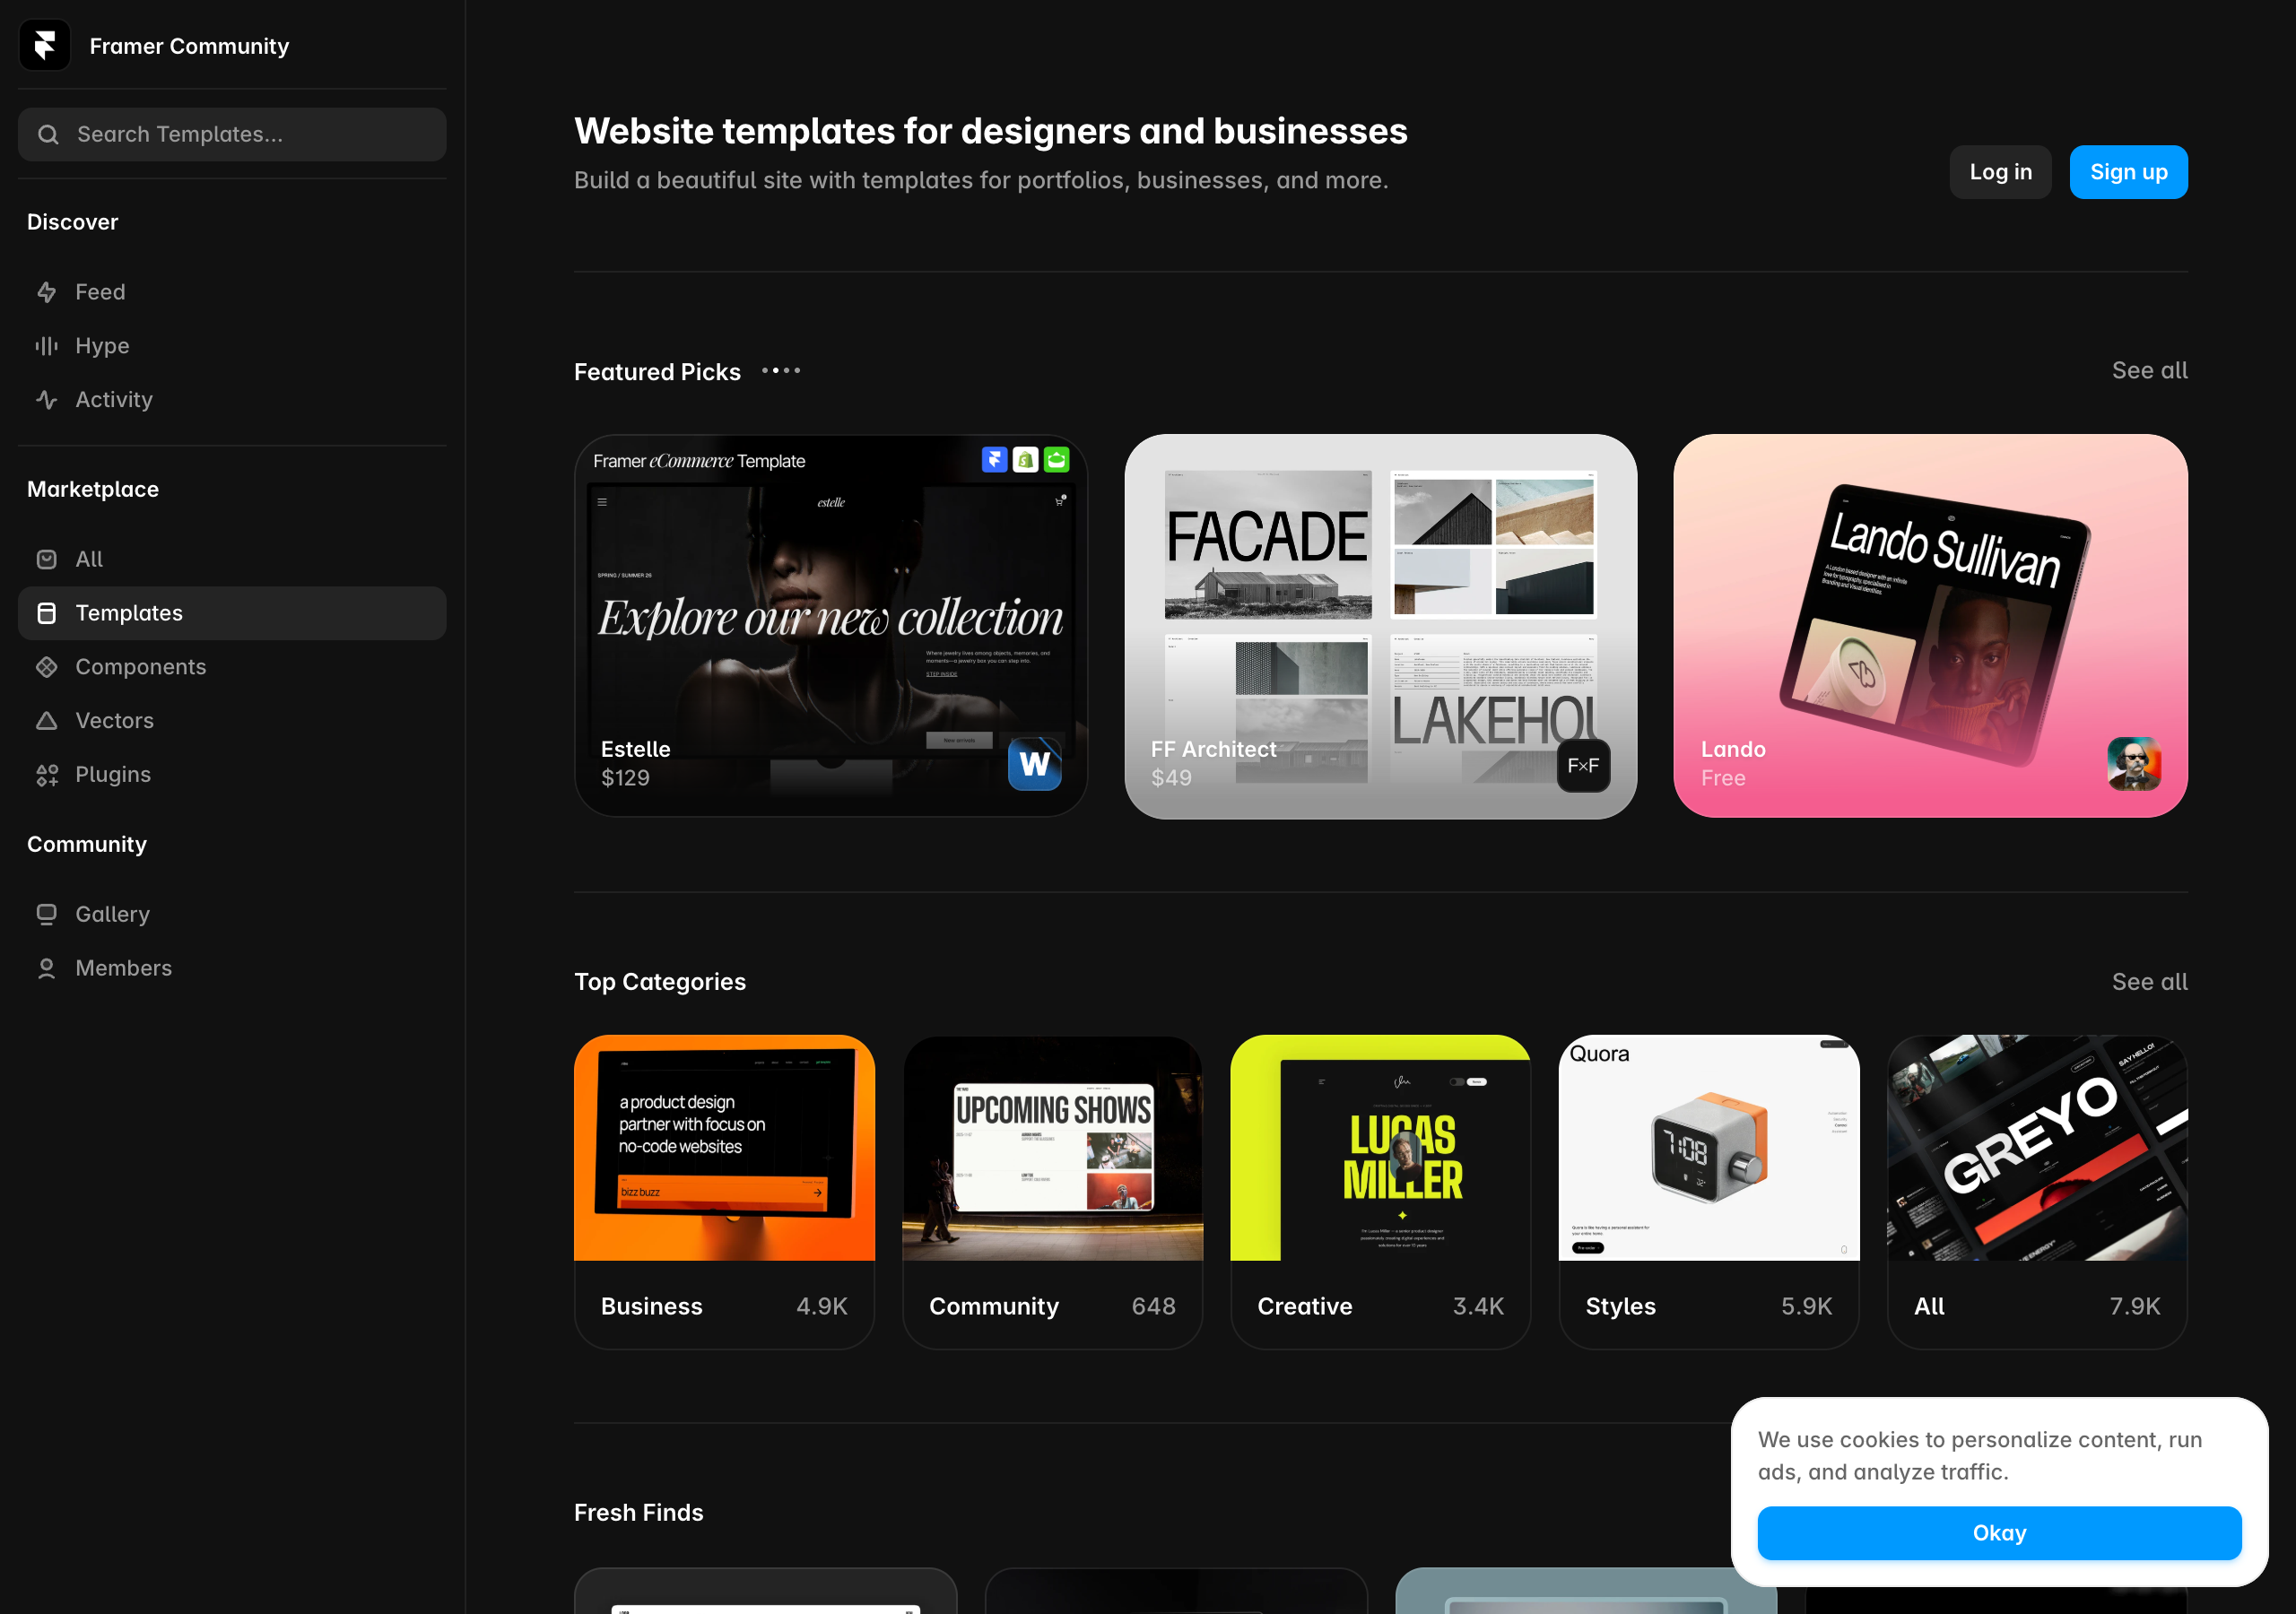
The final step, and the one Figma physically cannot do, is going live. On Framer’s free plan you get a framer.website subdomain to publish to instantly. To use your own custom domain, you connect it on a paid plan, which starts at Basic at $10 per month billed yearly and includes a free custom domain. Point your domain, hit publish, and your once-static Figma design is now a real, hosted, fast website on a global CDN. That is the moment the whole exercise was for.
A realistic before-and-after: how long this actually takes
To set expectations honestly, here is a typical single landing page, imported by paste, from a clean Figma file:
- Prep the Figma frames: 10 to 20 minutes.
- Paste sections into Framer and verify: 15 to 30 minutes.
- Rebuild Stacks and responsiveness: 30 to 60 minutes.
- Add links, animation, and SEO: 30 to 45 minutes.
- Connect domain and publish: 10 minutes.
So a well-prepared one-page design becomes a live site in roughly an afternoon, most of it spent on the finishing work, not the import itself. A plugin might shave time off the paste step for a much larger project, but it does nothing for the finishing work, which is why the total savings are smaller than people expect. Rebuilding from a design head start is dramatically faster than building from a blank canvas, and that speed, not a perfect one-click conversion, is the real prize.
Plugin versus copy-paste: the honest comparison
Here is the side-by-side so you can decide in ten seconds.
| Factor | Native copy-paste | Plugin path |
|---|---|---|
| Setup required | None, built into Framer | Install, authorize, learn the tool |
| Best for | Most designs: pages, landing pages, small sites | Large, highly systematized design sets |
| Text stays editable | Yes | Depends on the tool, verify it |
| Handles batch/many frames | One frame at a time | Potentially many at once |
| Reliability over time | High, it is native | Varies, third-party tools change |
| Cost | Free | Often free, but [VERIFY] per tool |
| Still need to finish in Framer | Yes | Yes |
| My default recommendation | Winner for most people | Only at real scale |
The pattern is clear. Copy-paste wins on simplicity, reliability, and being free and native, and it is the right call for the vast majority of people typing “figma to framer plugin” into a search bar. The plugin path is a specialist tool for scale, and even then it does not remove the finishing work. When in doubt, paste.
Troubleshooting: fixing the things that go wrong
When an import looks off, it is almost always one of these, and each has a clean fix.
My text pasted as an image instead of editable text. This usually means the text was flattened, rasterized, or trapped inside a complex effect in Figma. Go back to Figma, make sure it is a live text layer, remove any flattening, and re-copy just that layer. Native paste keeps real text as real text, so if it came in flat, the source was flat.
Spacing and alignment look slightly off after pasting. Figma auto layout and Framer Stacks compute spacing a little differently, so small drift is normal. Wrap the affected section in a Stack and reset the gap and padding to your intended values. Do not chase pixel-perfection by nudging every element by hand. Fix it at the Stack level and it holds.
Images came in blurry or low resolution. Check the source image resolution in Figma. If it was low-res there, it will be low-res in Framer. Replace it with a properly sized asset inside Framer, which also lets Framer handle optimized delivery for you.
Fonts changed or fell back to a default. Your Figma font may not be available in your Framer project yet. Add the font in Framer, or map it to the closest available option, then reapply it to your text layers.
Layers are a chaotic mess after import. This is a source-file problem. A disorganized Figma file produces a disorganized Framer structure. The fix is upstream: tidy the Figma frames, name layers, use proper frames instead of loose groups, then re-paste. Ten minutes of cleanup in Figma saves an hour of untangling in Framer.
Nothing pastes at all. Confirm you actually selected a frame in Figma and copied it, and that you are pasting onto the Framer canvas itself, not into a text field or a panel. Re-copy in Figma and try again on a fresh Framer page.
The plugin output looks worse than paste. This happens, especially with messy files. Do not fight it. Fall back to native paste for that section. Paste being the more reliable native path is exactly why I recommend it first.
Best practices that make every import smoother
A few habits separate a painful import from a clean one, regardless of method.
- Design in sections. Build your Figma file as distinct, self-contained frames for hero, features, testimonials, and so on. Sectioned files paste cleanly and let you verify one piece at a time.
- Use consistent auto layout in Figma. The more your Figma file already thinks in terms of stacked, spaced containers, the more naturally it maps to Framer Stacks.
- Name your layers. “Hero heading” beats “Text 47” when you are hunting for something to edit in Framer later.
- Keep type and color consistent. A tight set of styles in Figma becomes a tight set of styles to reapply in Framer, instead of a scavenger hunt.
- Start with one section as a test. Before you move a whole site, paste one frame, finish it fully, and publish it. That dry run teaches you your file’s quirks with the lowest possible stakes.
- Accept that finishing happens in Framer. Go in expecting to add links, responsiveness, animation, and SEO by hand. When you expect it, it feels like normal work instead of a disappointment.
Common mistakes people make
- Hunting for the perfect plugin instead of just pasting. Most people spend more time evaluating plugins than the paste would have taken. Try paste first, on one section, before you install anything.
- Expecting a live website out of the import. Import moves visuals. It does not create links, responsiveness, motion, or hosting. Those are always your job in Framer.
- Pasting one giant messy file at once. Big single pastes are hard to verify and harder to fix. Go section by section.
- Skipping the responsive step. A design that only works on desktop is not finished. Set your tablet and phone breakpoints every time.
- Forgetting SEO and links before publishing. A beautiful page with dead buttons and no meta tags is not ready. Run the finishing checklist before you go live.
- Trusting a third-party tool blindly. Always audit plugin output. Automated conversion is a starting point, not a final answer.
Frequently asked questions
Do I actually need a plugin to import Figma to Framer? No. For most designs, Framer’s built-in Figma paste is enough and is the better choice. You select frames in Figma, copy, and paste onto the Framer canvas, and layers stay editable. Reach for a plugin only when you are moving a large, highly systematized set of frames and want to batch the process.
Does copy-paste keep my text editable? Yes. That is the main strength of native paste. Headlines and body text arrive as real, editable Framer text layers, not flattened images, so you can retype and restyle them directly.
Will my Figma prototype animations come across? No, and this is true for every method. Figma prototype animations are not production code. You rebuild motion in Framer using its native scroll effects, hover states, and transitions, which is one of the biggest reasons to move to Framer in the first place.
Is the imported design automatically responsive? No. Your import arrives as the desktop layout. You set the tablet and phone breakpoints inside Framer, ideally after wrapping sections in Stacks. Figma auto layout helps, but it does not become Framer responsiveness on its own.
Is importing Figma to Framer free? The import itself, using native paste, is free, and you can publish to a free framer.website subdomain on Framer’s free plan. To connect your own custom domain you need a paid plan, which starts at Basic at $10 per month billed yearly and includes a free custom domain. Any plugin costs are separate, so [VERIFY] the current price of a specific plugin before relying on it.
How long does the whole process take? For a clean single landing page, plan on roughly an afternoon, with most of the time going to finishing work like responsiveness, links, animation, and SEO rather than the import itself. Larger sites scale up from there, but building from a design head start is far faster than starting from a blank canvas.
What if the plugin result looks bad? Fall back to native copy-paste for that section. Paste is the more reliable native path, which is exactly why I recommend trying it first. Automated plugin conversion is a convenience, not a guarantee, and a messy source file will produce a messy result either way.
Can I move an entire multi-page site at once? You can, but I would not paste it all in one go. Move it page by page and section by section so you can verify each piece and fix problems early. This is true whether you use paste or a plugin.
The bottom line
Here is the honest summary you came for. The best way to import Figma to Framer in 2026, for almost everyone, is the one that needs no plugin at all: select your frames in Figma, copy, and paste them onto the Framer canvas, where they arrive as editable layers with real text. Plugins are a specialist convenience for moving large, disciplined design systems at scale, and even then they only speed up the middle of the job, not the finishing.
The finishing is the real work, and it is the same regardless of method: rebuild structure with Stacks, set your responsive breakpoints, add real links, recreate animation natively, wire up SEO, connect your domain, and publish. That is how a static Figma picture becomes a fast, hosted, findable website. The import is just the head start, and it is a very good one.
The fastest way to know which method fits your file is to try the free one on a single section. It costs you nothing but a few minutes, and it usually ends the debate on the spot.
Start your free Framer project now, paste in one frame from your Figma design, and see how close it lands. No credit card, no plugin to install, and if it feels this smooth on the first section, you already know how to finish the rest.
Pricing, plan details, and plugin availability referenced here were captured in July 2026 and can change over time. Confirm the current Framer pricing on framer.com/pricing and check the live Figma and Framer plugin directories before relying on any specific third-party tool.
Almost nobody who searches “connect WordPress to Framer” wants the same thing. Some of you already own a domain that is stuck inside a WordPress host and you just want it pointing at a shiny new Framer site. Some of you have years of blog posts in WordPress and you are terrified of losing them. Some of you love the idea of building a fast marketing site in Framer but you are not ready to abandon the WordPress blog your team already knows how to update. And a few of you are hoping to keep writing in the WordPress editor while Framer renders the front end.
I have done every one of these on real projects, and here is the thing most articles will not tell you honestly: Framer and WordPress are two different kinds of software, and there is no official one-click bridge between them. WordPress is a self-hosted content management system that runs on a server you rent. Framer is a hosted design tool that publishes to its own global network. They do not natively talk to each other. But that does not mean you are stuck, because in practice “connect WordPress to Framer” almost always means one of four concrete jobs, and every one of them has a clean, real answer.
This guide walks through all four, tells you exactly which one you actually need, and gives you the click-by-click steps for each. No hand-waving, no pretending a plugin exists that does not.
The quick answer: four jobs, pick yours
When people say they want to “connect WordPress to Framer,” they mean one of these:
- Point a domain you registered through WordPress (or a WordPress host) at a new Framer site. You keep the domain, you drop WordPress, your site lives in Framer. This is the most common one, and it is easy.
- Migrate your WordPress content into Framer. You move pages and posts over and rebuild the design in Framer, then retire WordPress entirely. More work, very doable for small and mid sized sites.
- Run a Framer marketing site alongside a WordPress blog. Framer handles the homepage and landing pages, WordPress keeps handling the blog, and you stitch them together with a subdomain or subdirectory so it feels like one site to visitors.
- Use WordPress as a headless content source that feeds Framer. You keep writing in WordPress and pull that content into Framer’s CMS. This is the most technical option and, for most people, the one to avoid.
If you are not sure which you need, use this rule of thumb. Do you want to keep WordPress running, or leave it? If you want to leave it, you are in job 1 or 2. If you want to keep it for the blog while Framer does the pretty pages, you are in job 3. Only reach for job 4 if you have a developer and a specific reason. The rest of this article is those four jobs, in order, with the actual steps.
New to Framer and just want to see whether the front end is worth all this? Start a free Framer site and build one real page before you touch your domain. No credit card needed, and it will make every decision below concrete instead of theoretical.
Job 1: Point your WordPress domain at a Framer site
This is the scenario for most readers. You have a domain, say yourbusiness.com, that you bought when you set up WordPress. You have built (or are about to build) a Framer site, and you want yourbusiness.com to show the Framer site instead of the WordPress one. You are not moving content through any pipe. You are just repointing where the domain sends visitors.
The key idea to hold onto: your domain and your website are two separate things. The domain is an address. The website is a building. Repointing the domain is like putting a new “come here instead” sign at the old address. Framer does not care that the domain used to serve WordPress.
Here is how it goes, step by step.
Step 1: Find out where your domain is actually registered. This trips people up. The company you pay for WordPress hosting (Bluehost, SiteGround, GoDaddy, WP Engine, and so on) is often also your domain registrar, but not always. Log in to your hosting account and look for a “Domains” section. If your domain is listed there and you can edit its DNS records, you are in the right place. If not, you registered it somewhere else, and that is where you will make changes.
Step 2: Add the custom domain inside Framer first. In your Framer project, go to the site settings and open the Domains area. Add your custom domain, for example yourbusiness.com. Framer will then show you the exact DNS records it wants you to create. This usually means an A record (an IP address) for the root domain and a CNAME record for the www version, or a similar pair. Copy these exactly. Framer generates them for you, so you never have to guess.
Step 3: Go to your registrar’s DNS settings and update the records. In the same dashboard where your domain lives, find DNS management. You will see existing records currently pointing at your WordPress host. Replace the A record and the www CNAME with the values Framer gave you. Leave your MX records (email) alone unless you are also moving email, because email and website routing are separate. Save.
Step 4: Wait for DNS to propagate, then verify. DNS changes are not instant. They usually take anywhere from a few minutes to a few hours, and occasionally up to 24 to 48 hours in the worst cases. Framer’s Domains panel will show a status that flips to verified or connected once it sees the records. When it does, visiting yourbusiness.com will load your Framer site.
Step 5: Set up redirects if your URLs changed. If your old WordPress site had pages like yourbusiness.com/about and your Framer site uses the same path, you are fine. If the paths changed, add redirects so old links and Google’s index do not hit dead ends. Framer’s Pro plan includes site redirects for exactly this. Map each important old URL to its new equivalent.
A few honest cautions on this job. First, once the domain points at Framer, the old WordPress site is no longer visible at that address, but it still exists on your host. Do not cancel your WordPress hosting the same afternoon. Keep it for a couple of weeks so you can copy anything you forgot. Second, your domain registration itself does not have to move. You can leave the domain registered wherever it is and just change its DNS. You are renting a Framer site, not buying a new domain, unless you want to.
Custom domains work on Framer’s paid plans. The free plan gives you a framer.website subdomain to test with, and a custom domain becomes available from the Basic plan up, so budget for at least Basic if this is a real business site on your own domain.
Job 2: Migrate your WordPress content into Framer
This is the “I am leaving WordPress for good and bringing my content with me” path. It is more involved than repointing a domain because you are actually rebuilding the site, not just changing a sign. But for a portfolio, a small business site, or a modest blog, it is very achievable in a few days, and the payoff is a faster, better looking, lower maintenance site with no plugins to update and no security patches to babysit.
Set expectations first. There is no automatic importer that sucks a WordPress site into Framer with its design intact. WordPress design lives in themes and plugins that Framer does not read. So a migration is really two jobs bolted together: moving the content (the words and images), and rebuilding the design (how it looks). Here is the practical sequence.
Step 1: Inventory what you actually have. Open your WordPress admin and count. How many pages? How many blog posts? Which ones still earn traffic and which are dead weight? Migration is the perfect moment to prune. Most WordPress sites carry a graveyard of old posts nobody reads. You do not have to bring them all.
Step 2: Export your content from WordPress. In WordPress admin, go to Tools, then Export. You can export everything or just posts or just pages. WordPress produces an XML file. That file holds your text, but it is not something Framer imports directly, so treat it as a backup and a reference rather than a magic import file.
Step 3: Rebuild your static pages by hand in Framer. For your homepage, about page, services, and contact, do not try to convert anything. Just rebuild them in Framer’s canvas using its templates and sections. This is fast, and it is where Framer shines. You copy your text across, drop in your images, and design as you go. Most people find their new pages look dramatically better than the WordPress originals because Framer’s defaults are simply nicer.
Step 4: Recreate your blog as a Framer CMS collection. For posts, create a CMS collection in Framer (think of it as a spreadsheet where each row becomes a page). Add fields for title, slug, body, featured image, date, and author. Then move your posts in. For a handful of posts, paste them by hand. For dozens, this is the tedious part, and you copy each post’s content into a new CMS entry. Plan your collection needs against Framer’s plan limits: the Basic plan includes 2 CMS collections and Pro includes 10, so a blog plus maybe a case study library fits comfortably on Basic, and heavier content operations belong on Pro.
Step 5: Match your URLs and set redirects. This is the step people skip and regret. If your WordPress posts lived at yourbusiness.com/blog/my-post, try to keep that same slug in Framer so your Google rankings and inbound links survive. Where you cannot match a URL exactly, add a redirect from the old path to the new one. Do this before you flip the domain, not after.
Step 6: Flip the domain (Job 1) and monitor. Once the Framer site is fully built and your redirects are mapped, repoint the domain using the Job 1 steps above. Then watch Google Search Console for a couple of weeks. A small, temporary ranking wobble after any migration is normal. Clean redirects and matching content keep it small.
Who should take this path? Anyone with a marketing site, portfolio, or blog under a few hundred pages who is tired of WordPress upkeep. Who should think twice? A site with heavy WooCommerce e-commerce, hundreds of interrelated custom post types, or deep plugin functionality (membership, complex forms, LMS). Framer is a design-first site builder, not a full e-commerce or application backend, so if WordPress is running a real store or app for you, migrating is a bigger project than a weekend.
If you are on the fence about migrating, the smartest move is to rebuild just your homepage in Framer first and see how it feels. Grab a free Framer account and clone your current homepage into it. An hour of that tells you more than a week of comparison reading, and you risk nothing because your live WordPress site never changes.
Job 3: Run a Framer site with a WordPress blog attached
This is the pragmatic favorite for teams who love Framer for design but have an established WordPress blog with an editorial workflow, authors, and SEO history they do not want to disturb. The plan: Framer serves your marketing pages, WordPress keeps serving your blog, and you connect them so visitors feel one seamless site. Nobody has to abandon anything.
There are two clean ways to stitch them together, and one to avoid.
Option A: Blog on a subdomain. Put your Framer marketing site on yourbusiness.com and keep WordPress running your blog at blog.yourbusiness.com. Technically this is two separate sites under one brand. You point the root domain’s DNS at Framer (Job 1) and point a blog subdomain’s DNS at your WordPress host. In your Framer navigation, link to blog.yourbusiness.com. In WordPress, link back to the main site. This is the easiest setup, it is bulletproof, and both platforms stay fully independent. The only downside is that a subdomain is treated by search engines as a somewhat separate property, which is usually fine for most sites.
Option B: Blog in a subdirectory. The tidier looking option is yourbusiness.com for Framer and yourbusiness.com/blog for WordPress, all under one domain. Search engines tend to treat a subdirectory as fully part of the same site, which is the SEO ideal. The catch is that serving two different platforms under one domain at different paths requires reverse proxy configuration at the hosting or CDN level, which is a developer task. It is a well trodden pattern (many large companies run their blog this way), but it is not point and click, and it is not something Framer sets up for you. If you have technical help, subdirectory is the cleaner result. If you do not, subdomain is the honest, low risk choice.
The approach to avoid: trying to embed live WordPress posts inside Framer pages through iframes or manual copy-paste that you then maintain in two places. That way lies duplicated content, broken formatting, and a maintenance headache. Keep each piece of content living in exactly one system.
Here is the step by step for Option A, the setup most teams should use.
Step 1: Decide your split. Marketing pages (home, product, pricing, about, contact) go to Framer. The blog stays in WordPress. Write this down so everyone knows where each type of page lives.
Step 2: Point the root domain at Framer. Follow Job 1 to get yourbusiness.com serving your Framer site.
Step 3: Create the blog subdomain pointing at WordPress. In your DNS settings, add a record for blog that points to your WordPress host, using whatever A record or CNAME your host specifies. Then, inside WordPress settings, update the site address to blog.yourbusiness.com so WordPress knows its new home.
Step 4: Cross-link the two in navigation. In your Framer site’s menu, add a “Blog” link that goes to blog.yourbusiness.com. In your WordPress theme’s menu, add links back to your main Framer pages. Match the fonts, colors, and logo on both sides as closely as you can so the seam is invisible to visitors.
Step 5: Unify tracking. Put the same analytics (Google Analytics, for instance) on both the Framer site and the WordPress blog so you see the whole visitor journey in one place rather than two disconnected reports.
The beauty of Job 3 is that it lets you adopt Framer’s speed and polish on the pages that sell, while your content team keeps its familiar WordPress writing flow. Over time, if you decide the Framer CMS is good enough, you can graduate to Job 2 and retire WordPress. But you are never forced to.
Job 4: Use WordPress as a headless source for Framer
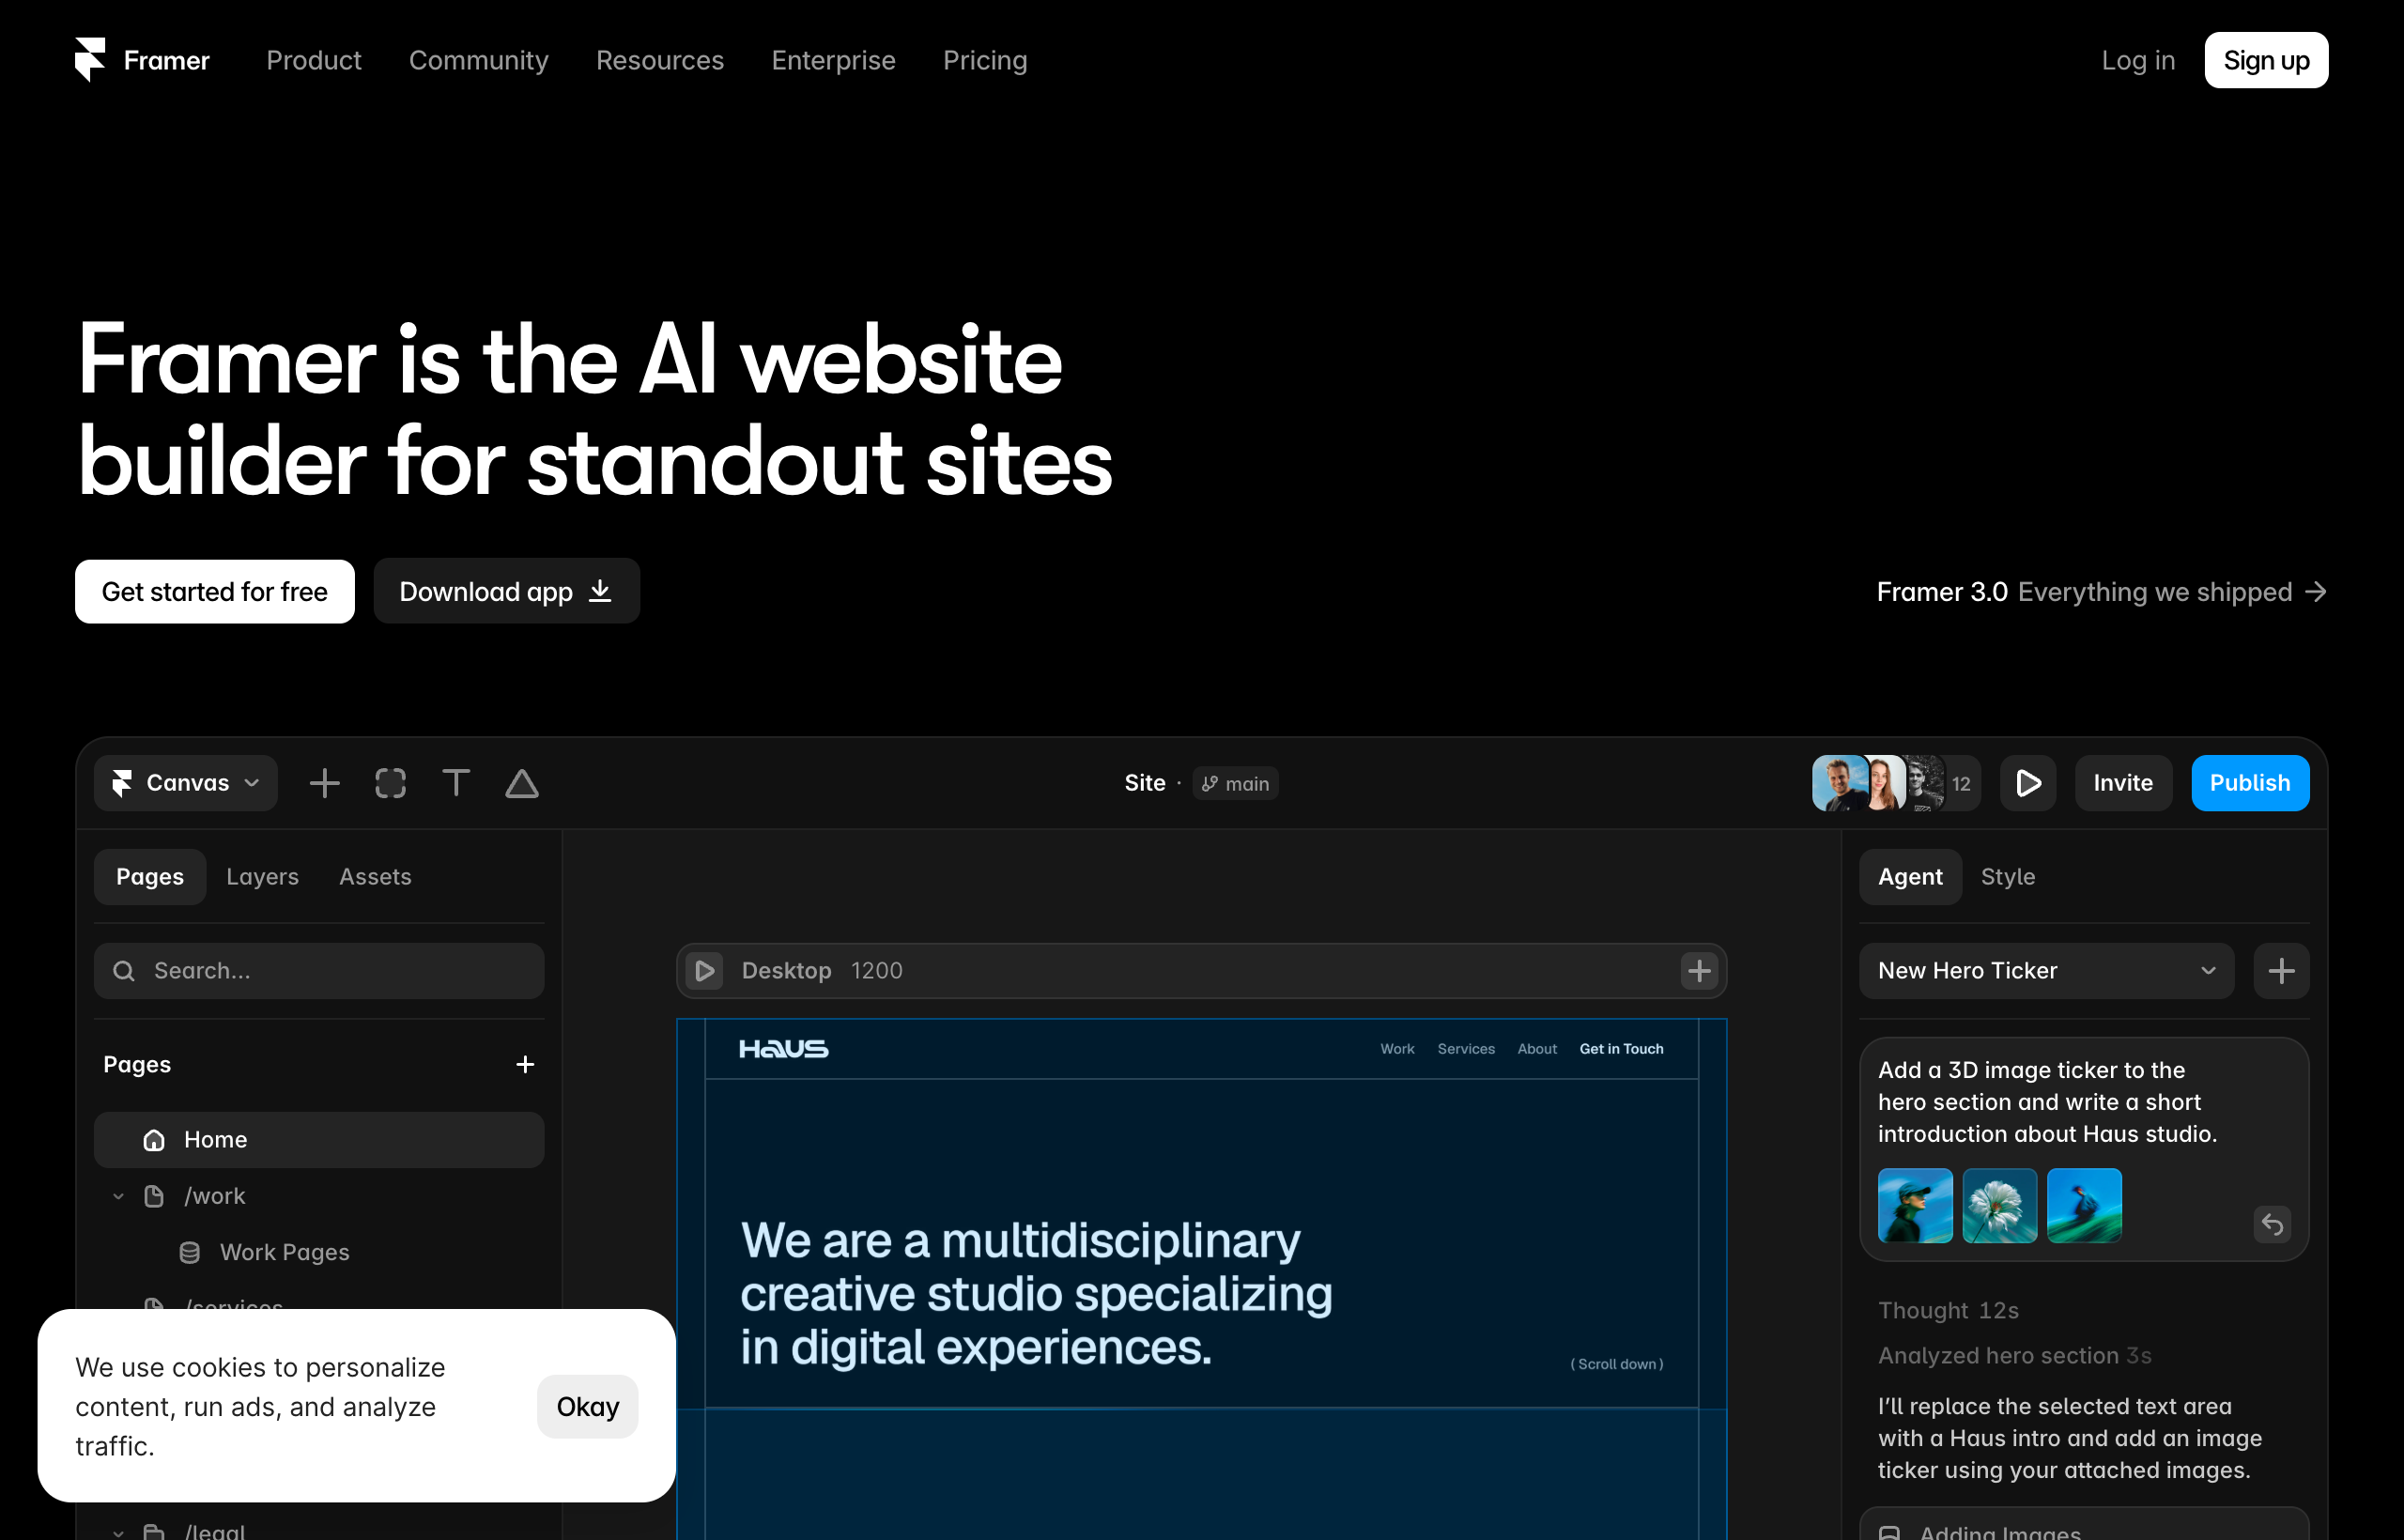
Here is the option that sounds elegant and, for most people, is not worth it. The dream is: keep writing in the WordPress editor your team already knows, and have that content automatically appear inside your Framer site. This is the “headless WordPress” idea, where WordPress becomes a pure content backend and something else renders the front end.
Can it be done with Framer? In a limited, do-it-yourself way, sometimes, but let me be straight about the reality. Framer has no official native WordPress integration. There is no menu item that says “connect WordPress.” So bridging them means pulling content out of WordPress through its REST API or an export, transforming it, and pushing it into Framer’s CMS, typically through Framer’s own CMS API or a syncing script. That is a developer project, and it is a fragile one, because you are maintaining a custom pipeline between two systems that were never designed to work together. When WordPress updates, or your data model changes, the bridge can break, and you are the one who has to fix it.
For the overwhelming majority of readers, the honest recommendation is: do not do Job 4. If you want to keep writing in WordPress, do Job 3 instead and let WordPress serve its own blog. If you are ready to leave WordPress behind, do Job 2 and use Framer’s CMS directly, which is pleasant to write in and needs no bridge to maintain. Job 4 only makes sense in narrow cases: you have a large existing WordPress content operation that must stay in WordPress for organizational reasons, you specifically want Framer rendering the front end, and you have a developer who will own and maintain the sync. That is a real but small audience.
If you genuinely fit that profile, the rough shape of the work is: expose your WordPress content via its REST API, write a script that reads those posts and creates or updates matching entries in a Framer CMS collection through Framer’s CMS API, and schedule that script to run so new WordPress posts flow into Framer. Treat it as ongoing engineering, not a one time setup. And test the honest alternative first, because most teams who think they need headless WordPress are happier once they simply move their writing into Framer’s own CMS.
Comparison: which job fits you
Since the whole point is picking the right one, here is the side by side.
| Your goal | The job | Difficulty | Keep WordPress? |
|---|---|---|---|
| Same domain, new Framer site, drop WordPress | Job 1: point the domain | Easy | No |
| Move content over, retire WordPress fully | Job 2: migrate content | Moderate | No |
| Framer for marketing pages, WordPress for the blog | Job 3: run side by side | Easy to moderate | Yes |
| Keep writing in WordPress, render in Framer | Job 4: headless bridge | Hard (developer) | Yes |
Read the table top to bottom and stop at the first row that matches what you want. If two rows tempt you, prefer the higher, simpler one. Most readers land on Job 1 or Job 3, and both are within reach of a non-developer in an afternoon.
What “connecting” WordPress and Framer does NOT mean
A quick myth-busting round, because search results are full of confusion on this.
There is no Framer plugin you install in WordPress that links the two. WordPress plugins extend WordPress. They do not reach into Framer. If a page promises a “Framer WordPress plugin” that magically syncs your site, be skeptical about what it actually does.
You cannot edit a Framer site from inside the WordPress dashboard, or vice versa. They are separate editors on separate platforms. Job 3 makes them feel unified to visitors, but you still manage each in its own place.
Moving your domain does not move your content. Repointing DNS (Job 1) changes where the address sends people. It does nothing to your posts and pages, which is why Job 2 is a separate, larger effort.
Framer is not a drop-in WordPress replacement for every site. For design-led marketing sites, portfolios, and normal blogs, Framer is often the better, lower maintenance home. For a real e-commerce store, a membership site, an LMS, or a site leaning on dozens of specialized plugins, WordPress may still be the right backend, and a Job 3 hybrid or staying put can be the smarter call.
Being clear-eyed about these saves you from chasing a bridge that does not exist.
Common mistakes when moving between WordPress and Framer
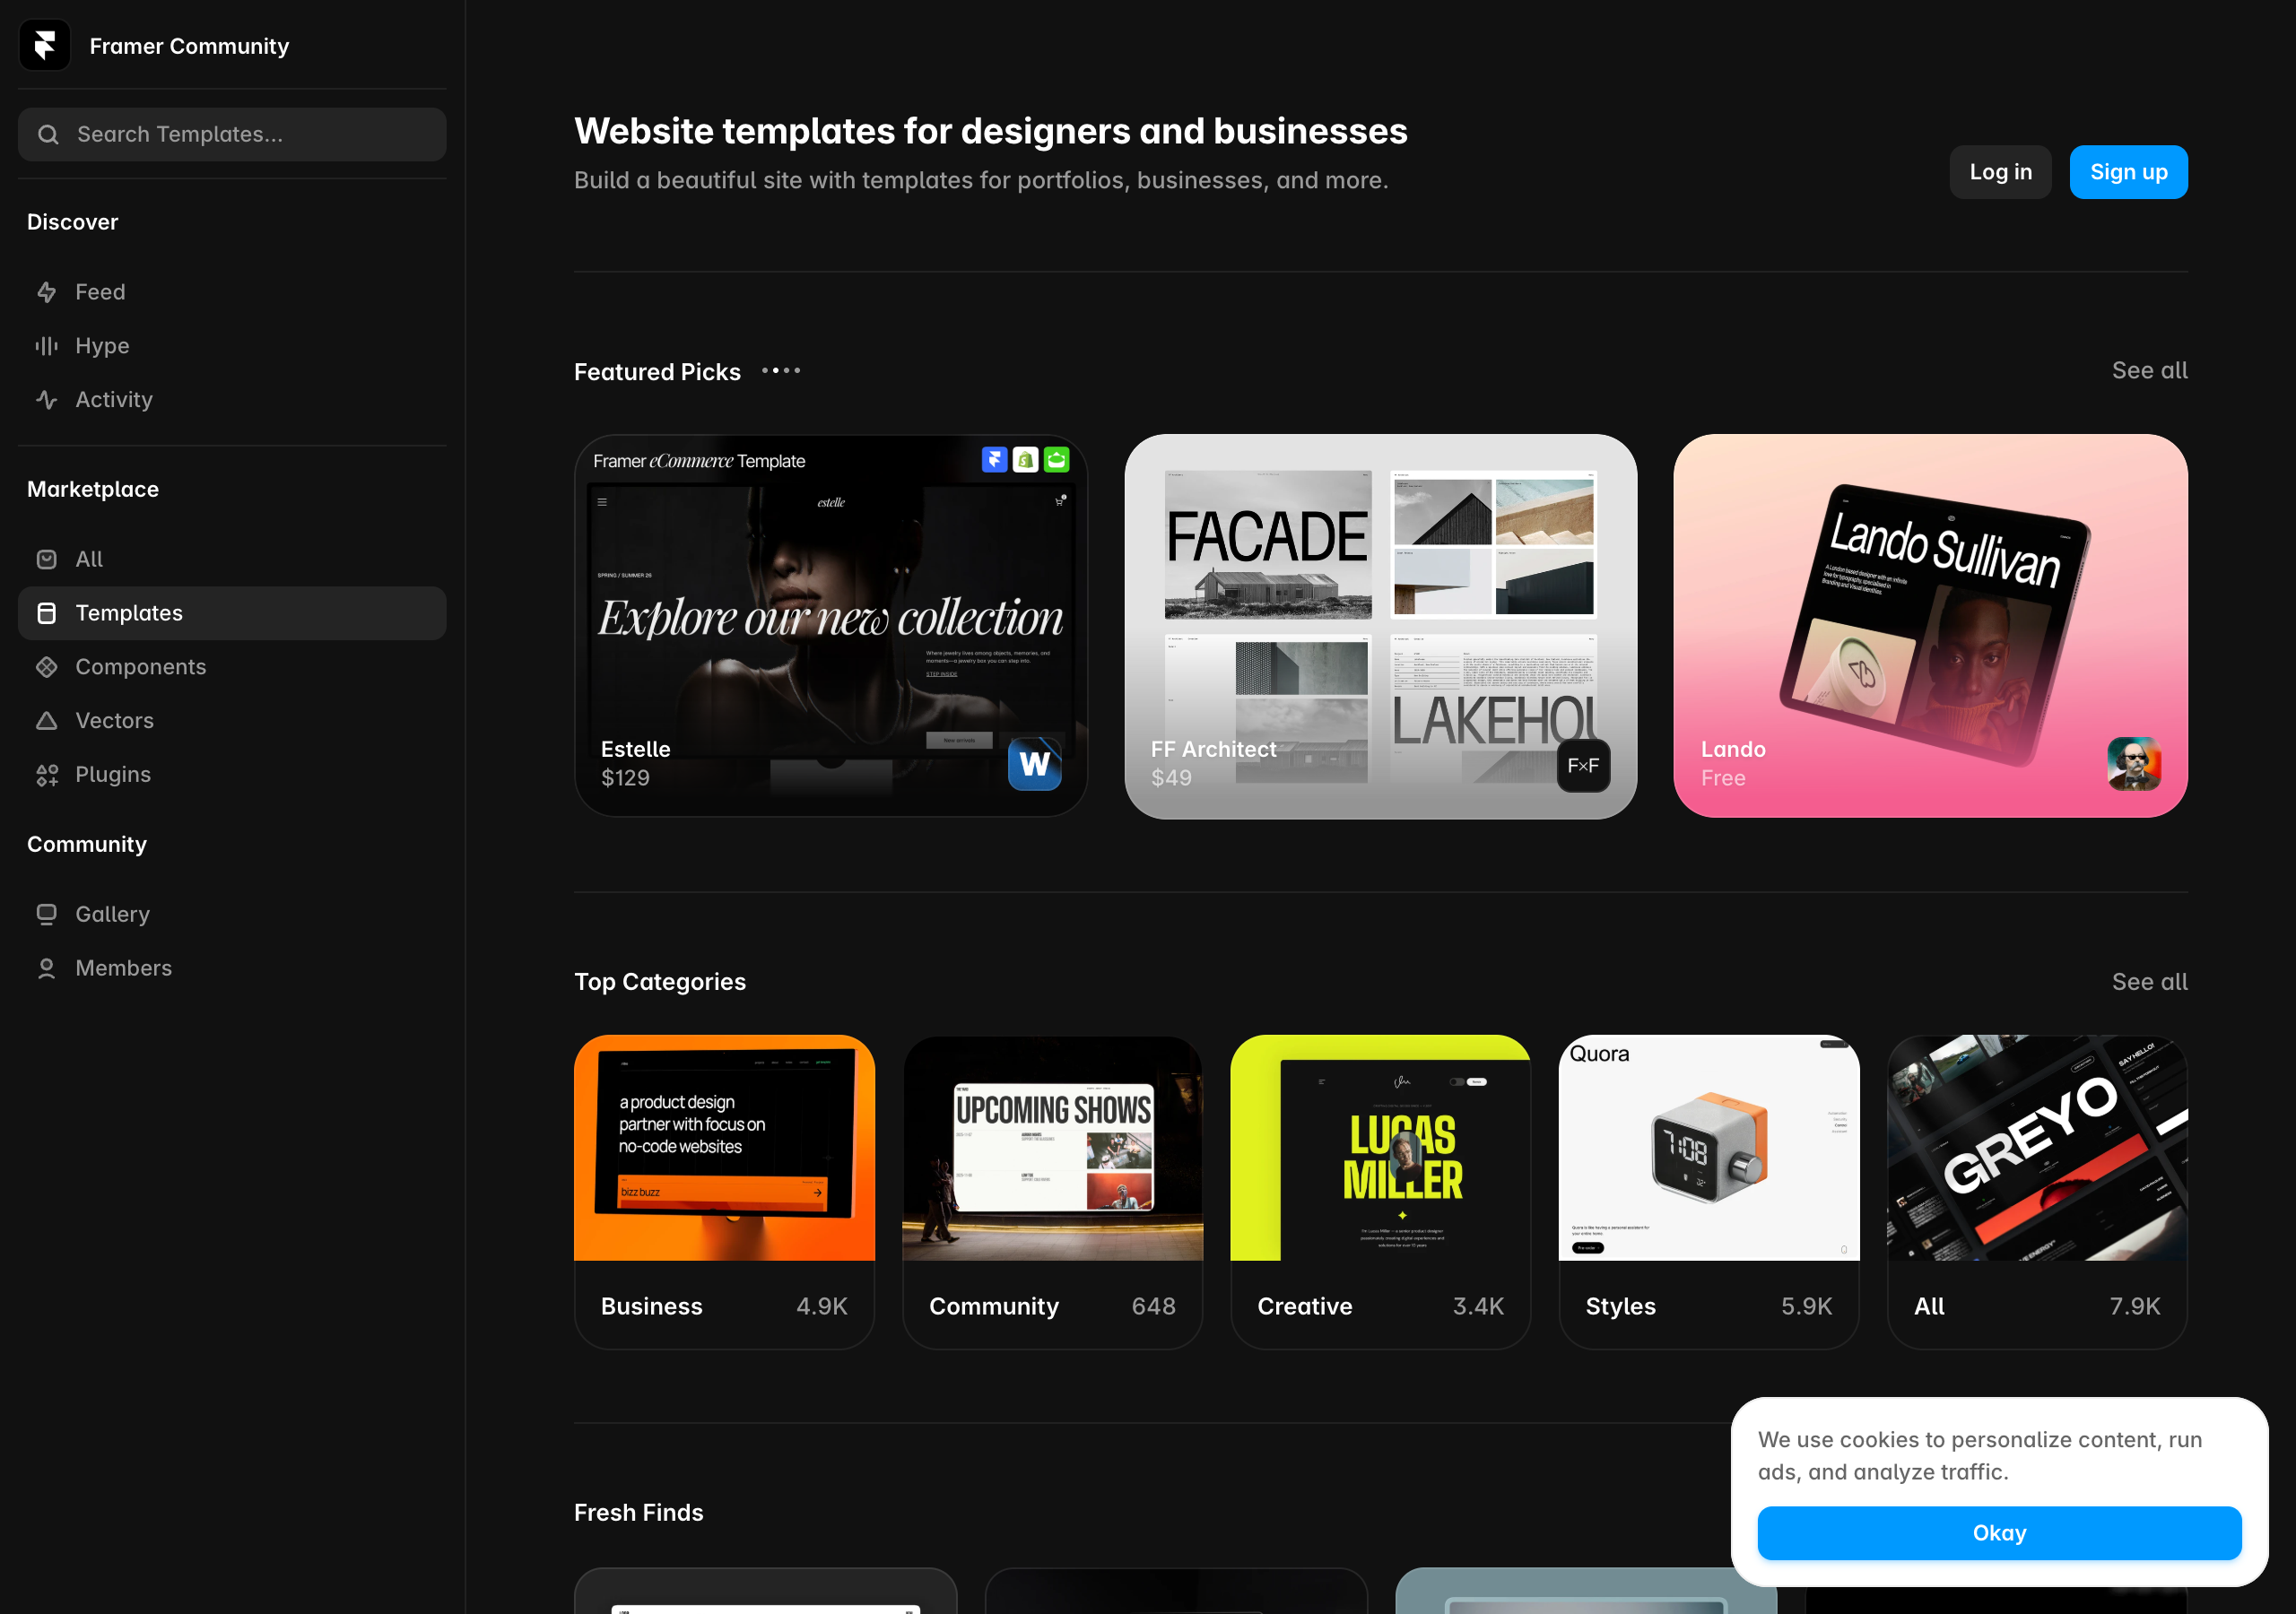
- Canceling WordPress hosting too fast. Repoint the domain, confirm the Framer site is fully live and correct, and only then wind down the old host, keeping a backup of your WordPress export.
- Forgetting redirects. If URLs change during a migration, unmapped old links become 404s that hurt SEO and annoy visitors. Map your important old paths to new ones before you flip the domain. Framer’s Pro plan includes site redirects for this.
- Touching the wrong DNS records. Change your A record and www CNAME to point the website at Framer, but leave MX records alone unless you are deliberately moving email. Mixing these up can knock out your email.
- Expecting design to carry over. Your WordPress theme does not travel. Budget time to rebuild the look in Framer, which is usually a pleasant surprise, not a chore, because the result looks better.
- Reaching for headless (Job 4) when Job 3 would do. Do not build and maintain a fragile custom sync just to keep writing in WordPress. A subdomain blog gets you the same outcome with none of the engineering risk.
- Not testing on the free
framer.websitesubdomain first. Build and preview your Framer site on its free subdomain, get it right, and only connect your real domain once you are happy.
Frequently asked questions
Can I connect my WordPress domain to Framer? Yes. Your domain is separate from your website. You add the domain in Framer’s settings, copy the DNS records Framer gives you, and update those records at your domain registrar. Once DNS propagates, your domain loads your Framer site. Custom domains require a paid Framer plan, available from Basic up.
Is there a plugin to connect WordPress to Framer? No official one that meaningfully syncs the two platforms. WordPress plugins extend WordPress, and Framer is a separate hosted platform. Be cautious about tools claiming a magic bridge. For most goals you want a domain repoint (Job 1), a content migration (Job 2), or a side by side hybrid (Job 3), none of which need a plugin.
Can I keep my WordPress blog and use Framer for the rest of my site? Yes, and it is a popular setup. Put your Framer marketing site on the root domain and keep the WordPress blog on a subdomain like blog.yourbusiness.com, then cross-link them and use the same analytics on both. Visitors experience one brand while each platform stays independent.
Will I lose my SEO if I move from WordPress to Framer? Not if you migrate carefully. Keep your URL structure the same where possible, set redirects for any URLs that change, and both Framer and WordPress produce fast, well marked up pages. A brief, minor ranking wobble after any migration is normal and usually recovers as Google reindexes.
How do I move my WordPress blog posts into Framer? Export your content from WordPress (Tools, then Export), create a CMS collection in Framer with fields for title, slug, body, image, date, and author, then move your posts into that collection. For a few posts you paste them by hand. Plan around Framer’s collection limits: Basic includes 2 collections, Pro includes 10.
Can WordPress feed content into Framer automatically? Only through a custom developer-built pipeline using WordPress’s REST API and Framer’s CMS API, which is fragile to maintain and not recommended for most people. If you want to keep writing in WordPress, running the blog on a subdomain (Job 3) is far simpler and more reliable.
Do I need to move my domain registration to use Framer? No. You can leave your domain registered wherever it is and simply change its DNS records to point at Framer. You are renting a Framer site, not buying a new domain.
Is Framer cheaper than running WordPress? Often, once you count the real cost of WordPress: hosting, premium themes, paid plugins, security tools, and the time spent on updates. Framer is fully hosted with no server to manage, so a single Framer plan can replace several WordPress line items. Compare your actual WordPress bill against a Framer plan for your specific needs.
The bottom line
“Connect WordPress to Framer” is really four different jobs wearing one search phrase. Most of you want the easy one: keep your domain, point it at a Framer site, and let WordPress go. That is a DNS change you can finish in an afternoon. If you have content worth keeping, migrate it into Framer’s CMS and set redirects so your SEO survives. If you love your WordPress blog but want Framer’s polish everywhere else, run them side by side with a subdomain and stop worrying about a bridge. And unless you have a developer and a very specific reason, skip the headless route entirely.
The one thing all four jobs share is that they get easier the moment you stop reading and actually build a page in Framer, because then the abstract “how do these connect” question becomes a concrete series of clicks. Framer is a no-code, fully hosted, design-first builder that publishes instantly, so there is no risk in trying it before you commit your domain.
Ready to make this real? Create your free Framer site now, rebuild one page from your WordPress site inside it, and see how fast and how good it feels. Once it looks better than your current site, the connection question answers itself, and you can point your domain over whenever you are ready.
Framer pricing, plan names, CMS collection limits, and feature details cited here were captured from Framer’s live pages in July 2026. Tiers and numbers change over time, so confirm current details on framer.com/pricing before you buy, and verify your domain host’s specific DNS steps in their documentation.
Most people who search “Framer to Shopify” are quietly hoping for one of two answers. Either they want to move a Shopify storefront into Framer because Framer looks so much better, or they have fallen for Framer’s design and now they are panicking about how it will ever handle a real cart and checkout. I am going to give you the honest answer to both, because the wrong one will cost you months.
Here it is up front: you almost never want to replace Shopify with Framer, and you almost never want to build your whole store inside Framer either. The move that actually works, the one real founders and agencies use, is to run both. You build the beautiful, fast, on-brand marketing site in Framer, and you let Shopify do the one thing it is genuinely world-class at, which is selling products: inventory, cart, checkout, payments, taxes, and shipping.
I have built marketing sites in Framer and I have wired them to real checkouts. This guide is the playbook for doing that cleanly. You will get a plain explanation of what each tool is for, the three concrete ways to connect them, a numbered integration plan, the domain and SEO details people always get wrong, and an honest list of when you should skip this whole approach and just use Shopify by itself.
The quick answer
If you only read one section, read this.
Framer is a design-first website builder. Shopify is a commerce engine. They are not competitors, they are partners. Framer builds gorgeous, fast, hosted marketing pages with no code. Shopify runs the actual store: product catalog, inventory, secure checkout, payment processing, order management, taxes, and shipping. Framer is not a full store backend, and Shopify is not a design playground. Trying to force either tool to do the other one’s job is where projects go sideways.
There are three honest ways to connect them:
- Link out. Your Framer site has “Shop” buttons that send visitors to your Shopify store. Simplest, most reliable, works today.
- Embed Shopify Buy Buttons. Shopify generates snippets of embeddable code for individual products or a cart, which you paste into a Framer embed. Products live on your Framer pages, checkout still happens on Shopify’s secure system.
- Split by subdomain. Your marketing site sits on your main domain via Framer, and your store lives on a
shop.subdomain pointed at Shopify. One brand, two tools, a clean handoff.
There is no official one-click “Framer to Shopify” importer, and you do not need one. You are not migrating a store into Framer. You are giving your Shopify store a better front door.
Before you overthink the architecture, go feel how fast Framer builds a marketing site. Start a free Framer project and publish a real page in the next hour. No credit card needed, and once you see how good the front end looks, the plan below makes total sense.
First, get the roles straight
The single biggest mistake I see is treating this as an either/or decision. It is not. Each tool has a job. Assign the jobs correctly and everything downstream gets easier.
What Framer is genuinely great at
Framer grew out of a design and prototyping tool, and it shows. The canvas feels like Figma: you drag elements, type directly onto the page, and drop in polished sections that look designed by default. It ships beautiful motion almost for free, so scroll effects, hover states, and smooth page transitions that make a brand feel premium are a matter of selecting an element and choosing an effect. It publishes instantly to a global CDN, so there is no server to manage. It has a CMS for content like blog posts and lookbooks, SEO meta controls, and responsive breakpoints for desktop, tablet, and phone.
In other words, Framer is the best tool in this pair for the parts of a commerce brand that are about story and persuasion: the homepage, the brand narrative, campaign landing pages, lookbooks, editorial content, an about page that actually makes people feel something, and the blog that brings in search traffic. This is the storefront window, the thing that makes a shopper stop and lean in.
What Shopify is genuinely great at
Shopify is a dedicated commerce platform, and the depth is not something you casually rebuild. It handles the product catalog with variants and options, real-time inventory, a secure and battle-tested checkout, payment processing through Shopify Payments and dozens of gateways, automatic tax calculation, shipping rates and label printing, discount codes, abandoned-cart recovery, order fulfillment, and a whole ecosystem of apps for reviews, subscriptions, and logistics. It also handles the boring but critical things: fraud analysis, PCI compliance, and staying up when you get a traffic spike.
That checkout is the crown jewel. Payment security and conversion optimization on a checkout flow represent years of engineering and testing. You do not want to reinvent that inside a design tool, and honestly, you cannot.
The line between them
Here is the clean mental model. Framer owns everything up to the moment a shopper decides to buy. Shopify owns the buying itself and everything after it. Keep that line sharp and you will build something that both looks incredible and reliably takes money.

The three ways to connect Framer and Shopify
Now the practical part. Pick the method that matches how many products you sell and how seamless you need the experience to feel.
Method 1: Link out to your Shopify store
This is the simplest and most robust approach, and for a lot of brands it is genuinely all you need.
You build your marketing site in Framer. Every “Shop Now,” “Buy,” or “View Collection” button is a plain link that points to your Shopify store URL. When a visitor clicks, they land in your fully featured Shopify storefront, where they browse, add to cart, and check out inside Shopify’s own system.
Best for: brands with a real catalog (more than a handful of products), anyone who wants Shopify’s full browsing and filtering experience, and teams who value reliability over a perfectly seamless visual handoff.
Strengths: almost nothing can break. You are just using links. Your Shopify store gets all its native features, and your Framer site stays lightning fast because it is not loading any commerce code.
Trade-off: there is a visible transition. The shopper moves from your Framer-designed pages into your Shopify-themed store, and if you have not styled Shopify to match your Framer brand, the seam shows. The fix is to invest a little in matching your Shopify theme’s colors, fonts, and logo to your Framer site so the jump feels intentional rather than jarring.
Method 2: Embed Shopify Buy Buttons in Framer
Shopify offers a Buy Button sales channel that generates a snippet of embeddable code for an individual product or a small collection. You copy that snippet, drop it into a Framer embed element, and now a real, purchasable product appears directly on your Framer page. When someone clicks buy, checkout happens through Shopify’s secure system, usually in an overlay or by handing off to Shopify checkout.
Framer supports embedding third-party code through embed blocks, which is exactly what a Buy Button snippet needs. So you can feature a hero product on your homepage, or build a tight little landing page that sells one flagship item, all inside your Framer design, while Shopify quietly handles the transaction.
Best for: a small number of hero products, single-product brands, campaign landing pages built around one item, and creators who sell a few things and want them to appear inside beautifully designed Framer pages.
Strengths: the product lives inside your Framer design, so the experience feels custom and on-brand right up to the checkout. You still get Shopify’s secure, compliant checkout doing the money part.
Trade-off: the Buy Button is not a full store. It does not give you category pages, faceted filtering, search, or a persistent multi-product cart the way the native Shopify storefront does. Once you are selling dozens of products, managing individual embeds gets tedious, and you should lean on Method 1 or 3 instead. Also test your embeds on mobile, because embedded widgets sometimes need a little sizing attention on small screens.
Method 3: Split your brand across a subdomain
This is the setup that scales, and it is what most serious brands running both tools end up doing.
Your marketing site lives on your primary domain through Framer. Your store lives on a subdomain pointed at Shopify. The classic pattern is:
yourbrand.comandwww.yourbrand.comserve your Framer marketing site.shop.yourbrand.com(orstore.yourbrand.com) serves your Shopify store.
To a visitor, it is one brand. Navigation on your Framer site links to shop.yourbrand.com, and if you like, your Shopify header links back to your Framer pages. Both live under your domain, both feel like home, and each tool does its real job at full strength.
Best for: established brands, anyone with a growing catalog, and teams who want the marketing polish of Framer and the full commerce power of Shopify without compromise.
Strengths: you get the complete Framer design experience and the complete Shopify store experience, both under one brand umbrella, with no feature sacrificed on either side.
Trade-off: it is the most setup. You are configuring DNS records in two places and making sure both properties feel visually consistent. It is not hard, but it is more than pasting a link. The step-by-step below walks through it.
If you have been stuck picturing all of this instead of building, that is the trap. Spin up the front end first and the rest gets obvious. Create your free Framer site and design your homepage today. You will make more progress in one hour of building than in a week of reading integration guides like this one.
A step-by-step integration plan
Here is the sequence I use to wire a Framer marketing site to a Shopify store without breaking anything. It works for all three methods, with the subdomain steps flagged where they apply.
Step 1: Audit what you have and what you need
Before you touch either tool, write two short lists. First, the marketing pages you want in Framer: homepage, about, campaign or collection landing pages, blog, contact. Second, the commerce pieces Shopify will own: your product catalog, checkout, and any store apps you rely on for reviews, subscriptions, or shipping. This five-minute audit stops you from accidentally rebuilding your product catalog inside Framer, which is the classic time sink.
Step 2: Build the marketing site in Framer
Open Framer and start from a template or a blank canvas. Structure your pages with Stacks so they flex cleanly across breakpoints. Design your homepage, brand story, and any campaign landing pages. Add your blog through the Framer CMS if you want search traffic feeding the store. This is where you pour your design energy, because this is what shoppers see first and what makes them trust you enough to buy.
Do not try to model your product catalog in the Framer CMS as if it were a store. You can showcase a few featured products as content, but inventory, variants, and checkout belong in Shopify. Keep the line sharp.
Step 3: Set up or confirm your Shopify store
In Shopify, make sure your catalog is loaded, your products have proper titles, descriptions, and images, and your checkout, payment, tax, and shipping settings are configured. If you are using Method 2, activate the Buy Button sales channel in Shopify so you can generate embed snippets. Spend a little time styling your Shopify theme’s colors, fonts, and logo to match your Framer brand, because visual consistency across the handoff is what makes the whole thing feel like one store rather than two bolted together.
Step 4: Connect them with your chosen method
- For Method 1 (link out): in Framer, set every shop button’s link to your Shopify store URL. Decide whether it opens in the same tab (smoother for a true handoff) or a new tab. Same tab usually feels more like one continuous store.
- For Method 2 (embed): in Shopify, generate a Buy Button for the product you want to feature, copy the code, then in Framer add an embed element on the page and paste it in. Preview it, then test the actual checkout flow end to end with a real click.
- For Method 3 (subdomain): this gets its own step below because DNS deserves care.
Step 5: Configure the domain and subdomain (Method 3)
This is the step people fumble, so go slowly.
- Decide your structure. Typically your Framer marketing site takes
yourbrand.comandwww.yourbrand.com, and Shopify takesshop.yourbrand.com. - Connect your custom domain to Framer. A custom domain is available on Framer’s paid plans starting at the Basic tier, so make sure you are on a paid plan, then follow Framer’s domain settings to add the DNS records it gives you at your domain registrar.
- In Shopify, add
shop.yourbrand.comas a domain and point that subdomain at Shopify with the DNS record Shopify provides, usually a CNAME record created at your registrar. - Wait for DNS to propagate, which can take anywhere from a few minutes to a day, and confirm both properties load over HTTPS. Both Framer and Shopify handle SSL for you once the domain is connected correctly.
- Wire the navigation. On your Framer site, point “Shop” links to
shop.yourbrand.com. In Shopify, link the store header back to your main domain so shoppers can return to your marketing pages.
Step 6: Handle SEO and redirects
If you are moving from an all-Shopify setup to a Framer front end, some of your old URLs will change. Do not let that silently tank your search traffic. Make a list of your important existing URLs, decide where each should now live, and set up redirects so old links land in the right place. Framer’s Pro plan includes site redirects, which is the feature you use to send old paths to their new homes on the Framer side. On the Shopify side, use Shopify’s URL redirect tool for any store paths that changed. Match your SEO metadata too: recreate your page titles, meta descriptions, and Open Graph images in Framer’s SEO settings so search engines and social previews stay intact.
Step 7: Test the full journey before you announce it
Walk the entire path as a customer would. Land on the Framer homepage, click a shop button, browse or view a product, add to cart, and complete a test checkout in Shopify. Do it on desktop and on a phone. Check that your branding feels consistent across the handoff, that no links are broken, and that the checkout actually processes. Only when the whole loop works end to end do you point your live domain and tell the world.
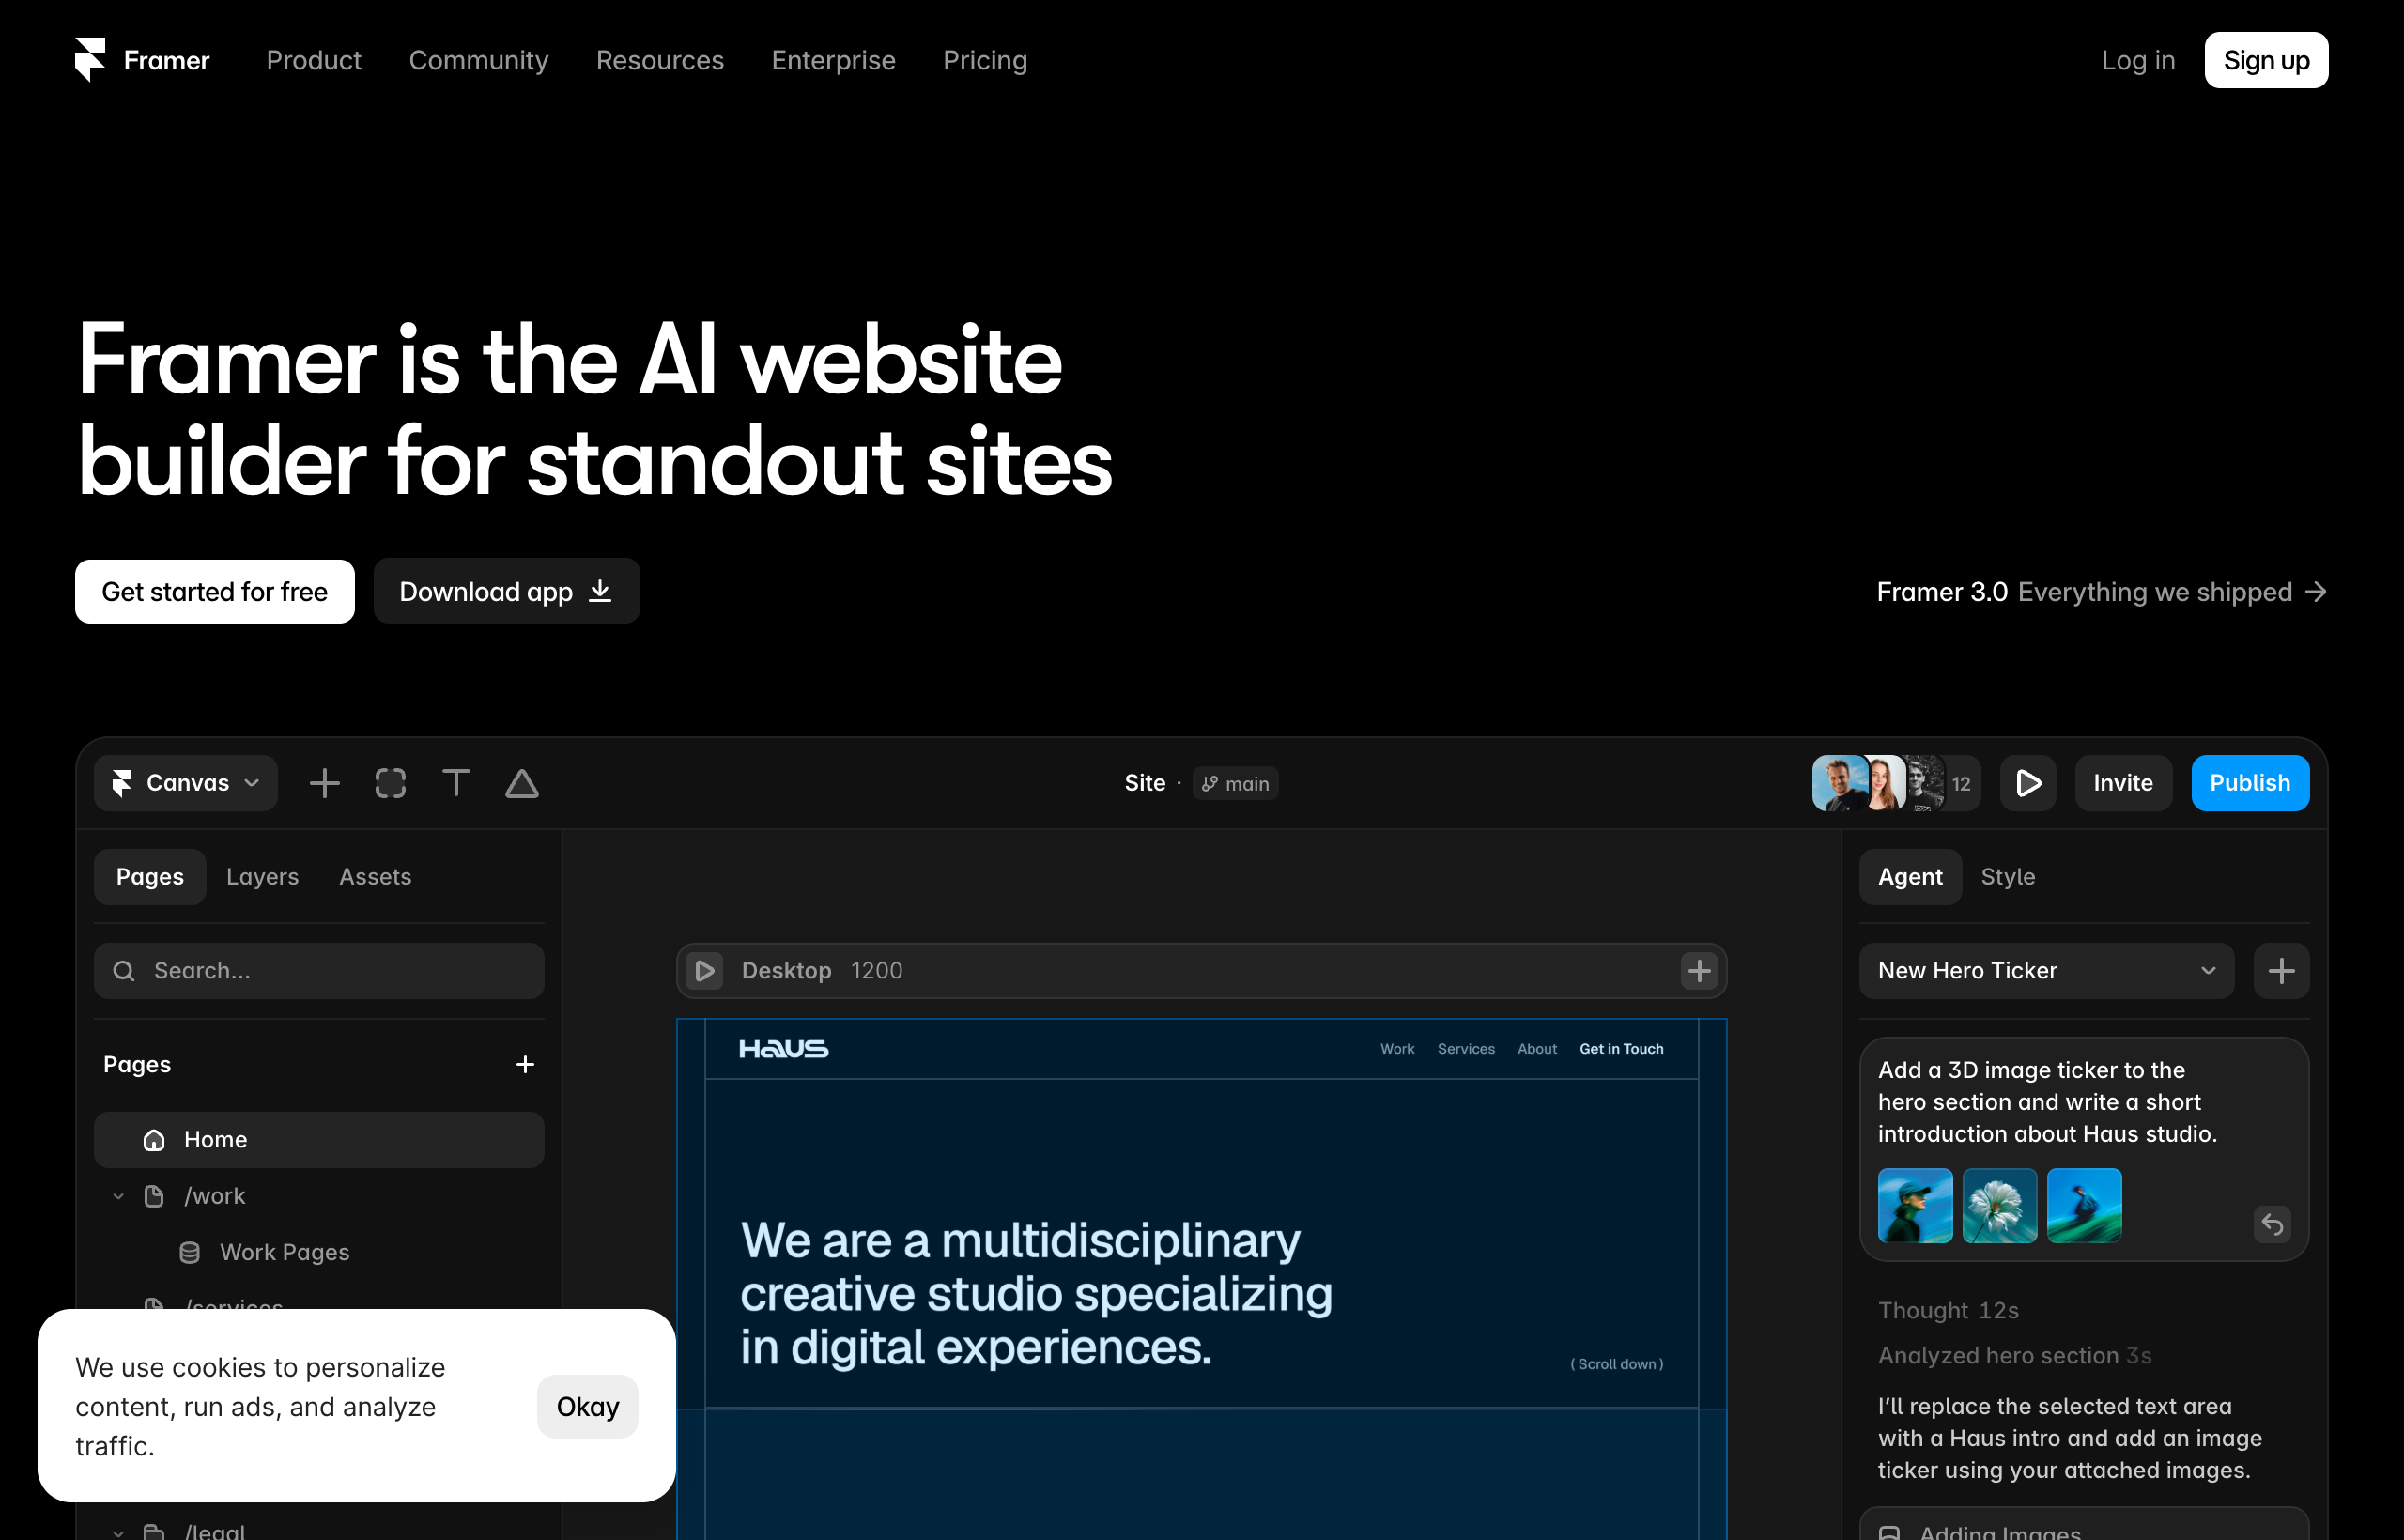
Can you just use Framer for the whole store instead?
Fair question, and the honest answer is: for a very small, simple offer, sometimes. If you are selling one digital product, a single course, or a couple of items, you can present them beautifully in Framer and connect a lightweight checkout, whether that is a Shopify Buy Button, a payment link, or another checkout tool. For that scale, spinning up a full Shopify store can be overkill.
But the moment you have a real catalog, variants, inventory you need to track, shipping rules, taxes across regions, discount codes, and the need for order management, you want a dedicated commerce engine. That is precisely what Shopify exists to be. Framer is not trying to be a full store backend, and trusting a design tool to run inventory, payments, taxes, and fulfillment at scale is a bet you do not want to make. The grown-up move is to let each tool do its job.
So the decision rule is simple. Few simple products, low complexity: Framer plus a light checkout can carry it. Real store with catalog, inventory, and logistics: Framer for marketing, Shopify for commerce.
Framer plans and where the store fits
You will run the Framer marketing site on a Framer plan and pay Shopify separately for the store. Here are Framer’s plans, captured from Framer’s live pricing page (yearly billing) in July 2026, so you can see where a custom domain and redirects live.
| Plan | Price | What you actually get |
|---|---|---|
| Free | $0 | 500 credits to try, free framer.website domain, 1 GB bandwidth, design pages |
| Basic | $10/mo | Free custom domain, 2 CMS collections, 50 GB bandwidth, use your own domain |
| Pro | $30/mo | 10 CMS collections, 100 GB bandwidth, site redirects, staging environment, branching with previews, A/B testing (add-on) |
| Enterprise | Custom | Custom limits, enterprise security, dedicated support |
Two things matter for this setup. First, you need at least the Basic plan to connect your own custom domain, which you will want for a real brand. Second, if you are moving URLs around and need redirects to protect your SEO, that lives on the Pro plan. Shopify charges its own monthly subscription plus payment processing fees on top, which vary by plan and payment method, so budget for both tools rather than expecting one bill. Always check the current numbers on framer.com/pricing and shopify.com/pricing before you commit, because tiers change.
Method comparison at a glance
| Link out | Buy Button embed | Subdomain split | |
|---|---|---|---|
| Setup effort | Lowest | Low | Highest |
| Products on Framer pages | No | Yes (individual) | No (store is separate) |
| Full store features | Yes | No | Yes |
| Seamless feel | Handoff visible | Most seamless per product | One brand, clean handoff |
| Best for | Real catalogs, simplicity | A few hero products | Established, scaling brands |
| Checkout | Shopify storefront | Shopify secure checkout | Shopify storefront |
Notice the checkout row. In every method, Shopify handles the money. That is the point. You never rebuild checkout, you route to it.
Common mistakes people make
I have watched these trip up smart people, so learn them for free.
- Trying to rebuild the whole store inside Framer. Modeling products, variants, inventory, and a cart in a design tool is a trap. You will spend weeks recreating a worse version of something Shopify already does. Let Shopify own commerce.
- Ignoring the visual handoff. If your Shopify store looks nothing like your Framer site, the jump feels broken and trust drops right before checkout. Style your Shopify theme to match your Framer brand, even just colors, fonts, and logo.
- Forgetting redirects when URLs change. Swapping in a Framer front end can change your old paths. Without redirects, you lose the search traffic you already earned. Map old URLs to new ones and set redirects on both sides.
- Skipping the mobile test. Embedded Buy Buttons and the desktop-to-store handoff can behave differently on phones. Most shopping happens on mobile, so test the full journey on a real phone before launch.
- Assuming there is a one-click importer. There is not, and you do not need one. This is an integration, not a migration of your store into Framer. Set expectations accordingly and the project stays simple.
- Not testing a real checkout. A beautiful site that cannot actually take payment is worse than an ugly one that can. Run a genuine end-to-end test purchase before you go live.
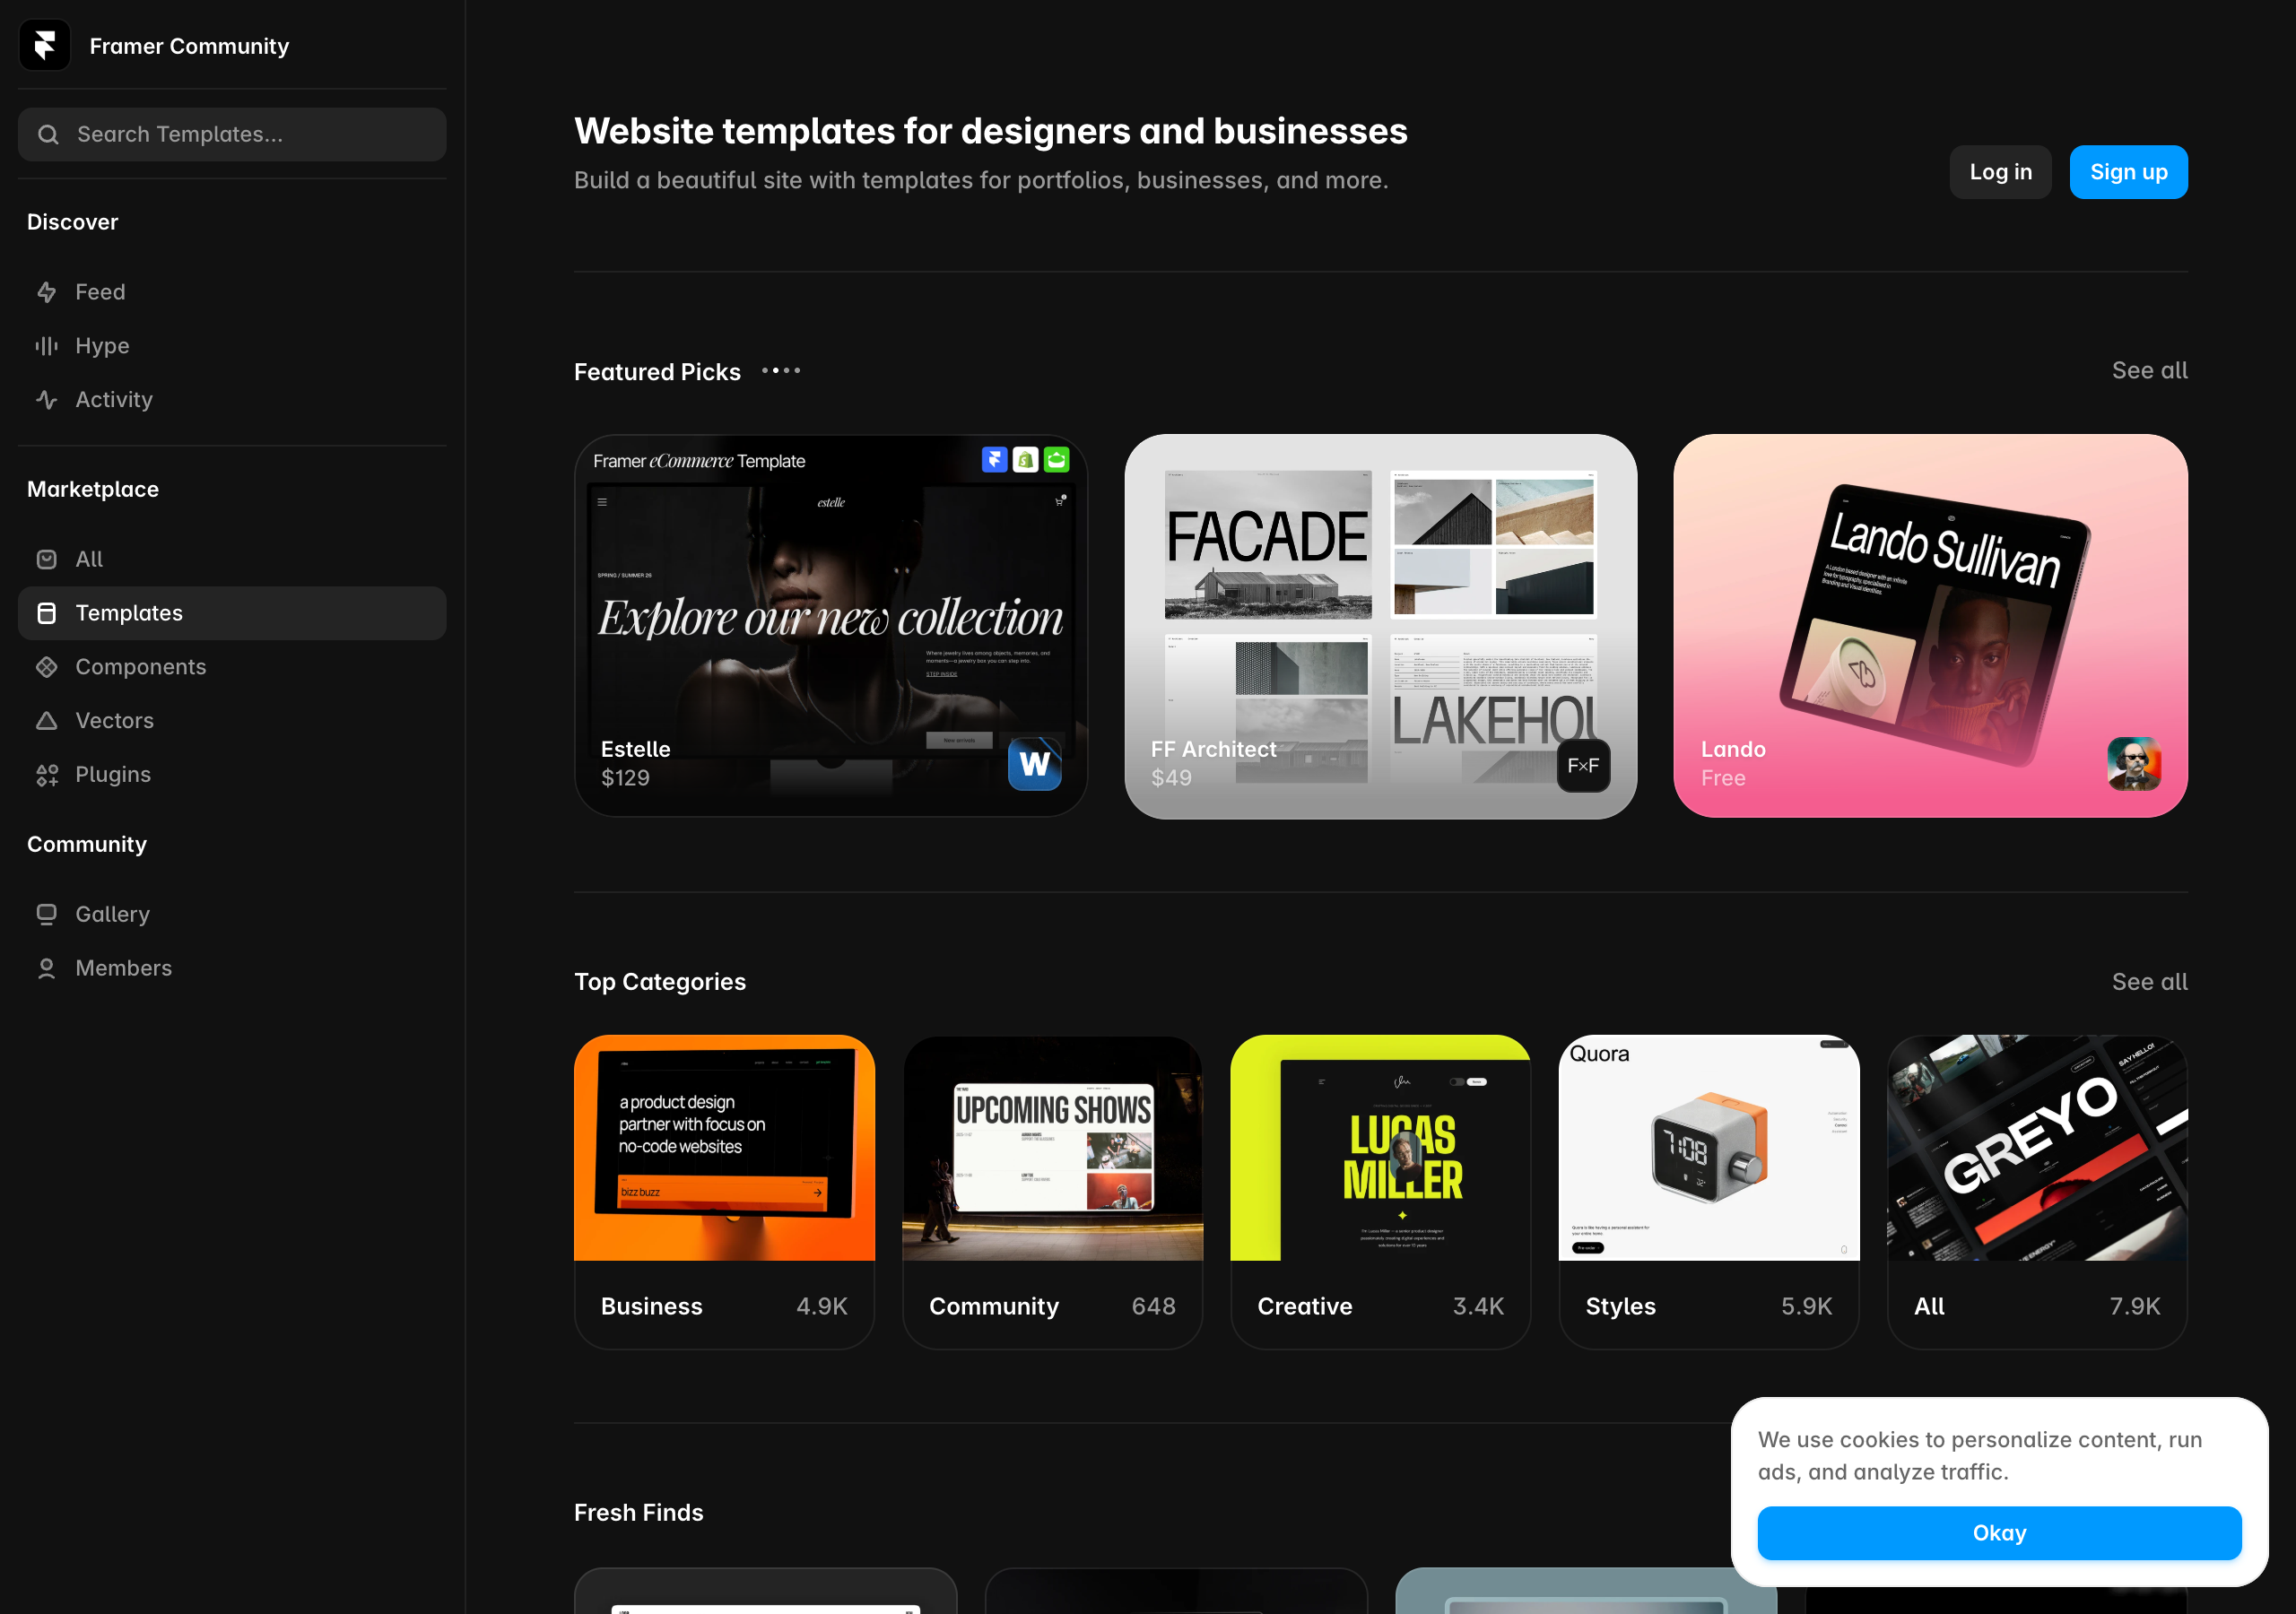
Frequently asked questions
Can I move my Shopify store into Framer? Not in the sense of running the actual store inside Framer, and you should not want to. Framer is a design and marketing site builder, not a full commerce backend with inventory, checkout, and payments at scale. The right move is to build your marketing site in Framer and connect it to your Shopify store, which keeps Shopify doing the selling.
Is there a one-click Framer to Shopify importer? No. There is no official one-click migration between them, because they do different jobs. You connect them through links, embedded Buy Buttons, or a subdomain split. None of those require an importer.
Can I sell products directly on a Framer page? Yes, in a limited way, by embedding a Shopify Buy Button so a specific product is purchasable inside your Framer design. Checkout still runs through Shopify’s secure system. For a full catalog with browsing, filtering, and a persistent cart, use your Shopify storefront rather than trying to embed everything.
Do I need a paid Framer plan for this? For a real brand, yes. You need at least the Basic plan at $10 a month to connect your own custom domain. If you are changing URLs and need redirects to protect your SEO, that lives on the Pro plan at $30 a month. The free plan is fine for trying Framer, but it uses a framer.website subdomain and shows a Framer badge.
How do I keep my Framer site and Shopify store looking like one brand? Match the details. Use the same logo, colors, and fonts on both, style your Shopify theme to echo your Framer design, and keep navigation consistent so a shopper always feels at home. The subdomain approach helps here because both live under your one domain.
Will connecting them hurt my SEO? Only if you change URLs without setting up redirects. Map your old URLs to their new locations, use Framer’s site redirects on the Pro plan and Shopify’s redirect tool on the store side, and recreate your page titles, meta descriptions, and Open Graph images in Framer. Done carefully, your search traffic stays intact.
Which method should a beginner start with? Method 1, linking out. It is the simplest and hardest to break: your Framer buttons just point to your Shopify store. You can always upgrade to embedded Buy Buttons or a subdomain split later as your needs grow.
Can I use just Framer without Shopify at all? For a very small, simple offer, sometimes. A single product, a course, or a couple of items can work in Framer with a lightweight checkout. But once you have a real catalog with inventory, variants, taxes, and shipping, you want Shopify’s dedicated commerce engine behind the marketing site.
The bottom line
Stop thinking of this as Framer versus Shopify. The winning setup is Framer and Shopify, each doing what it is best at. Framer gives your brand a fast, gorgeous, on-brand front end that makes shoppers stop and trust you. Shopify runs the catalog, cart, and secure checkout that reliably takes their money. Connect them by linking out, by embedding Buy Buttons, or by splitting your brand across a subdomain, and you get the design polish of Framer with the commerce power of Shopify, without asking either tool to fake being the other.
The best part is that the Framer half, the part that makes your store feel premium, is the fastest and most enjoyable thing to build, and you can start it right now for free.
Create your free Framer site and design the front end of your store today. Publish a real page, feel how fast and polished it is, and then wire it to your Shopify checkout using the plan above. Your store deserves a front door this good.
Framer pricing, plan names, and limits cited from Framer’s live pricing page, captured July 2026. Shopify features and fees vary by plan and region. Tiers and numbers change over time, so confirm current details on framer.com/pricing and shopify.com/pricing before you buy.
If you are reading this, you have already made most of the decision. You have a Webflow site that works, but every small edit turns into a wrestling match with classes and breakpoints, or the bill crept higher than you expected, or you just want the design freedom and the effortless motion that Framer is known for. Now you want to know the honest, practical part: how do you actually move, what comes with you, what do you have to rebuild, and how do you do it without tanking the Google rankings you worked hard to earn?
I have migrated real sites off Webflow and rebuilt them in Framer, including marketing sites that had to keep their traffic and their form submissions on day one. So this is not a theory piece. It is the playbook I wish someone had handed me the first time, including the parts nobody likes to admit, like the fact that there is no magic import button and you will be recreating pages by hand. The good news is that rebuilding in Framer is dramatically faster than building from scratch, and if you follow the steps below in order, you can move a typical marketing site in a weekend without losing your search traffic.
Let me walk you through it.
The quick answer
Here is the whole migration in one paragraph, so you know what you are signing up for before you read the details.
There is no one-click importer from Webflow to Framer. You do not export a file and load it in. Instead, you rebuild the site in Framer, which sounds worse than it is, because Framer’s speed means recreating a page takes a fraction of the time the original build did. Your content (text, images, copy, blog posts) comes across by hand or by paste, your design intent comes across by rebuilding it on Framer’s canvas (often faster and cleaner than the original), and your SEO equity comes across if, and only if, you keep your URLs matching or set up redirects and copy your meta tags carefully. The migration is a rebuild plus a careful SEO handoff. Do the SEO handoff right and your rankings survive the switch. Skip it and you will watch traffic dip.
If that tradeoff sounds acceptable, and for most people leaving Webflow it is, keep reading for the exact steps.
Before you plan the whole move, feel the tool for yourself. Start a free Framer site and rebuild just your homepage in the next hour. No credit card needed. One real page will tell you more about whether this migration is worth it than any article can.
Why people actually move from Webflow to Framer
Understanding your own reason matters, because it tells you which parts of the migration to obsess over. In my experience the people who switch fall into a few clear groups.
The speed seekers. They love their Webflow site but hate how long every change takes. Webflow exposes the CSS box model, divs, flexbox, grid, and a full class system, which is powerful but slow, and it means small edits can ripple in ways that break other things. Framer’s canvas feels like Figma. You drag, you type directly on the page, you drop in a section, and it looks polished by default. For a marketing team that ships changes weekly, that difference compounds into hours saved.
The design-and-motion crowd. They want scroll effects, page transitions, and appear-on-scroll animation that look expensive without a week of setup. Framer ships that motion nearly for free, where Webflow’s Interactions panel, though very capable, is more manual. If your brand lives on how the site feels, this is often the whole reason.
The pricing-clarity people. Webflow splits its cost into Site plans and Workspace plans, and a real published site frequently needs both, which surprises people at renewal. Framer prices per site, so the math is simpler: one site, one predictable bill.
The handoff-frustrated. They want a non-technical teammate to safely edit the site without touching a fragile class system. Handing a Framer site to a marketer for content edits is genuinely lower risk.
None of these mean Webflow is bad. Webflow remains the stronger tool for large, structurally complex, deeply relational content sites, and if that is what you run, read the honest “when NOT to move” section below before you commit. But if you are in one of the groups above, you are in the right place.
The honest truth: what transfers and what you rebuild
This is the section most migration guides skip, and it is the one that saves you from a nasty surprise on Saturday afternoon. Let me be blunt about it.
What comes across (with a little effort):
- Your text and copy. Every headline, paragraph, and button label can be copied over. Tedious for a big site, trivial for a small one.
- Your images and media. Download them from Webflow (or grab them from the live site) and re-upload into Framer. Take this chance to compress oversized ones.
- Your blog and CMS content. The words and images move; you re-enter them into Framer collections, or paste them in. There is no automatic CMS-to-CMS transfer between the two.
- Your domain. This is the part that fully transfers. You point the same custom domain at Framer when you are ready. Your visitors never know it moved.
- Your brand and design direction. Fonts, colors, spacing, and layout ideas all carry over because you are rebuilding them intentionally.
What you rebuild from scratch:
- The layout and structure. Framer does not read Webflow’s HTML or classes. You recreate each page on the Framer canvas. Because Framer is fast, this is usually quicker than the original build was.
- Animations and interactions. Webflow interactions do not port. You rebuild motion using Framer’s built-in effects, which for most sites is faster and produces cleaner results.
- Forms and integrations. Contact forms, newsletter signups, and any embeds get set up again in Framer. Note down every form and where its submissions go before you start.
- CMS structure. You recreate your collections and their fields in Framer, then bring the content in.
The mental reframe that makes this painless: you are not migrating a website, you are rebuilding a better one with all the content already written. The hard creative work, deciding what the site says and how it should look, is done. You are just reassembling it in a faster tool.
The step-by-step Webflow to Framer migration plan
Here is the exact order I follow. Do not skip the audit at the start or the redirects near the end. Those two steps are what separate a clean migration from a traffic-losing one.
Step 1: Audit and inventory your Webflow site
Before you touch Framer, make a simple list of everything the current site contains. Open your Webflow site and write down, in a spreadsheet or a doc:
- Every page and its URL. This is your master list. You will need these exact URLs later for redirects. Include the homepage, all static pages, and your CMS-generated pages (every blog post URL, every dynamic page).
- Every page’s SEO metadata. For each page, note the title tag, meta description, and Open Graph image. In Webflow these live in each page’s settings and in your CMS collection page settings. Copy them exactly. This is your ranking insurance.
- Every form and where it sends data. Contact form to which inbox, newsletter to which email tool, and so on.
- Every integration and embed. Analytics, chat widgets, booking tools, custom code in the head.
- Your top traffic pages. If you have Google Search Console or analytics, pull your top 10 to 20 pages by traffic. These are the ones you must get perfect. A blog post nobody visits can wait.
This audit takes an hour and it is the highest-leverage hour of the whole project. When something breaks later, this list is how you find it.
Step 2: Set up your Framer project and pick your starting point
Create a new Framer site. Now decide how you will rebuild, and you have two smart paths.
Path A, start from a template. Framer’s Community templates marketplace mixes free and paid options across categories like Business, Creative, and Portfolio. Search your niche, filter visually, and pick a template whose structure is close to your current site. Starting from a well-built template can save hours because the responsive behavior and section patterns are already sound. You then swap in your own content and restyle to match your brand.
Path B, start from a blank canvas and paste from Figma. If your Webflow site started as a Figma design, or you can quickly recreate key sections in Figma, you can paste Figma frames directly onto the Framer canvas and the layers stay editable, so text stays text. This is a genuinely underused shortcut for a pixel-faithful rebuild.
For most marketing sites, I start from a template that is 70 percent right structurally, then bend it to my brand. It is faster than a blank page and cleaner than fighting to match an old layout exactly.
Step 3: Rebuild your pages, starting with the homepage and top traffic pages
Now the main work. Rebuild page by page, in priority order from your audit. Homepage first, then your highest-traffic pages, then the long tail.
For each page:
- Recreate the sections using Framer’s drag-and-drop canvas. Hero, features, testimonials, FAQ, footer, whatever the page contains.
- Paste your copy in from your audit doc. Because the words are already written, this goes fast.
- Drop in your images, and compress anything large as you go so the new site is faster than the old one.
- Set the responsive breakpoints. Framer gives you desktop, tablet, and phone layouts through Stacks. Check each one before you move on, because mobile is where hasty rebuilds break.
Work section by section rather than trying to perfect a whole page at once. Framer’s polished defaults mean each section looks good quickly, which keeps momentum up.
Halfway through your first rebuild you will feel the difference in your hands: edits that took ten minutes in Webflow take one in Framer. Grab a free Framer project and rebuild your busiest page today. That single page is the honest test of whether the rest of the migration is worth your weekend.
Step 4: Recreate your CMS collections and content
If your Webflow site has a blog or any dynamic content, set up the equivalent in Framer now. Create a collection, define the fields you need (title, slug, body, featured image, author, date, and so on), then bring your content in item by item.
One thing to plan for: Framer’s CMS collection limits by plan. From Framer’s live pricing page, the Basic plan includes 2 CMS collections and the Pro plan includes 10. For a normal marketing blog that is plenty, but if your Webflow site used many separate collections, count them against the plan you intend to buy before you start, so you do not get stuck mid-migration.
Pay special attention to your slugs. If you want to keep your blog URLs identical (the cleanest way to preserve SEO), make each Framer post’s slug match its old Webflow slug exactly. Where you cannot, you will handle it with a redirect in Step 6.
Step 5: Rebuild forms, integrations, and embeds
Go down the forms-and-integrations list from your audit and recreate each one in Framer.
- Rebuild each form on the matching page and reconnect it to the correct destination, then submit a real test entry and confirm it lands where it should.
- Re-add analytics (for example your Google Analytics or Search Console tag) so tracking is live from the moment you launch.
- Re-add any third-party embeds such as chat, booking, or scheduling widgets.
Do not assume a form works because it looks right. Every form gets one real test submission before launch. A silently broken contact form is the most expensive kind of migration bug because you do not notice it until a lead complains.
Step 6: Match your SEO metadata and set up redirects
This is the step that protects your rankings, so slow down here.
First, match your metadata. For every page, copy the title tag, meta description, and Open Graph image from your audit into the equivalent fields in Framer. Framer gives you SEO meta controls (title, description, OG image) plus alt text on images. Matching these tells Google the page is the same page it already ranks, just in a new home.
Second, handle URLs and redirects. You have two clean scenarios:
- Best case, keep every URL identical. If each new Framer page and blog slug matches its old Webflow URL exactly, Google barely notices the switch and your rankings are least disturbed. Aim for this wherever you can.
- When a URL has to change, set up a redirect so the old address forwards to the new one, which passes the ranking signal and stops visitors hitting a dead page. Framer’s Pro tier includes site redirects, which is the practical reason many people migrating a content site choose Pro. Map every changed old URL to its new destination from your audit list. Do not leave any top-traffic URL without a redirect.
The rule to remember: a URL that changes without a redirect is a broken link and a lost ranking. Your audit spreadsheet is exactly the checklist that stops that from happening.
Step 7: Test everything on staging before you point the domain
Do not switch your live domain yet. Framer’s Pro plan includes a staging environment and branching with previews, so you can put the whole rebuilt site through its paces on a preview URL first. Walk the site as a visitor would:
- Click every navigation link and button. Fix anything that dead-ends.
- Check every page on desktop, tablet, and phone.
- Submit every form and confirm delivery.
- Proofread. A rebuild is a fresh chance to catch old typos.
- Compare against your original page by page so nothing got dropped.
Fix everything you find now, while the old site is still the one your visitors see.
Step 8: Point your domain and go live
When staging is clean, make the switch. Connect your custom domain to Framer and update your DNS to point at Framer instead of Webflow. Framer supports custom domains, and the switch is where your domain fully transfers with no visible change to visitors.
Right after the switch:
- Confirm the live site loads on your real domain, not the
framer.websitesubdomain. - Spot-check your top pages one more time on the live URL.
- Submit your sitemap in Google Search Console so Google recrawls the new pages quickly.
- Keep your Webflow site paid and live for a short overlap window (a week or two) as a safety net, in case you need to reference the original for something you missed.
That is the full migration. Audit, build, rebuild content, redo forms, match SEO, test on staging, then point the domain.
Migration pitfalls that cost people traffic (and how to dodge them)
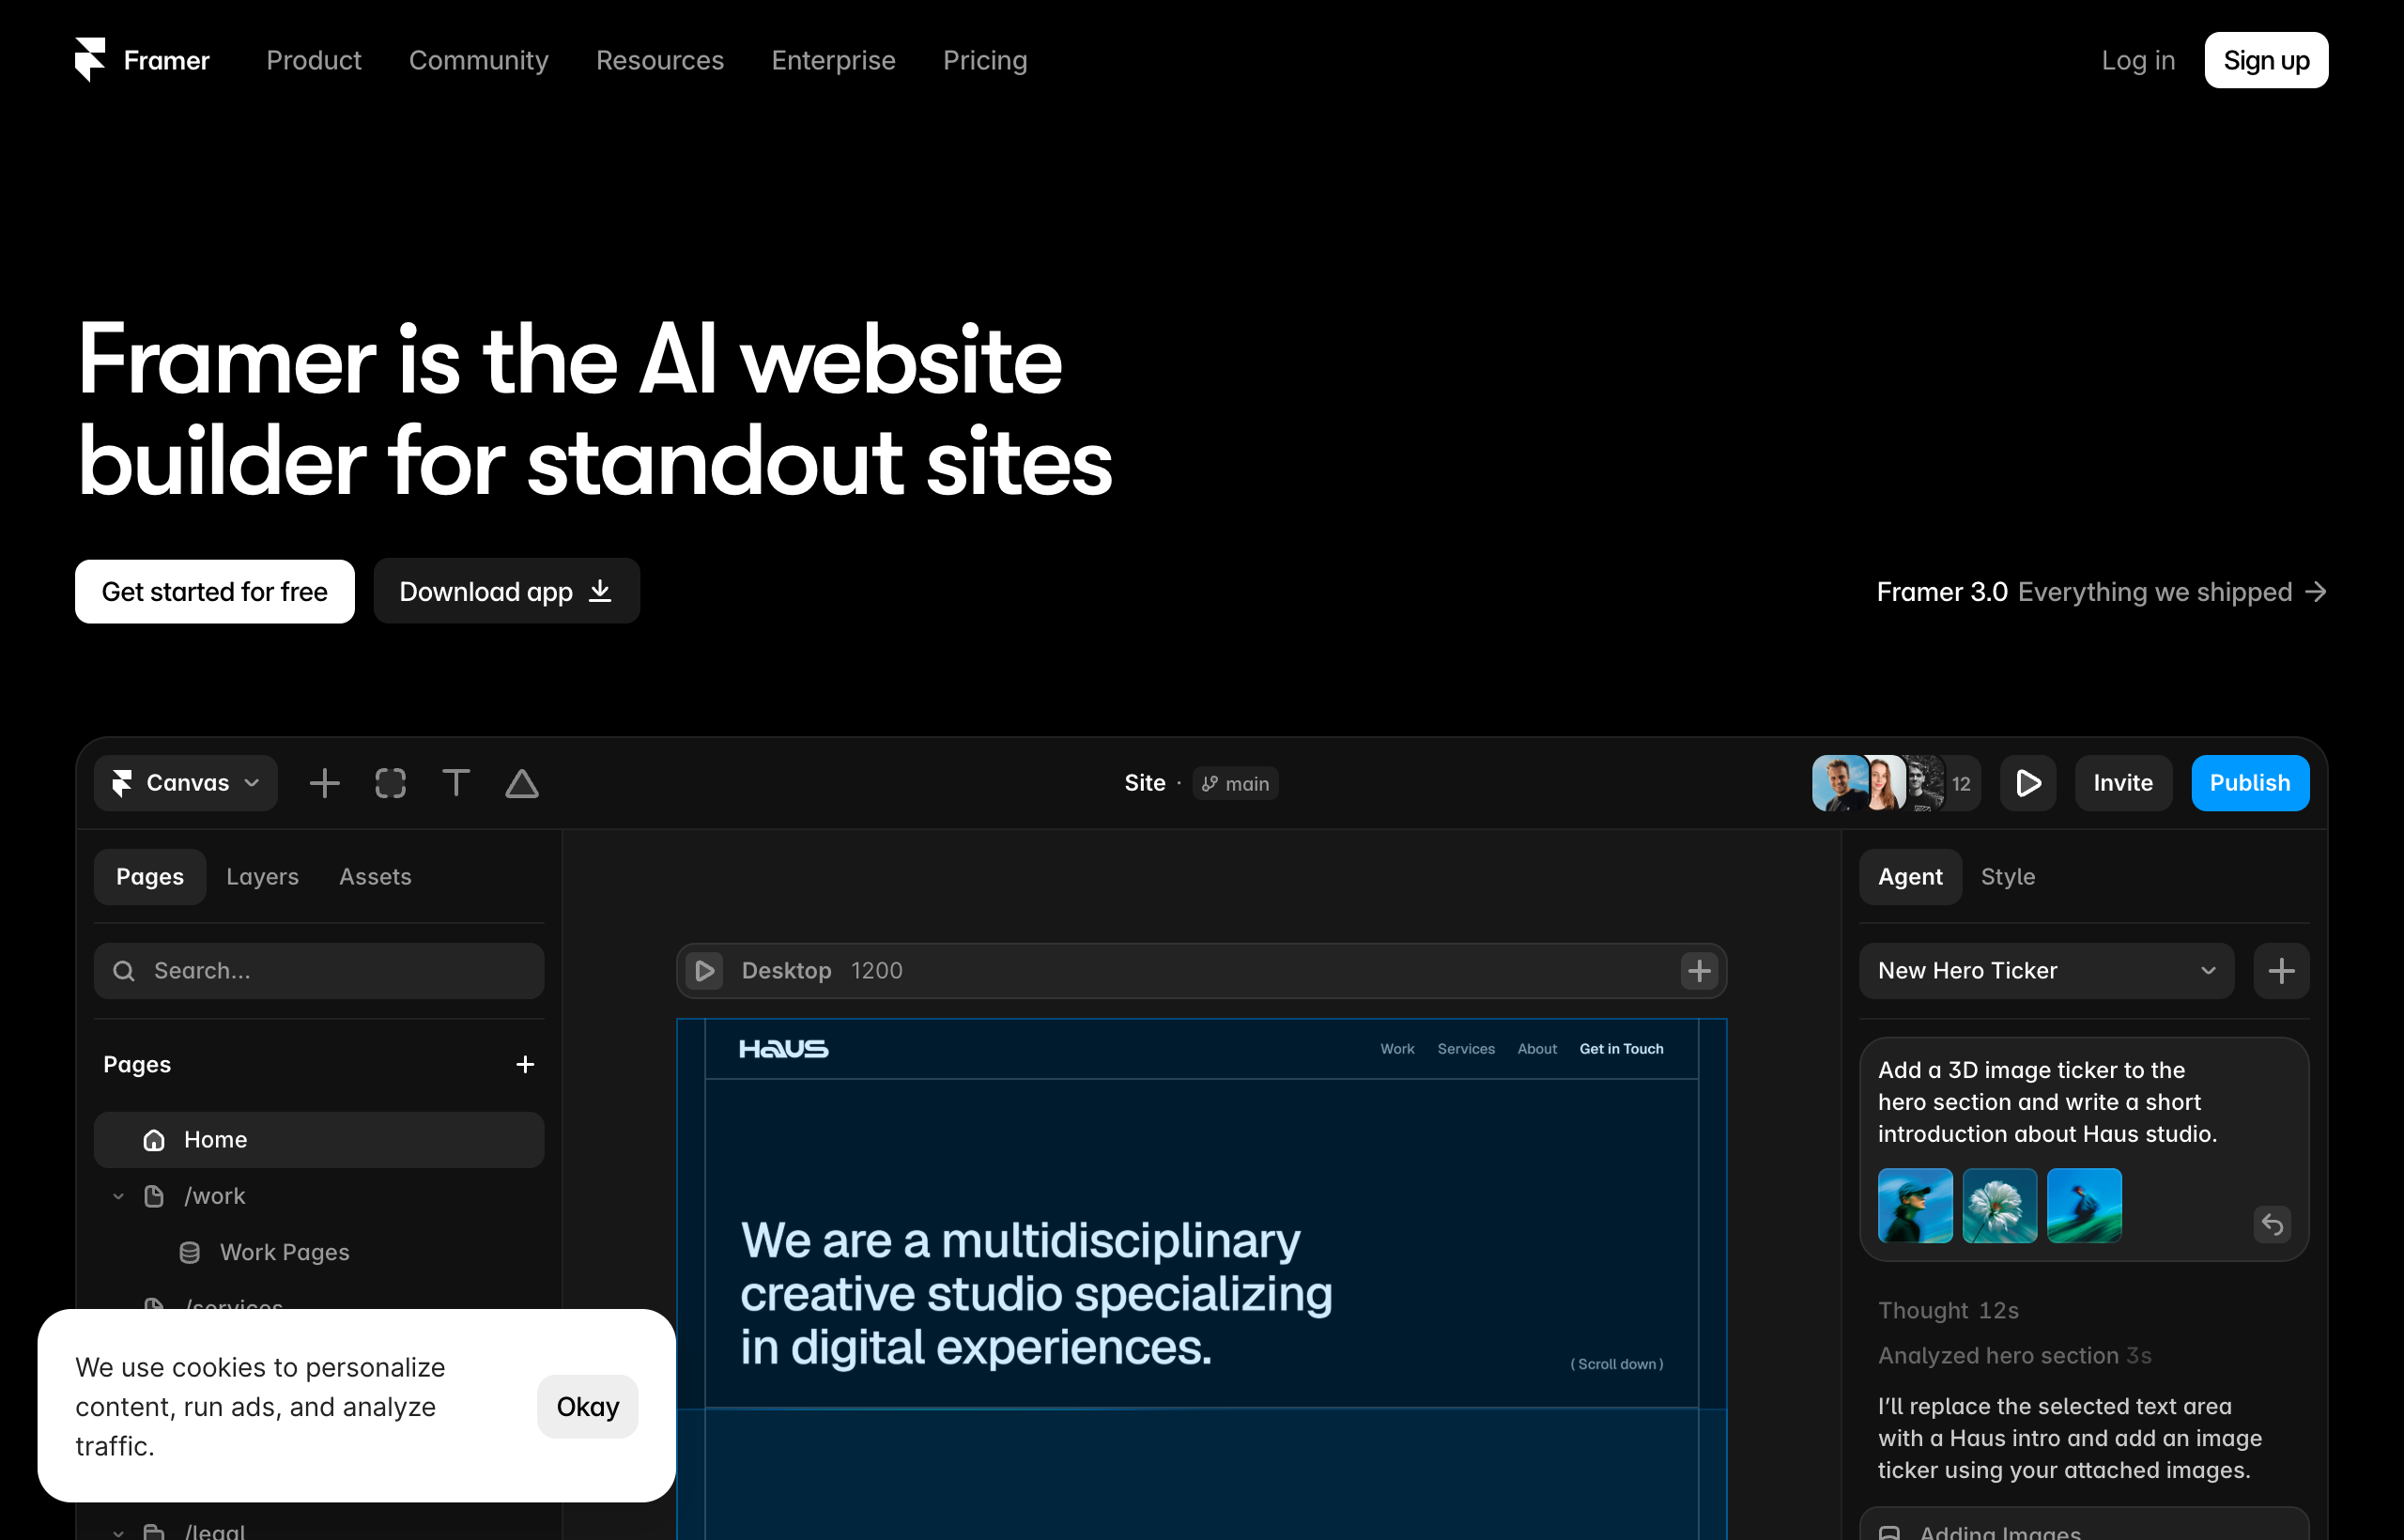
I have watched every one of these go wrong. Here is how to avoid them.
Broken internal links. When you rebuild, some of your internal links will point at old paths that no longer exist. After launch, crawl your own site or click through it and fix any link that leads to a dead page. Your navigation, footer, and in-body links are the usual culprits.
Missing redirects on changed URLs. The single most common cause of a post-migration traffic dip. If you had to change any URL, it needs a redirect, full stop. Use your audit list as the master checklist and confirm each changed URL forwards correctly.
A short-term SEO dip is normal, a lasting one is a mistake. Even a clean migration can see a small, temporary ranking wobble while Google recrawls and reindexes the new site. Do not panic and start changing things randomly. If you matched your metadata, kept or redirected your URLs, and resubmitted your sitemap, rankings typically recover within a few weeks. A dip that does not recover usually means a redirect or a meta tag was missed, so go back to your audit and find the gap.
Forgotten forms and integrations. Covered above, but it bears repeating because it is the bug people notice last. Test every form with a real submission.
Not compressing images during the move. A migration is a free opportunity to make the site faster. If you re-upload the same bloated 4 MB hero images, you carried a performance problem across for no reason. Right-size images as you go.
Cancelling Webflow too early. Keep the old site live for a short overlap. Cancelling the day you launch means that if you discover a missing page next week, your only reference is gone.
When you should NOT move from Webflow to Framer
An honest guide has to include this, because for some sites Webflow is genuinely the better home and switching would be a step backward.
Do not move if you run a large, deeply relational content site. Webflow’s CMS handles reference and multi-reference fields and complex relationships between hundreds or thousands of interlinked items better than most tools. A big directory, a marketplace, or a publication where posts link to authors, categories, and locations in intricate ways is exactly what Webflow is built for. Framer’s CMS is capable and improving fast, but if relational complexity at scale is your core need, count your collections and your relationships honestly before you commit.
Do not move mid-project on a hard deadline. A migration is a rebuild. If you are two days from a launch, ship on what you have and migrate calmly afterward.
Do not move purely to save a few dollars if your team has deep Webflow expertise. The cost of relearning and rebuilding can outweigh the saving. Switch for the design speed, the motion, or the editing workflow, not for a marginal price difference alone.
If none of those describe you, and you are here because you want to build and edit faster with better motion, you are exactly the person for whom this migration pays off.
Webflow vs Framer at a glance (for the switch)
A quick reference for the tradeoffs that actually matter when you are deciding to move.
| What you care about | Webflow | Framer |
|---|---|---|
| Speed to edit and ship | Slower, class-based | Faster, canvas-based |
| Design and motion | Powerful but manual | Beautiful motion, low effort |
| CMS at large relational scale | Winner | Strong for typical blogs |
| Learning curve | Steep, expect to study | Gentle, Figma-like |
| Pricing model | Split Site + Workspace plans | Per site, simpler |
| Redirects for migration | Yes | Yes, on Pro |
| Staging and previews | Yes | Yes, on Pro |
| Non-technical teammate editing | Riskier | Lower risk |
The pattern is consistent: Webflow wins on structural power and large relational content, Framer wins on speed, motion, simplicity, and editing workflow. Your migration makes sense when the right-hand column describes what you want more of.
Framer pricing for your migrated site
Since you are switching partly to control cost or complexity, here is what Framer actually charges, straight from its live pricing page (yearly billing), captured July 2026.
| Plan | Price | What you get |
|---|---|---|
| Free | $0 | 500 credits to try, free framer.website domain, 1 GB bandwidth, design pages |
| Basic | $10/mo | Free custom domain, 2 CMS collections, 50 GB bandwidth, use your own domain |
| Pro | $30/mo | 10 CMS collections, 100 GB bandwidth, site redirects, staging environment, branching with previews, A/B testing (add-on) |
| Enterprise | Custom | Custom limits, enterprise security, dedicated support |
For a migration, the plan that matters most is usually Pro, because it bundles the two features you lean on hardest during a move: site redirects (for the URLs you cannot keep identical) and a staging environment with branching and previews (for testing the whole rebuilt site before you point your domain). If your site is small, has few or no URL changes, and needs only one or two CMS collections, Basic can be enough. Framer prices per site, so unlike Webflow you are not stacking a site plan on top of a workspace seat.
Always open the live pricing page before you buy, because tiers and numbers change, and the only price that matters is the one for your exact setup.
How long does a Webflow to Framer migration take?
Honest ranges from real projects, assuming your content is already written (which it is, since you have a live site):
- A small marketing site or portfolio (5 to 10 static pages, no big blog): a focused weekend, sometimes a single long day if you start from a close template.
- A typical business site with a modest blog (10 to 25 pages plus a few dozen posts): a few days to a week, with most of the time going to re-entering CMS content and testing.
- A larger content site (many pages, a big blog, several collections, lots of URLs to redirect): a couple of weeks, and this is the size where you should seriously double-check whether Webflow’s CMS strength means you should stay.
The build itself is fast in Framer. What takes the time is the careful, unglamorous work: re-entering content, matching metadata, and setting up redirects. Rush the build and you save an hour. Rush the redirects and you lose a month of rankings. Spend your care where it counts.
Frequently asked questions
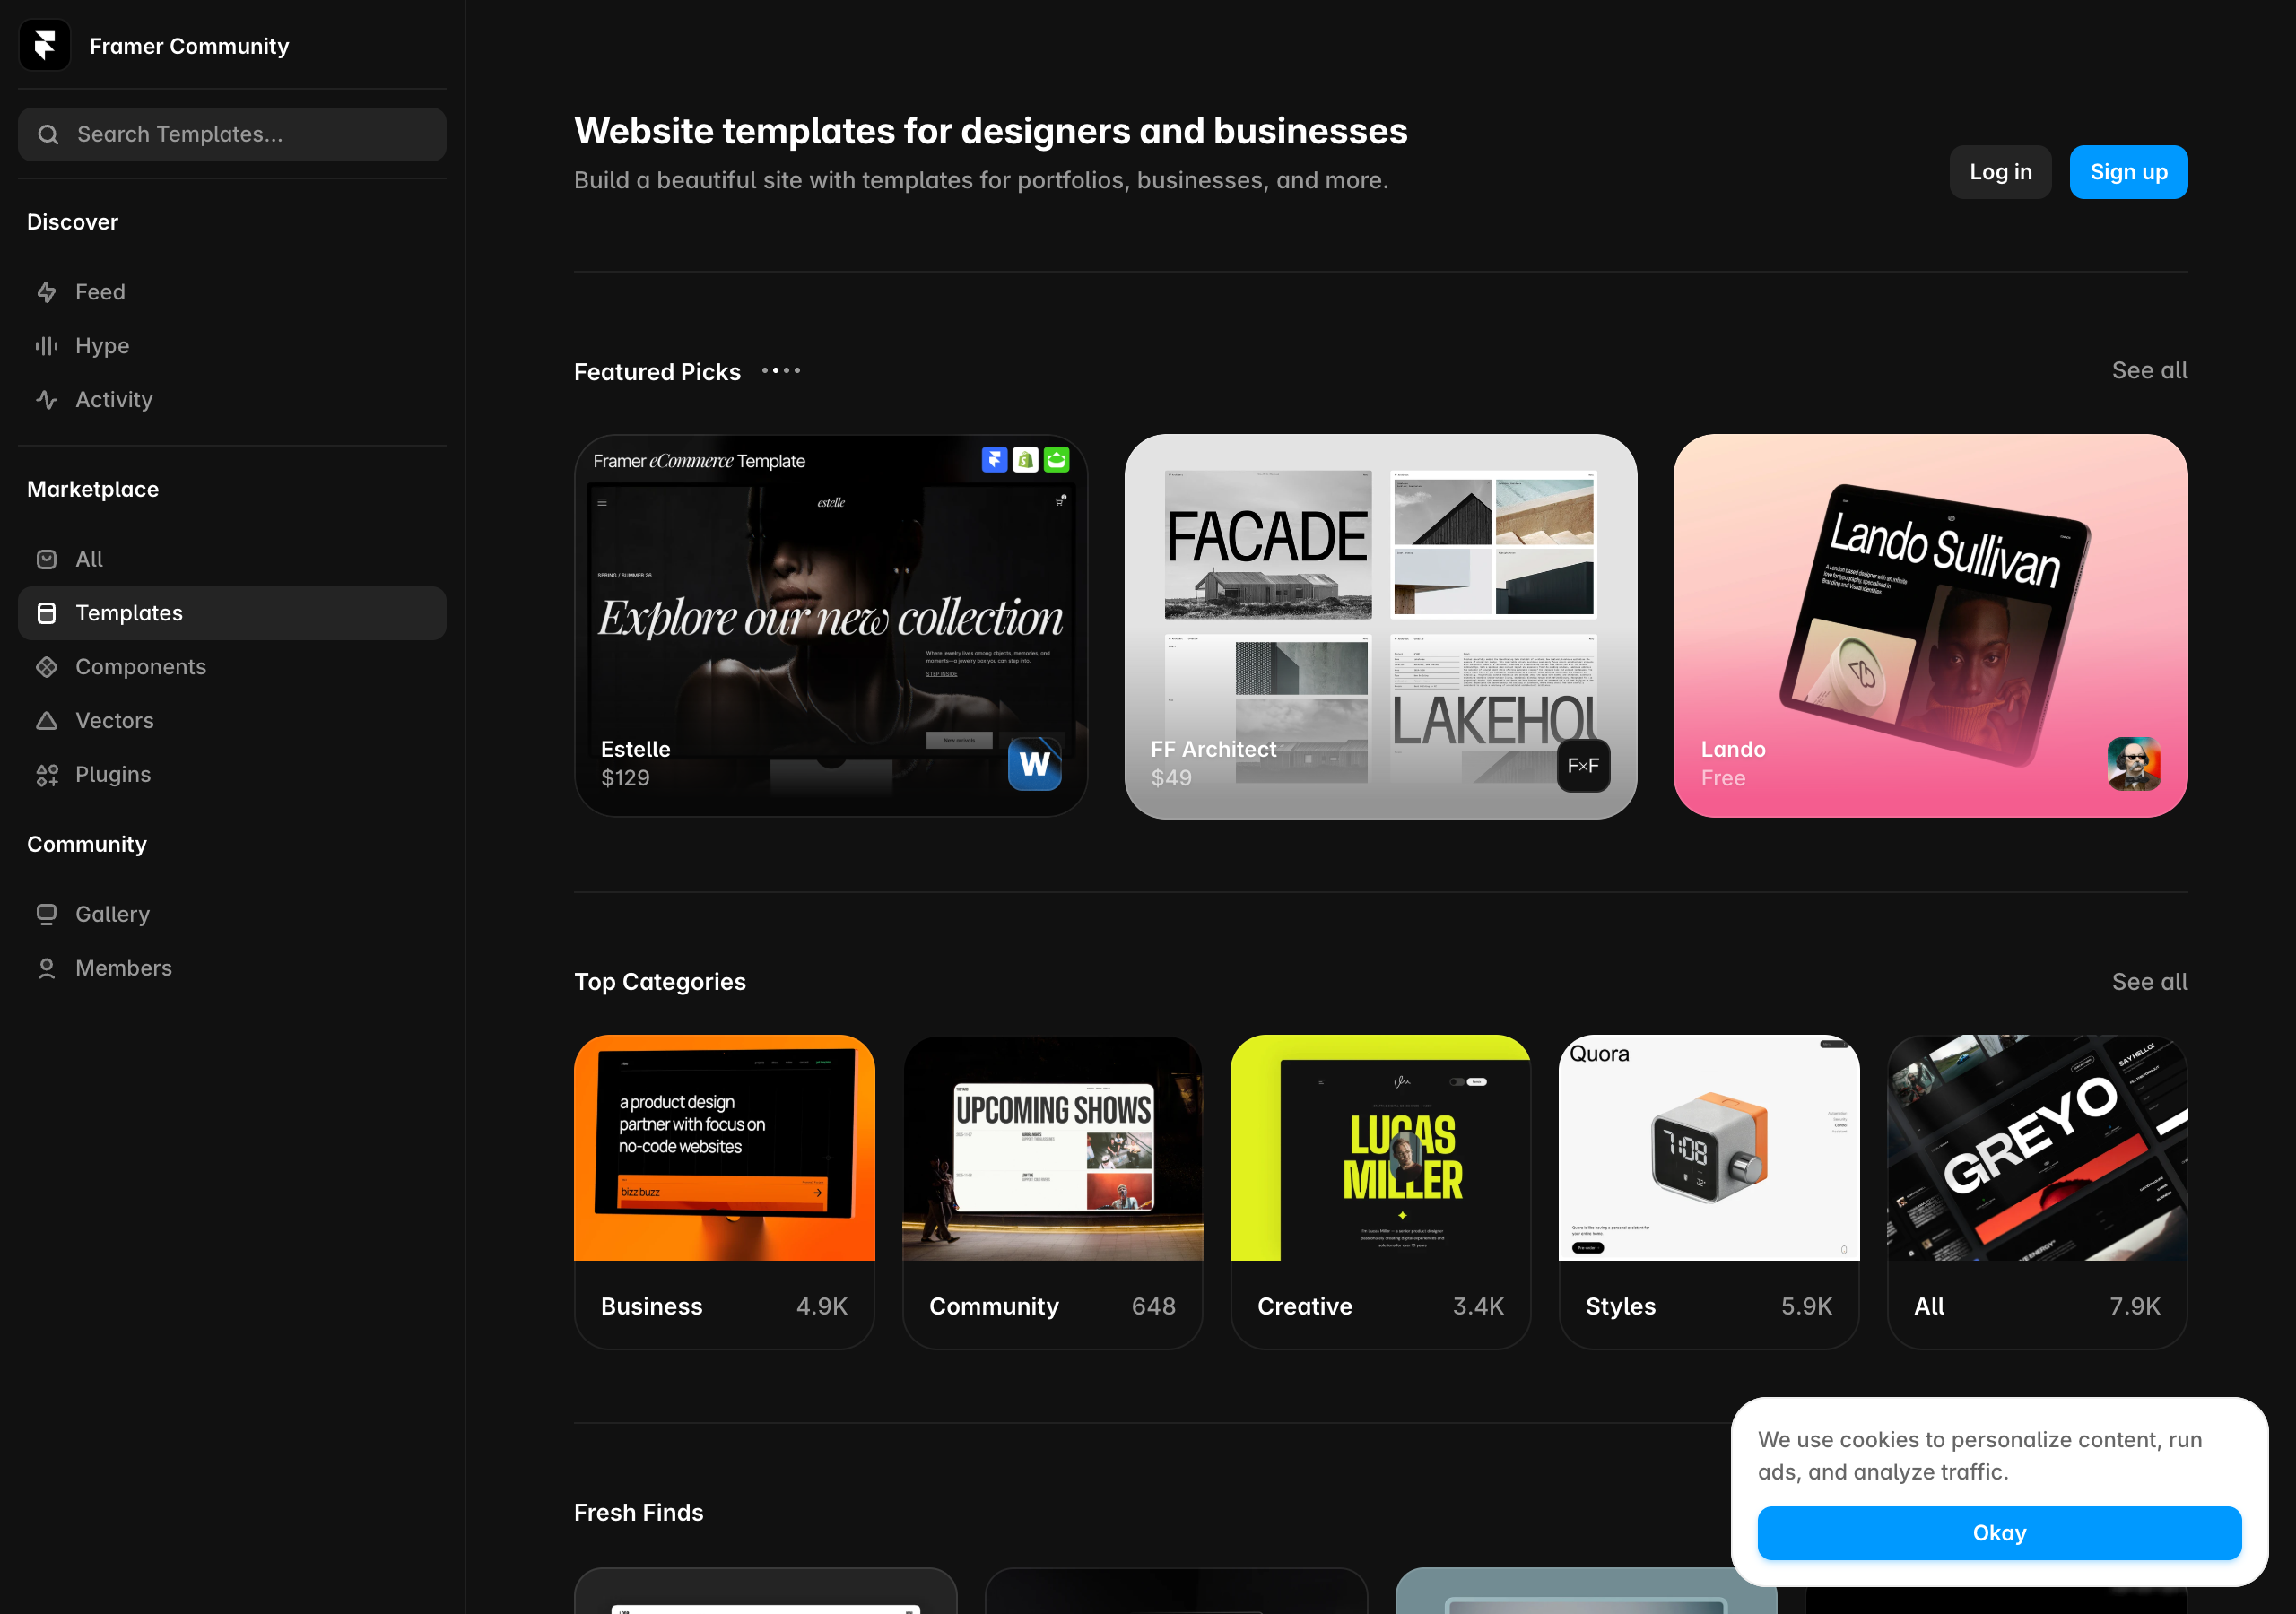
Can I import my Webflow site directly into Framer? No. There is no one-click importer between the two. You rebuild the site in Framer, which is faster than it sounds because Framer’s canvas is quick and all your content is already written. Think of it as reassembling a finished website in a faster tool, not building from zero.
Will I lose my Google rankings when I switch? Not if you migrate carefully. Keep your URLs identical where possible, set up redirects for any that change, and copy your title tags, meta descriptions, and Open Graph images exactly. Do that, resubmit your sitemap, and rankings typically recover from any brief dip within a few weeks. Rankings are lost when redirects or metadata are skipped, not by the act of switching itself.
Does my blog content transfer automatically? The content moves, but not automatically. You recreate your collections in Framer and bring the posts in item by item, or paste them. Match each post’s slug to its old URL to keep its SEO. Remember Framer’s CMS collection limits: 2 on Basic, 10 on Pro.
What about my custom domain? Your domain transfers fully. When you are ready to launch, you point the same domain at Framer by updating your DNS. Visitors see no change; the site just loads from Framer now.
Do my Webflow forms and interactions carry over? No. Forms, animations, and integrations are rebuilt in Framer. Motion is usually faster to recreate with Framer’s built-in effects than it was to set up in Webflow’s Interactions panel. Test every form with a real submission before launch.
How much does Framer cost compared to Webflow? Framer prices per site: Free, Basic at $10/mo, Pro at $30/mo (yearly billing), captured July 2026. Webflow splits Site and Workspace plans, which often means paying for both. For a single custom-domain site, Framer is usually simpler and often cheaper.
Should I cancel Webflow the day I launch on Framer? No. Keep the old site live for a week or two as a reference and safety net, in case you find a page or asset you missed. Cancel once you are confident the Framer site is complete and stable.
Is it worth moving for design reasons alone? For many people, yes. If you switch for Framer’s speed of editing and its effortless motion, that is a legitimate and common reason. Just do the SEO handoff (redirects and metadata) properly so you keep your traffic while you gain the design freedom.
The bottom line
Moving from Webflow to Framer is not an import, it is a rebuild, and once you accept that, the whole thing gets easier. Your content is already written, your design decisions are already made, and Framer’s fast canvas means recreating the site takes far less time than the original build did. The part that demands real discipline is not the design, it is the SEO handoff: audit your pages, match your metadata, keep or redirect every URL, and test on staging before you point your domain. Get that right and you switch tools without losing the traffic you earned.
For most people leaving Webflow, the reward is a site that is faster to edit, richer in motion, and simpler to pay for. If you run a huge relational content operation, stay and read the “when NOT to move” section again. Everyone else: the switch is very doable in a weekend, and you can prove it to yourself before you commit a cent.
The fastest way to know if this migration is for you is to rebuild one page and feel the difference. Create your free Framer site now, rebuild your homepage from your existing copy, and publish it to a preview URL today. If it feels this fast on page one, the rest of the move is just repetition, and your rankings come with you.
Pricing, plan names, CMS limits, redirect and staging features cited from Framer’s live pricing page, captured July 2026. Tiers and numbers change over time, so confirm the current details on framer.com/pricing before you migrate.
You already have a Squarespace site. It works. It is live, it has your content, and it probably looks fine. So the fact that you are reading a migration guide tells me something specific: fine is not enough anymore. You want a site that moves, that feels custom instead of template-shaped, that loads fast and looks like it cost five figures even though it did not. That is the itch that sends people from Squarespace to Framer, and it is a good itch to scratch.
I have rebuilt Squarespace sites in Framer for real clients, not demo pages. The honest truth up front, before you get excited or nervous: there is no one-click importer that sucks your Squarespace site into Framer. Anyone selling you a magic button is selling you a disappointment. What you actually do is rebuild, and the good news is that rebuilding in Framer is dramatically faster than building from scratch, because your content, your copy, and your structure already exist. You are not inventing a site. You are re-housing one.
This guide walks the whole move end to end: why people switch, what genuinely transfers versus what you recreate, a numbered migration plan that protects your Google rankings, the pitfalls that burn people, and a realistic timeline so you know what weekend you are committing to.
The quick answer
Migrating from Squarespace to Framer is a manual rebuild, not an automated import. You keep your domain, your written content, your images, and your SEO metadata, because those are yours and you carry them over. You recreate the design, the page structure, and the navigation inside Framer, which is the part that actually gets better, since Framer’s design-first canvas lets you build things Squarespace templates never allowed.
The migration succeeds or fails on one thing that has nothing to do with design: redirects. If you map your old Squarespace URLs to your new Framer URLs and preserve your page titles and meta descriptions, you keep your Google rankings and your traffic. If you skip that step, you can watch months of SEO evaporate. Everything else is design work, which is the fun part. The redirect and metadata work is the insurance, and it is non-negotiable.
A typical small marketing site, portfolio, or five-to-fifteen-page business site is a weekend project once your content is organized. A larger content site with a big blog takes longer, mostly because of the content re-entry, not the design.
Before you read the whole plan, feel the tool for yourself. Start a free Framer site and rebuild your homepage in the next hour. No credit card needed, and one hour on the canvas will tell you more about whether this move is right for you than any article can.
Why people move from Squarespace to Framer
Squarespace is genuinely good at what it is built for: polished templates, simple business and portfolio sites, and an all-in-one dashboard where a non-technical owner can manage everything without touching code. It earned its reputation honestly. So why do people leave?
Design ceiling. Squarespace templates are beautiful until you want to do something the template did not anticipate. Then you are fighting the system, wedging in custom CSS, or accepting “close enough.” Framer starts from a blank, Figma-like canvas where you drag, type inline, and drop sections. There is no template fighting you, because you are designing directly. For anyone with a specific vision, that difference is the whole reason to move.
Animation and motion. This is the big one. Framer grew out of a design and prototyping tool, so scroll effects, appear-on-scroll animations, parallax, hover states, and smooth page transitions are built in and mostly a matter of selecting an element and choosing an effect. Squarespace has some motion options, but it does not come close to the out-of-the-box, premium-feeling motion that makes so many modern startup and portfolio sites look expensive. If you have been staring at Framer sites and thinking “why does mine feel static,” that is why.
A modern, current feel. Design trends move, and Framer sites tend to look like they belong to right now. Migrating is often less about hating Squarespace and more about wanting a visible upgrade that signals your brand leveled up.
Speed of iteration. Once you are comfortable in Framer, making changes and republishing feels fast and direct. You edit on the canvas, you hit publish, it is live on a global CDN. No template constraints deciding what you are allowed to change.
The honest counterpoint, because trust matters: if your Squarespace site is a simple brochure that never needs to change and you have zero interest in design, migrating may not be worth the weekend. Framer wins when design quality, motion, and creative control actually matter to you. If they do, keep reading, because the move is very doable.
What transfers, and what you rebuild
The single most important mental model for this migration is knowing which things you carry over intact and which things you recreate. Get this clear and the whole project stops feeling overwhelming.
What transfers (you carry these over):
- Your written content. Every headline, paragraph, product description, and blog post is yours. Copy it out of Squarespace and into Framer. The words do not change.
- Your images and media. Download your images from Squarespace at full resolution and re-upload them into Framer. Re-optimize the large ones while you are at it.
- Your domain. You keep your custom domain. At the end of the migration you point it at Framer instead of Squarespace. Your web address never has to change.
- Your SEO metadata. Your page titles, meta descriptions, and image alt text should be copied over deliberately. This is not automatic, and it is one of the highest-leverage things you do, because it is a big part of how you keep your rankings.
- Your brand assets. Logo, fonts (Framer supports custom fonts), colors, and any brand imagery all come across because they are yours to reuse.
What you rebuild (you recreate these in Framer):
- The visual design and layout. This is the point of moving. You are not copying the Squarespace look, you are building a better one on Framer’s canvas.
- Page structure and navigation. You recreate your pages, your nav menu, your footer, and your internal links inside Framer. Framer uses responsive Stacks for layout across desktop, tablet, and phone.
- Any blog or collection. Framer has a CMS where collections generate dynamic pages. If you had a Squarespace blog, you recreate it as a Framer CMS collection and re-enter or import the posts. Mind the plan limits: Framer’s Basic plan includes 2 CMS collections and the Pro plan includes 10.
- Forms. Contact forms, signup forms, and the like get rebuilt in Framer.
- Any Squarespace-specific features. Native scheduling, member areas, or commerce that lived inside Squarespace’s ecosystem do not transfer. You either recreate them with Framer-compatible tools or reconsider whether you need them. Be honest with yourself here before you start, because this is where people get surprised.
Notice the pattern: the boring, valuable stuff (content, SEO, domain) transfers, and the stuff that was holding you back (design, structure) gets rebuilt better. That is exactly the trade you want.
The step-by-step migration plan
Here is the sequence I follow. Do it roughly in this order, because each step sets up the next, and the redirect and metadata work at the end depends on the audit at the beginning.
Step 1: Audit your current Squarespace site
Before you build anything, make a simple inventory. Open a spreadsheet and list every page on your Squarespace site with four columns: the page’s current URL, its page title, its meta description, and a note on which pages actually matter. You are looking for two things. First, a complete map of what exists, so nothing gets forgotten. Second, an honest ranking of what earns its keep. Most sites have pages that get zero traffic and can be quietly retired instead of rebuilt.
If you have any analytics, use them here. The pages that bring you search traffic are the ones you must protect with redirects and metadata later. The pages nobody visits are candidates for deletion. Migration is a great moment to prune.
Also note your top-performing blog posts or landing pages by search traffic if you have that data. These are your crown jewels, and they get the most careful redirect treatment in Step 5.
Step 2: Export your content and download your assets
Now gather the raw materials. Copy your written content out of Squarespace into a document, organized page by page so you know what goes where. Download your images at full resolution from your Squarespace media library. If you had a blog, Squarespace lets you export content, and while that export will not drop neatly into Framer, it gives you a clean archive of your posts to re-enter or reference.
While you are collecting images, take a minute to note which ones are oversized. A migration is the perfect time to right-size hero images so your new Framer site loads fast, because bloated images are the number one performance mistake on any builder, Squarespace or Framer alike.
Step 3: Rebuild the design in Framer
This is the part you came for. Open Framer and start your new site. You have two on-ramps.
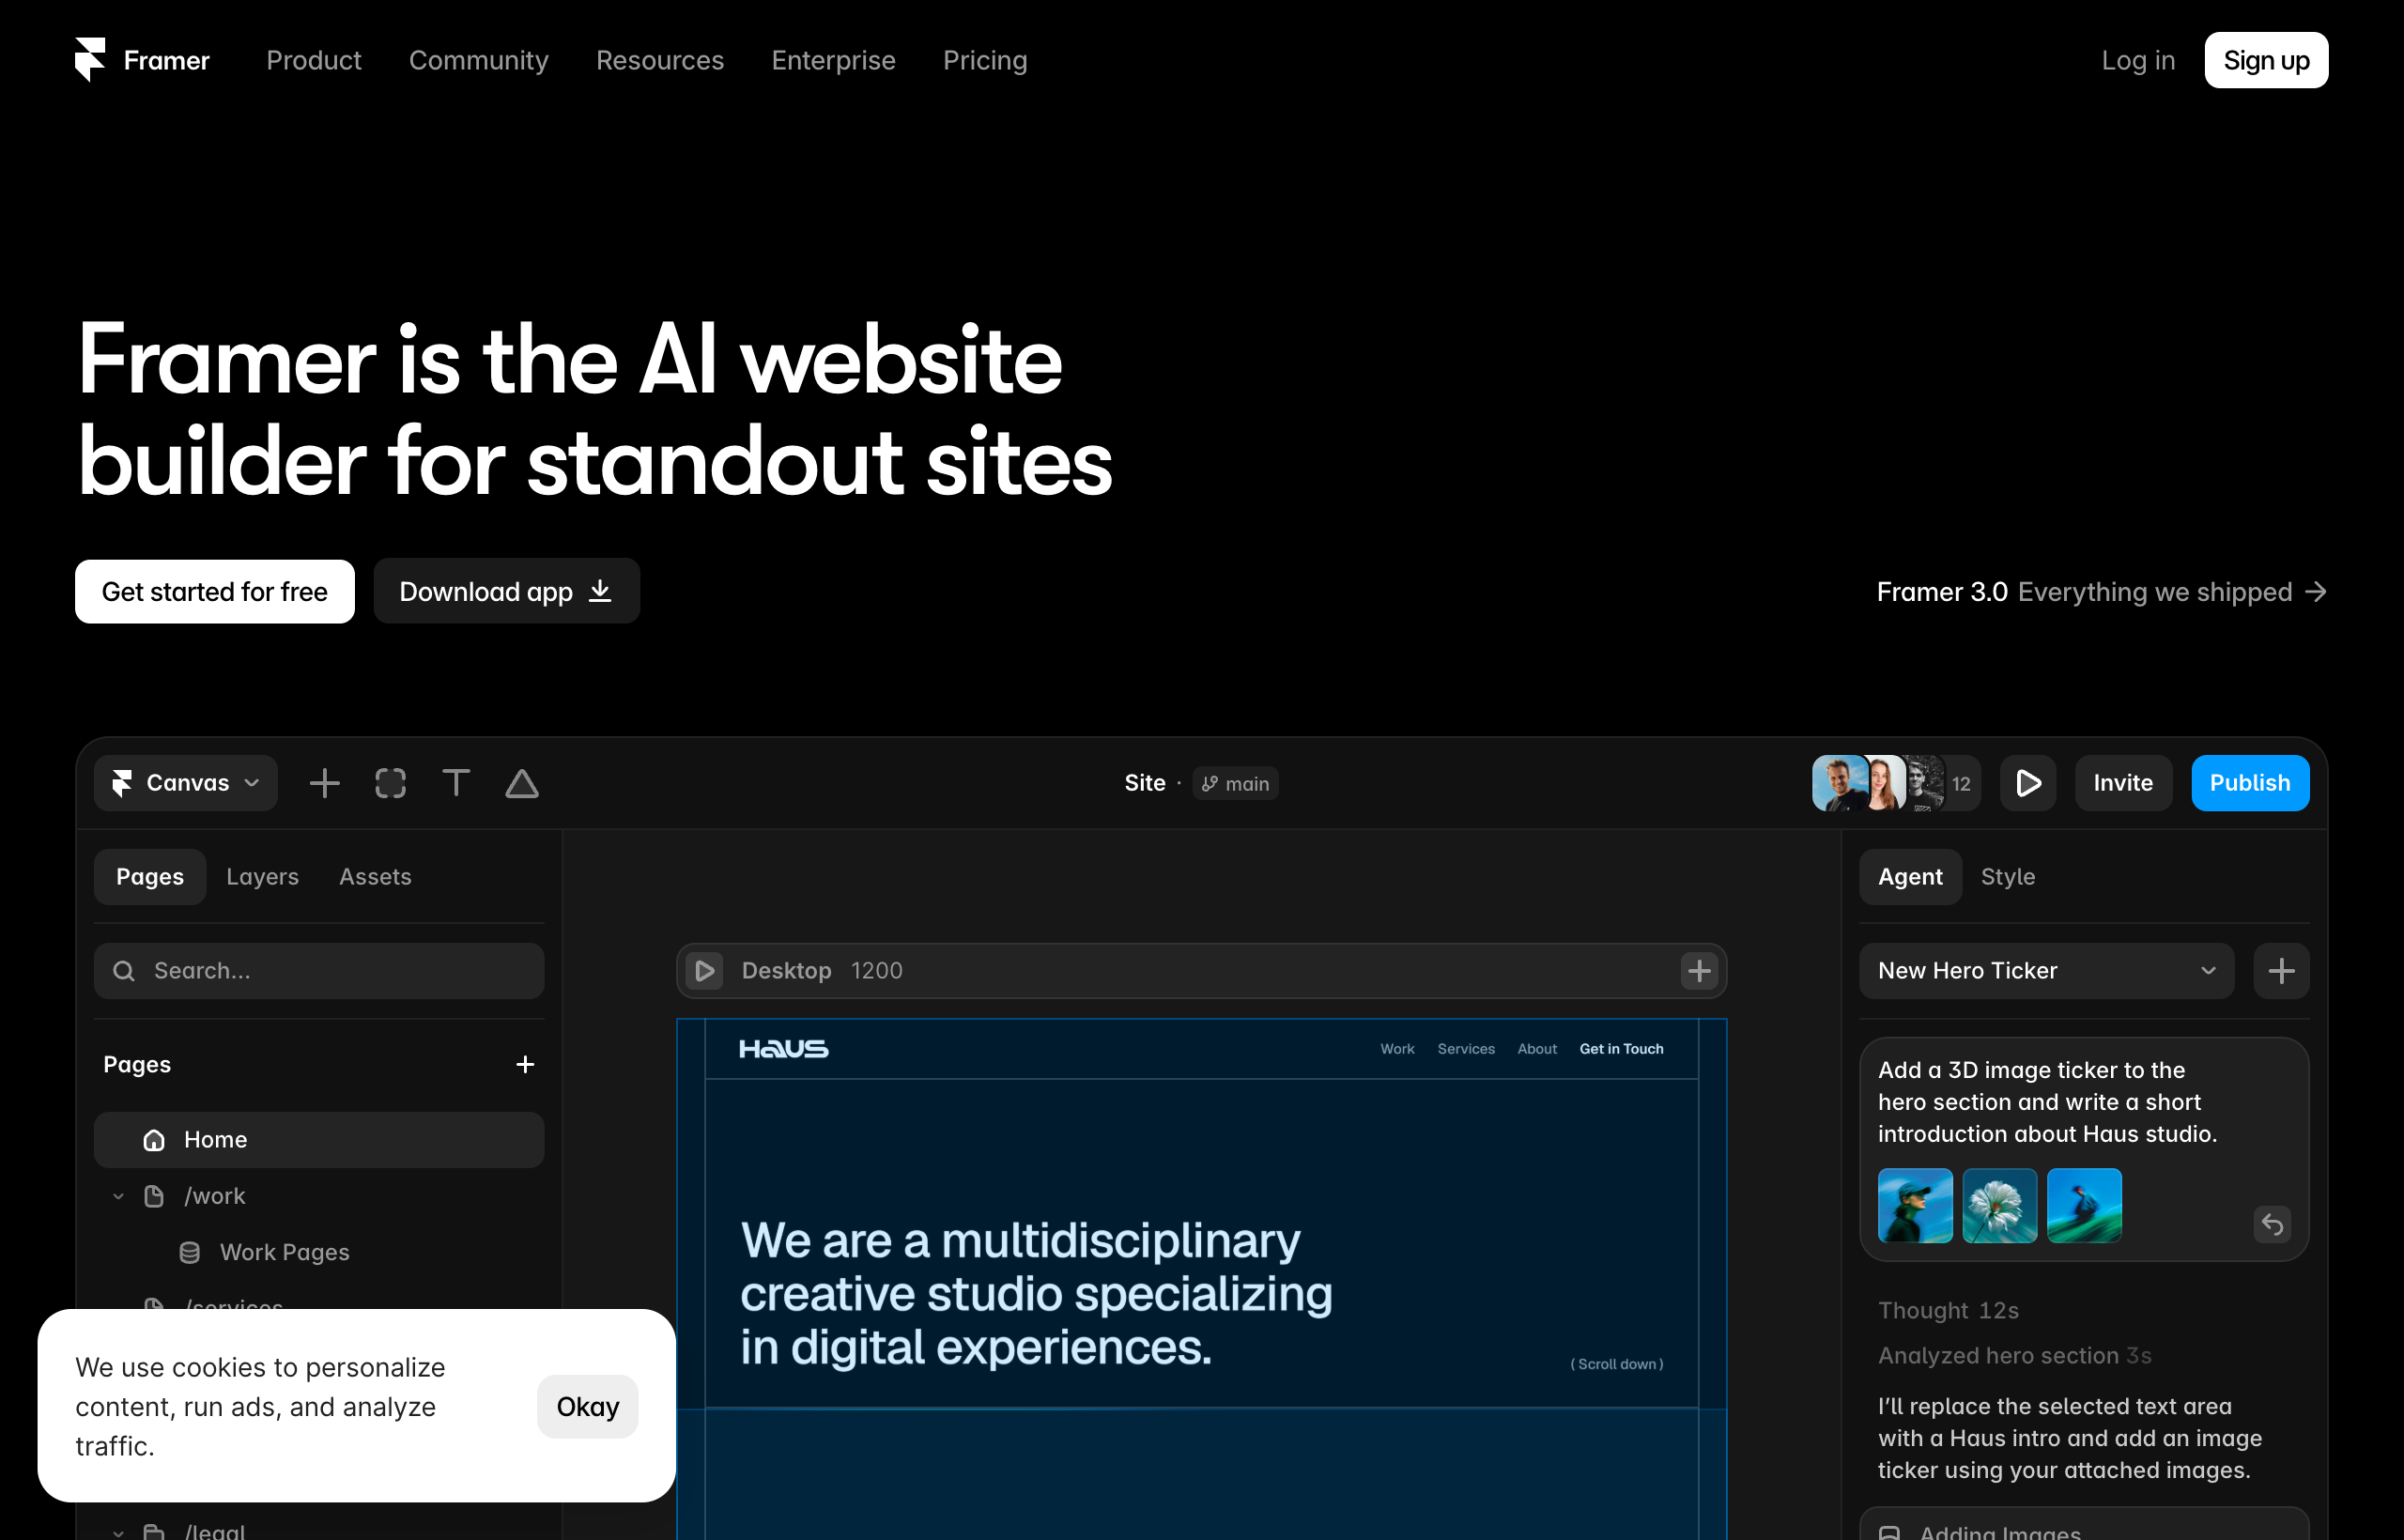
The faster path for most people is to start from a Framer template that resembles the structure you want, then customize it with your content and brand. Framer’s marketplace (Community, then Templates) mixes free and paid options across categories like Business, Creative, and more. Free templates are labeled “Free.” Pick one whose layout roughly matches your page structure, then swap in your real content, colors, fonts, and images. You are not stuck with the template, you are using it as scaffolding.
The other path is a blank canvas, which gives you total control if you have a clear design in mind. Because the canvas feels like Figma, you drag sections in, type directly onto the page, and build with responsive Stacks so your layout flexes cleanly across desktop, tablet, and phone breakpoints.
A useful bonus if you or a designer already mocked up the new site in Figma: you can paste Figma frames directly onto the Framer canvas, and the layers stay editable, so text stays text. That turns a design file into a real, editable starting point instead of a flat picture.
Rebuild page by page, matching the structure from your Step 1 audit. Hero, then your main sections, then footer. Recreate your navigation menu and make sure every internal link points to the right new page. This is where you add the motion Squarespace could not give you: appear-on-scroll effects on sections, subtle hover states on buttons and cards, and smooth transitions between pages. Use restraint. A few well-placed effects read as premium, while a page stuffed with animation reads as slow and try-hard.
Step 4: Recreate your blog and forms
If your Squarespace site had a blog, create a CMS collection in Framer for it. A collection is a content type, like “Blog Posts,” with fields for title, body, featured image, date, and so on. Framer generates dynamic pages from that collection automatically, so you design the post layout once and every post uses it. Re-enter your posts, or use your Squarespace export as the source. Remember the collection limits by plan when you choose your Framer tier: Basic includes 2 collections, Pro includes 10, which is plenty for a blog plus a couple of other content types.
Rebuild your contact and signup forms in Framer as well. Wire them to wherever you want submissions to go, and test them before launch, because a broken contact form on launch day is a silent revenue leak.
Step 5: Match your SEO metadata and set up redirects
This is the step that decides whether you keep your Google rankings or lose them, so slow down here.
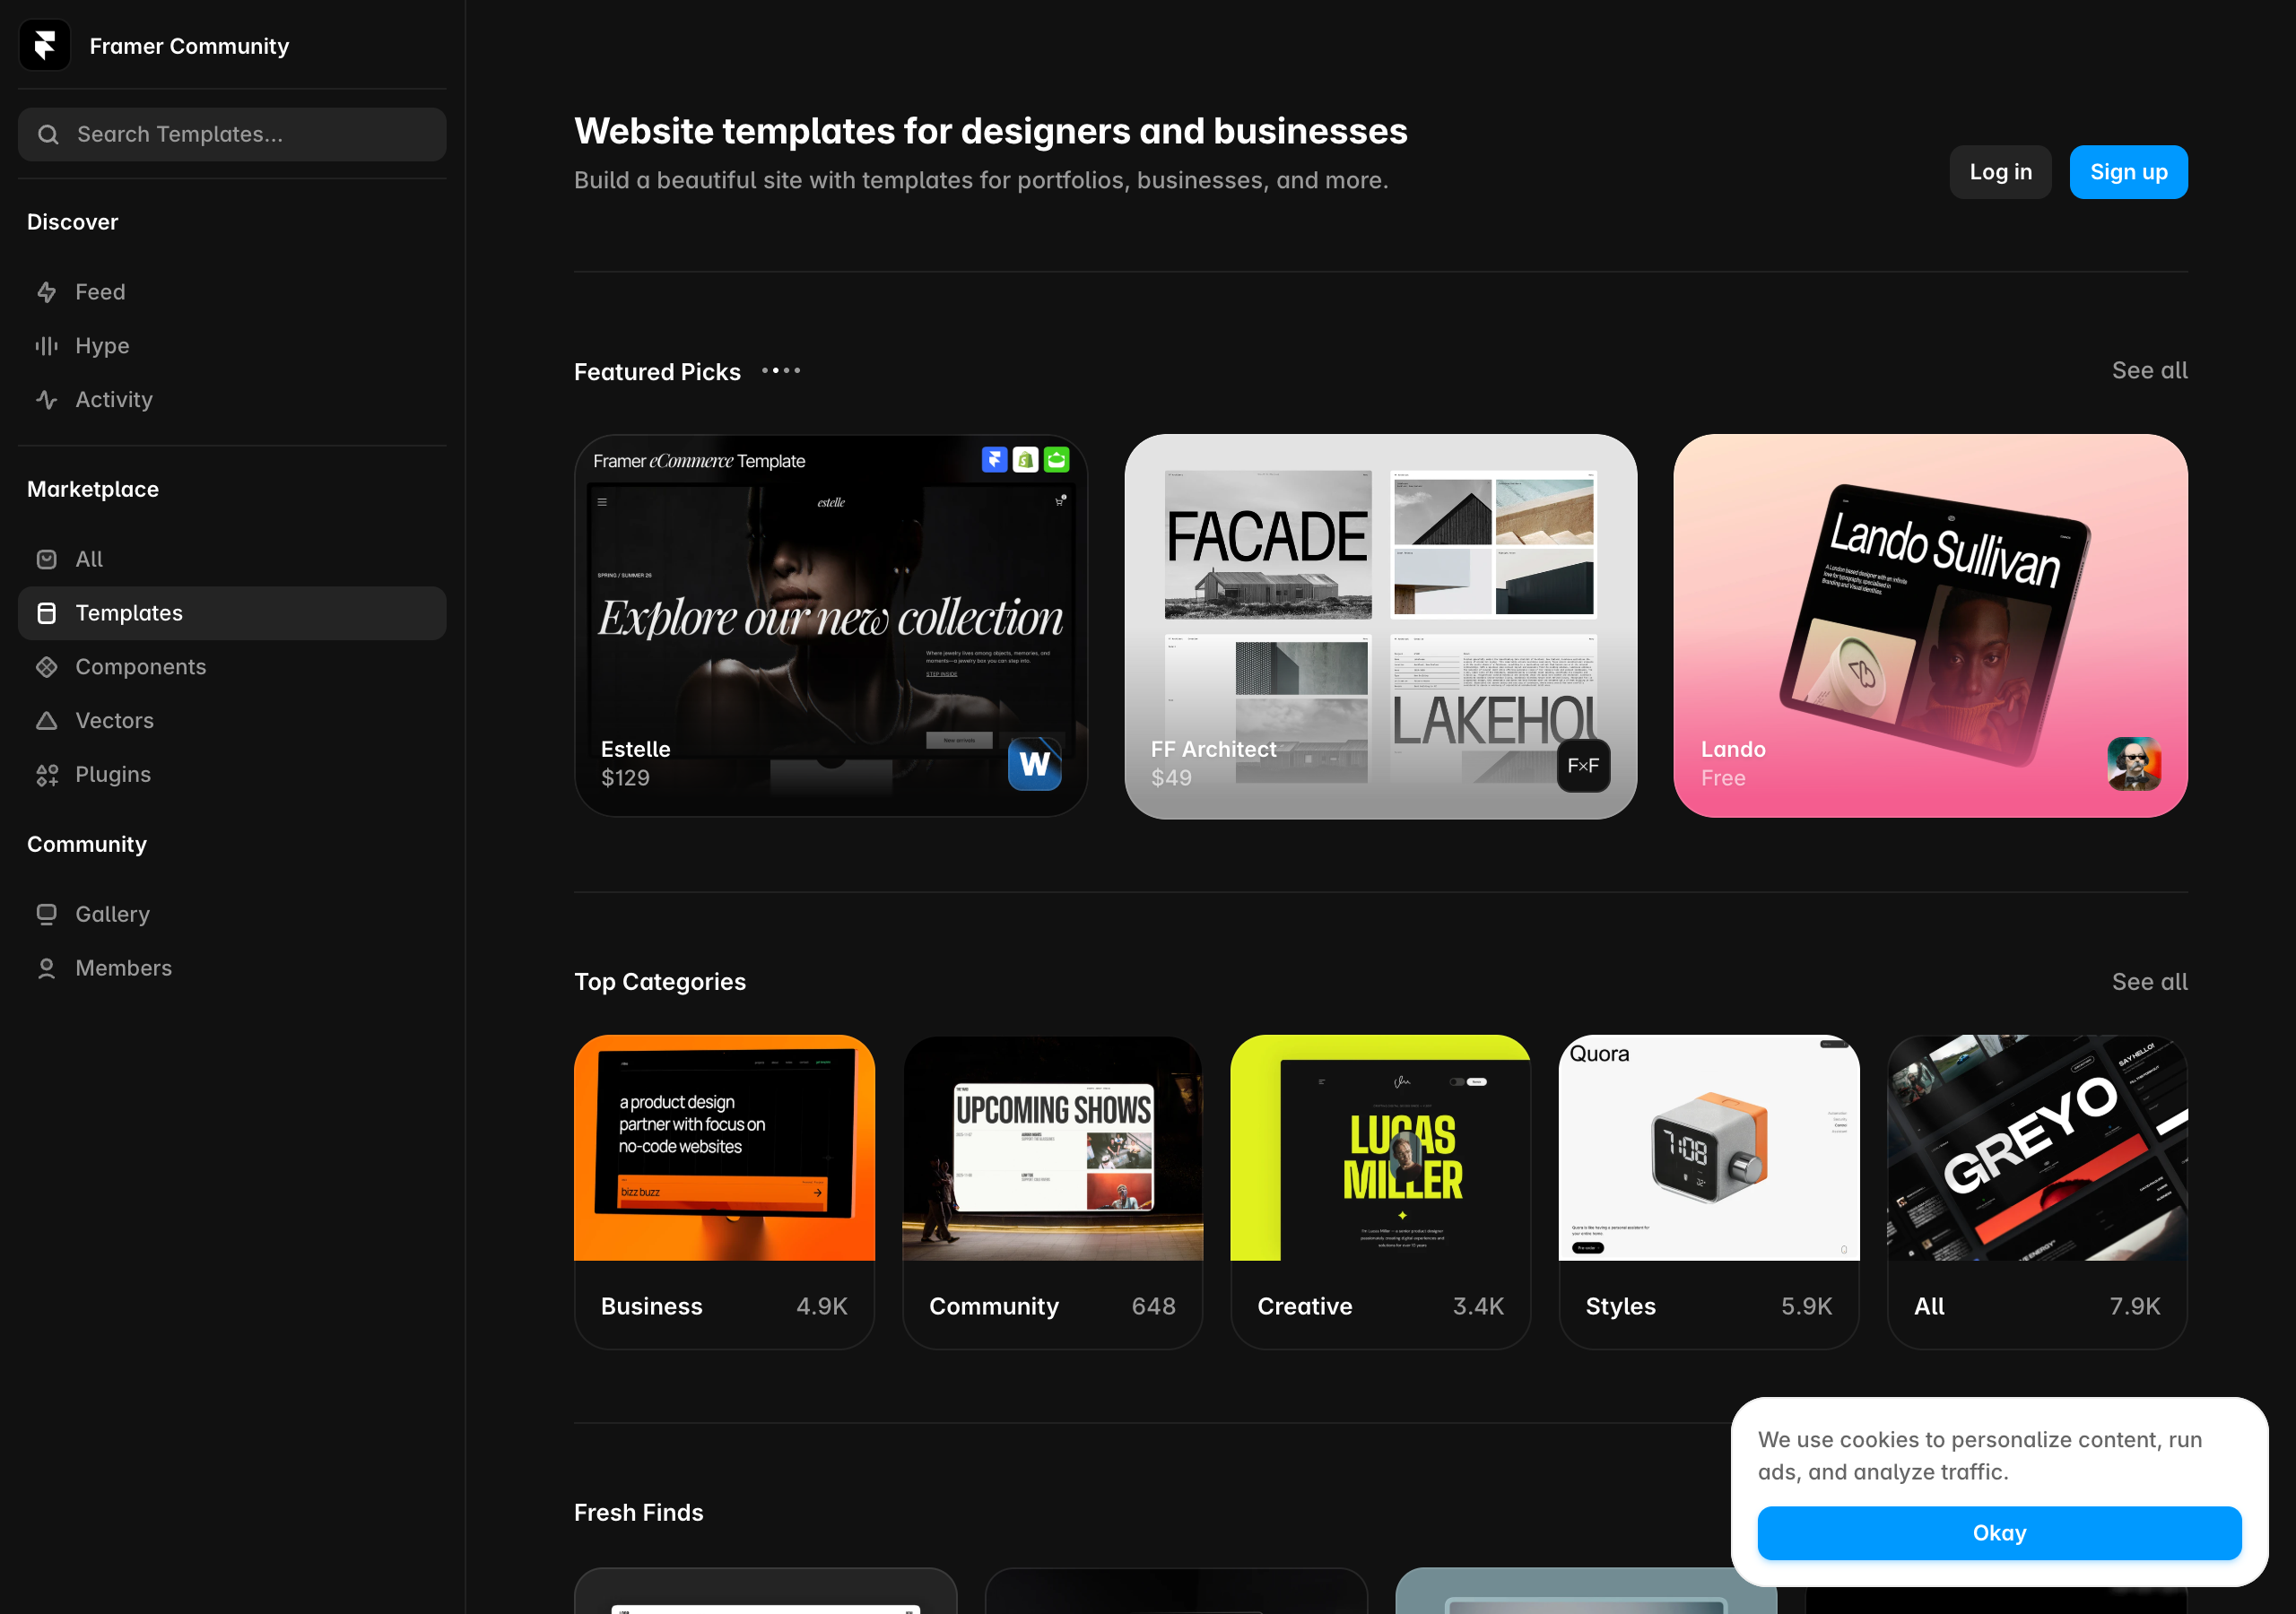
First, match your metadata. For every page you rebuilt, set the SEO meta title, meta description, Open Graph image, and image alt text in Framer to match what you carried over from your Step 1 audit. Framer gives you controls for all of these. If Google saw a certain title and description on a page that ranks, you want the new Framer page to present the same signals so the transition is seamless in Google’s eyes.
Second, set up redirects. This is the heart of the whole migration. If your Framer URLs are different from your old Squarespace URLs, every old link, whether from Google’s index or from another site linking to you, needs to point to the correct new page. You do this with 301 redirects, which tell search engines “this page permanently moved here” and pass the ranking value along. Map each important old URL to its new counterpart. Framer’s Pro tier includes site redirects, which is the practical reason many people migrating a real, ranked site choose Pro rather than Basic. Prioritize the high-traffic pages from your audit first, then handle the rest.
Miss this step and you get the classic migration horror story: the new site looks gorgeous, and traffic falls off a cliff because every ranked URL now returns a dead end. Do this step and the transition is smooth.
Rebuilding is the fun part, and it goes faster than you expect once your content is organized. Open a free Framer project and start recreating your top page now. You can build and preview the whole thing before you ever touch your live domain, so there is zero risk to your current site.
Step 6: Test everything before you switch the domain
Framer publishes to a free framer.website subdomain, which is perfect for staging. Publish your rebuilt site there and go through it like a suspicious visitor. Click every navigation link. Submit every form. View every page on a real phone, not just the desktop preview, because responsive issues hide until you check. Read your content for anything that got lost in the copy-paste. Confirm your metadata is set on each page.
Make a checklist from your Step 1 audit and tick off every page. The goal is to launch a finished site, not to discover broken links after your domain is already pointed at it.
Step 7: Point your domain at Framer and go live
When the staged site passes your test, it is time to switch. In Framer, connect your custom domain, and update your domain’s DNS settings to point to Framer instead of Squarespace. Framer walks you through the exact records to set. Once DNS propagates, which can take anywhere from minutes to a day, your custom domain serves the new Framer site.
Do not cancel your Squarespace subscription the instant the switch happens. Keep it active for a short overlap period so you have a fallback and so you can reference the old site if you spot something you missed. Once you are confident the new site is fully live, redirects are working, and traffic looks healthy in your analytics, then you close the Squarespace account.
A migration checklist you can actually use
| Phase | Task | Why it matters |
|---|---|---|
| Audit | List every page: URL, title, meta description, traffic | You cannot protect what you did not map |
| Audit | Flag top pages by search traffic | These get priority redirects |
| Export | Copy all written content, page by page | Your words transfer unchanged |
| Export | Download all images at full resolution | Re-optimize oversized ones now |
| Rebuild | Recreate design in Framer (template or blank) | This is the upgrade you came for |
| Rebuild | Recreate nav, footer, internal links | Broken internal links hurt UX and SEO |
| Rebuild | Rebuild blog as CMS collection, rebuild forms | Mind plan collection limits |
| SEO | Match meta title, description, OG image, alt text | Preserves ranking signals |
| SEO | Set 301 redirects old URL to new URL | The single most important step |
| Test | Publish to framer.website subdomain and check everything | Launch finished, not half-broken |
| Launch | Point domain DNS to Framer | Your address stays the same |
| Launch | Keep Squarespace active during overlap | Safety net before you cancel |
Pitfalls that burn people
Skipping redirects. Said three times on purpose. If you take one thing from this guide, it is that a migration without 301 redirects can tank your search traffic. Map your important old URLs to new ones before you switch the domain.
Changing metadata carelessly. Your ranked pages rank partly on their existing titles and descriptions. Rewriting all of them during a migration adds a variable at the worst possible time. Match first, optimize later once the dust settles.
Forgetting Squarespace-specific features. Native scheduling, member areas, and Squarespace commerce do not come with you. If your business depends on one of these, plan the replacement before you migrate, not after. This is the most common “oh no” moment, and it is entirely avoidable with five minutes of honest inventory in Step 1.
Re-uploading bloated images. Migration is a fresh start. Do not haul your unoptimized 4 MB hero images into the new site and then wonder why the beautiful new build feels slow. Right-size them during export.
Canceling Squarespace too early. Keep the overlap. A short period of paying for both is cheap insurance against a launch-day surprise you cannot roll back.
Trying to rebuild everything at once for a huge site. If you have hundreds of pages, migrate in phases. Move the high-value marketing pages and top blog posts first, get them live and redirected, then work through the long tail.
How long does it actually take?
Set expectations by site size, because “how long” has no single answer.
- A small portfolio or one-to-five-page business site: a weekend once your content is gathered. The design rebuild is the bulk of it, and Framer’s speed makes that quick.
- A standard small-business site, roughly five to fifteen pages, with a modest blog: several days of focused work, most of it content re-entry and redirect mapping rather than design.
- A content-heavy site with a large blog: longer, and mostly bottlenecked by re-entering blog posts and mapping many redirects. The design itself is not the slow part. The volume of content is.
The design work is faster than you fear. The content re-entry and the redirect mapping are the real time costs, and both scale with how much content you have, not with how ambitious your design is. Budget accordingly and you will not be caught off guard.
Frequently asked questions
Is there a one-click way to import a Squarespace site into Framer? No. There is no automatic importer that transfers a Squarespace site into Framer. You rebuild the site in Framer, carrying over your content, images, domain, and SEO metadata manually. It is faster than building from scratch because everything already exists, but it is a manual rebuild, not a migration button.
Will I lose my Google rankings when I move to Framer? Only if you skip the two protective steps. If you set up 301 redirects from your old Squarespace URLs to your new Framer URLs, and you match your page titles and meta descriptions, you preserve your rankings through the transition. Rankings are lost when people forget redirects, not because Framer is worse for SEO. Both tools produce fast, semantic, well-marked-up pages.
Can I keep my domain name? Yes. Your custom domain is yours. During migration you point its DNS at Framer instead of Squarespace, and your web address never changes for your visitors.
Does my blog transfer to Framer? The blog content transfers because it is your writing, but you rebuild the blog structure as a Framer CMS collection. Framer generates dynamic pages from the collection. Keep the plan limits in mind: Basic includes 2 CMS collections and Pro includes 10.
What about my Squarespace store or scheduling? Squarespace-native commerce, scheduling, and member areas do not carry over to Framer, because Framer is a design-first website builder, not a full commerce or booking backend. If you rely on these, plan a replacement with Framer-compatible tools before you migrate, or reconsider whether Framer fits that particular need. Position this honestly with yourself up front.
Which Framer plan do I need for a migration? For a real site with existing rankings, Pro is often the practical choice because it includes site redirects and 10 CMS collections, plus a staging environment for safe testing. Basic works for a simpler site with minimal blog needs and fewer redirect requirements. Pricing and limits were captured July 2026, so confirm the current details before you buy.
Can I preview the new site before switching my domain? Yes, and you should. Framer publishes to a free framer.website subdomain that works perfectly as a staging URL. Build and test the entire site there, then only point your real domain once everything passes your checklist. Your live Squarespace site stays untouched the whole time.
How much faster is Framer to work in after I migrate? Once you are past the learning curve, editing and republishing in Framer feels fast and direct, because you design straight on the canvas and publish to a global CDN. The bigger win most people report is not raw speed but creative freedom: things Squarespace templates would not let you do become straightforward.
The bottom line
Migrating from Squarespace to Framer is a rebuild, not an import, and that framing is the key to doing it well. You carry over the parts that are already yours, your content, images, domain, and SEO metadata, and you recreate the design, structure, and navigation on Framer’s canvas, which is the whole reason you are moving. Done in the right order, with your metadata matched and your redirects in place, you keep your rankings and gain a site that looks and moves like it belongs in 2026.
The design rebuild is the fun, fast part. The redirects and metadata are the insurance that protects everything you have built. Respect both, keep Squarespace running during a short overlap, and the switch is smooth rather than scary.
You do not have to commit to anything to find out whether this move is right for you. You can rebuild your homepage in Framer, on a staging URL, for free, without touching your live site.
Create your free Framer site and start your migration today. Rebuild one page, feel the difference, and preview the whole thing before you ever point your domain. If the first hour feels this good, you already have your answer.
Pricing, plan names, CMS limits, and marketplace details cited from Framer’s live pricing and community pages, captured July 2026. Tiers and numbers change over time, so confirm the current details on framer.com/pricing before you buy, and check Squarespace’s current export options before you migrate.
You already have a website. It works. It is on Wix, it has your pages and your logo and a contact form that mostly does its job, and you are not here because you want a hobby project. You are here because Wix has started to feel like a ceiling. The design looks a little dated next to competitors, the animations you want are just not possible, editing feels clumsy, and every time you try to make the site feel premium you run into the same template walls.
I have moved real sites off Wix and rebuilt them in Framer, including small-business pages and portfolios that had years of content and existing Google rankings to protect. It is very doable, and the result almost always looks and performs better. But it is not a magic button, and anyone who tells you it is a one-click import is setting you up to lose traffic. This guide walks you through the honest version: what actually carries over, what you rebuild by hand, how to protect your SEO and your links, and a realistic timeline so you know what you are signing up for.
The quick answer: is there a one-click Wix to Framer importer?
No. Let us be clear about that up front, because it is the single most important thing to understand before you start.
There is no automatic tool that reads your Wix site and rebuilds it inside Framer. Wix is a closed, all-in-one platform. It does not hand you clean, portable code you can pour into another builder, and Framer is a design-first canvas, not a site scraper. So a Wix to Framer migration is a rebuild, not a conversion.
Here is the good news that makes that sound scarier than it is. Rebuilding in Framer is dramatically faster than building from a blank page, because you already know exactly what your site says, what pages it needs, and which content matters. You are not inventing a site. You are re-housing one you already designed once. With a template as a starting point, most small marketing sites and portfolios move over in a few focused days, not weeks. You keep your words, your images, your brand, and your structure. You rebuild the container, and you get a far better container in return.
The mental shift that makes this easy: think of it as a redesign that happens to change platforms, not a data transfer. That framing is the whole game.
Before you read the rest, go feel the tool your new site will live in. Start a free Framer project and rebuild one page from your current Wix site. No credit card, and one hour of hands-on will tell you more than any article about whether this move is right for you.
Why people move from Wix to Framer
You do not need me to sell you on leaving, since you are already reading a migration guide. But it helps to name the reasons clearly, because they also tell you what to prioritize when you rebuild.
Design freedom. This is the big one. Wix is beginner-friendly and genuinely good at getting an ordinary person a working site fast, but it is template-locked. You start inside someone else’s layout and you are always nudging against its limits. Framer is a design-first canvas that feels like Figma: you drag elements, type inline, and build the exact layout you want. If your site currently looks like “a Wix site,” Framer is where that stops being true.
Animation and motion. Framer grew out of a design and prototyping tool, so scroll effects, appear-on-scroll animations, hover states, and smooth page transitions are built in and easy. This is what makes a site feel modern and expensive. Wix has some motion, but it is nowhere near the same league, and the polished, animated sites you admire online are very often Framer.
A cleaner editing experience. Once you learn the Framer canvas, day-to-day edits feel lighter and more direct than pushing around Wix sections. You are designing, not fighting a template.
Performance and a fresh, hosted setup. Framer is fully hosted on a global CDN and publishes instantly, and it optimizes image delivery well by default, which quietly helps your speed scores. You get a modern foundation without managing a server.
Room to grow. Framer has a CMS (collections that generate dynamic pages), AI features, a template marketplace, and real SEO controls. It scales from a one-page site up to a proper marketing site with a blog.
The honest counterpoint, which I will keep repeating because it builds trust: if your Wix site is simple, works fine, and you have zero design ambition, you may not need to move at all. Migration is worth it when the design ceiling is actually costing you, not just when you are bored.
What transfers, and what you rebuild
This is the part most guides gloss over, and it is exactly where people get surprised. Be honest with yourself about each of these before you start, so nothing catches you mid-project.
What comes with you (by copying, not by import):
- Your text. Every headline, paragraph, and button label. You copy and paste it. It is the most valuable thing on your site and it moves perfectly.
- Your images and logo. Download them from Wix, re-upload into Framer. Take the chance to re-export anything that looks dated or low-resolution.
- Your brand. Colors, fonts, and overall feel. Framer lets you set these once as styles and reuse them, which is cleaner than how most Wix sites handle it.
- Your content structure. The list of pages and how they are organized. This is essentially your sitemap, and it transfers as a plan even though the pixels do not.
- Your blog content. The words and images of each post. In Framer you recreate these as CMS items.
What you rebuild from scratch in Framer:
- The actual layout and design. Every section is built new on the Framer canvas. This is the work, and also the point, since the better design is why you are moving.
- Forms. Your Wix contact or signup form does not carry over. You rebuild it in Framer and connect where the submissions go.
- Any Wix-specific apps or widgets. Bookings, Wix Stores, restaurant ordering, members areas, and similar Wix apps are platform features. You will replace each with a Framer-native approach or a third-party embed, and some may not have a like-for-like equivalent. Inventory these early.
- Interactions and animations. You will add these fresh, which is a feature not a bug, because Framer does them far better.
What you must actively protect (the SEO layer):
- Your URLs. Framer will not automatically match your old Wix page paths, so you set them deliberately and add redirects for any that change. More on this below, because getting it wrong is how people lose rankings.
- Your meta titles and descriptions. These do not travel. You re-enter them page by page in Framer’s SEO settings.
- Structured content like blog dates and slugs. You recreate these so search engines see continuity.
If you read only one section of this guide, read this one twice. The migrations that go badly are almost never the design. They are the URLs and redirects that someone forgot.
The step-by-step Wix to Framer migration plan
Here is the sequence I actually follow. Do it in this order. Skipping the audit at the start is where projects fall apart.
Step 1: Audit your current Wix site
Before you touch Framer, make a simple inventory of what you have. Open your Wix dashboard and write down, in a spreadsheet or a document:
- Every page, with its exact URL path (for example
/about,/services,/blog/my-post-title). This list is gold. You will use it for redirects later. - Every blog post, with its title, URL, and publish date.
- Every form and where its submissions currently go (an email inbox, a Wix inbox, a connected tool).
- Every Wix app or special feature you use: bookings, store, members, chat, and so on. Mark which ones are business-critical.
- Your top pages by traffic. Open your analytics (Wix Analytics or Google Analytics) and note which pages actually get visitors and rankings. These are the pages you protect most carefully.
This audit takes an hour and saves you from the classic disaster of publishing the new site and discovering three weeks later that your best-ranking blog post now returns a 404.
Step 2: Download your content from Wix
Now gather the raw material. From Wix:
- Save your text. Go page by page and copy your headlines and body copy into your document. Yes, by hand. It is tedious and it is also the most reliable way, and it forces you to re-read and tighten your copy while you are at it.
- Download your images. Pull your logo, photos, and any graphics out of the Wix Media Manager at the highest resolution available. Keep them organized in folders named by page.
- Export your blog. Wix offers a blog export in some cases; at minimum, copy each post’s text, images, title, and date. If you have many posts, prioritize the ones that get traffic.
- Note your fonts and colors. Record your exact brand colors (hex codes) and font names so you can match them precisely in Framer.
By the end of this step you have a complete, portable archive of your site’s actual content, independent of Wix. That alone is worth doing, because your content should never be trapped in one platform again.
Step 3: Start your Framer project, ideally from a template
Open Framer and create a new site. You have two paths:
- Start from a template. This is what I recommend for almost everyone. Framer’s marketplace (Community, then Templates) has a large mix of free and paid options across categories like Business and Creative. Find one whose structure roughly matches your site type, duplicate it, and you now have a professional skeleton to pour your content into. It is far faster than a blank canvas.

- Start blank only if you have a very specific design in mind and you are comfortable on the canvas.
If you want a shortcut, Framer’s AI features can generate a starting layout from a prompt, which you then refine. Treat AI output as a rough draft, not a finished site.
Set up your brand first: define your colors and fonts as styles so every element you build stays consistent. This single habit is why Framer sites look more cohesive than the average Wix build.
Step 4: Rebuild your pages, one at a time
Work through your page list in priority order (homepage first, then your top-traffic pages). For each page:
- Lay out the structure using Stacks, Framer’s system for responsive layout. Build the sections top to bottom: hero, then your content blocks, then your footer.
- Paste in your text from your archive. Because the words are already written, this goes quickly.
- Drop in your images. Re-upload from your organized folders.
- Match your brand by applying the color and font styles you set up.
- Add the motion you moved here for: appear-on-scroll effects on sections, hover states on buttons and cards, a smooth transition or two. Restraint reads as premium, so do not stuff every element with animation.
Do not try to make every page perfect on the first pass. Get all your priority pages built and roughly right, then do a polish pass. Momentum matters more than perfection in the middle of a migration.
Halfway through a rebuild is exactly when the new site starts to feel real, and better than the old one. If you have not started yet, spin up your free Framer site now and rebuild your homepage first. Seeing your own content look this good is the moment most people stop second-guessing the move.
Step 5: Rebuild your forms and replace Wix apps
For each form from your audit, build a new one in Framer and connect where submissions should go. Framer supports forms and can route submissions to your email or a connected service. Test every form by submitting it yourself before launch, because a silent, broken contact form is a business emergency hiding in plain sight.
For Wix apps (bookings, store, members, and so on), decide per feature:
- Can Framer do it natively or with a simple embed? Use that.
- Do you need an external tool? Many scheduling, form, and store tools give you an embed snippet you can drop into Framer as custom code or an embed element.
- Is it a full e-commerce store? Framer is a marketing-site builder, not a full store backend. For real selling, plan a dedicated commerce tool and connect or embed it, rather than expecting Framer to replace Wix Stores one-for-one. [VERIFY your specific store setup]
Handle these honestly and early. A surprise mid-migration (“wait, how do I do bookings?”) is what stalls projects.
Step 6: Set your URLs and prepare redirects
This is the SEO-critical step. Do not rush it.
In Framer, set each page’s URL path to match your old Wix path exactly wherever you can. If your old about page was /about, make the new one /about. When the path matches, search engines and existing links keep working with no redirect needed. Match as many as you possibly can.
For any URL that has to change (Wix and Framer sometimes structure blog paths differently, for example), you need a 301 redirect from the old path to the new one. A 301 tells Google “this moved permanently,” and it passes the ranking value along. Framer’s Pro plan includes site redirects, which is the feature you use to map old paths to new ones. Build a redirect for every changed URL, especially every page on your top-traffic list from Step 1.
The rule to burn into your memory: every old URL must either exist at the same path or 301-redirect to its new home. No orphans. This one discipline is the difference between a smooth move and a traffic crash.
Step 7: Match your SEO metadata
Framer gives you real SEO controls: page title, meta description, Open Graph image for social sharing, and alt text on images. Go page by page and re-enter the metadata you recorded (or improve it while you are there). Do not launch with empty title tags. Search engines read these, and copying them over preserves the signals your pages already earned on Wix.
While you are at it, set descriptive alt text on your images. It helps accessibility, image search, and it is a small SEO win that most people skip.
Step 8: Test everything before you point your domain
Framer gives you a free framer.website subdomain, so you can publish and review the entire new site privately before it goes live to the public on your real domain. Use that. Before you switch:
- Click every link and every button. Hunt for anything that goes nowhere.
- Submit every form and confirm the submission actually arrives.
- Check every page on phone, tablet, and desktop. Framer has responsive breakpoints; walk through each one. Wix sites and Framer sites handle mobile differently, so do not assume.
- Proofread. A fresh rebuild is where typos sneak in.
- Re-check your redirect list against your Step 1 URL audit. Every old path accounted for.
Step 9: Connect your domain and go live
Once you are confident, connect your custom domain to Framer (available from the Basic plan up) and publish. This involves updating your domain’s DNS settings to point at Framer, which Framer walks you through. There may be a short propagation window while the change spreads.
Right after launch:
- Test your live domain end to end again, because live sometimes behaves differently than preview.
- Submit your new sitemap to Google Search Console and use the URL inspection tool on your top pages so Google recrawls them quickly.
- Watch Search Console for 404 errors over the next couple of weeks. Any that appear are redirects you missed. Add them immediately.
Then cancel or downgrade your Wix plan, but not a second before you are certain the new site is fully live and stable. Keep Wix around as a safety net for a little while.
Migration timeline: what to actually expect
Realistic expectations keep you sane. Here is a rough guide, assuming you are doing the work yourself and learning Framer as you go.
| Site type | Realistic timeline | Main effort |
|---|---|---|
| One-page or simple portfolio | 1 to 2 days | Design polish, one form, redirects |
| Small business site (5 to 10 pages) | 3 to 5 days | Rebuild pages, forms, replace Wix apps, redirects |
| Site with a real blog (many posts) | 1 to 2 weeks | All of the above plus recreating posts as CMS items |
| Complex site (store, bookings, members) | 2+ weeks, plan carefully | Replacing Wix apps is the long pole, not the design |
Two honest notes. First, your first few hours in Framer are slower because you are learning the canvas; you speed up fast. Second, the content rebuild for a large blog is the real time sink, so if you have a hundred posts, decide whether you truly need all of them or whether this is a good moment to prune dead weight.
Common mistakes that wreck a Wix to Framer migration
I have seen every one of these, and all of them are avoidable.
- Forgetting redirects. The number one killer. You rebuild a beautiful site, point the domain, and your Google traffic quietly falls off a cliff because your ranked pages now 404. Audit every old URL, redirect every changed one.
- Cancelling Wix too early. Do not tear down the old site until the new one is fully live, tested, and stable on your real domain. Keep the safety net.
- Skipping the mobile check. A site that looks great on your laptop can be broken on a phone. Most of your visitors are on mobile. Walk every breakpoint.
- Leaving forms untested. A contact form that silently fails costs you leads you never even know you lost. Submit every form yourself before and after launch.
- Not matching metadata. Empty title tags and missing descriptions throw away SEO equity your Wix pages already earned. Copy it over, page by page.
- Trying to make it pixel-perfect on the first pass. You will burn out. Build everything roughly, then polish. Done and live beats perfect and unpublished.
- Assuming Wix apps have one-to-one replacements. Bookings, stores, and members areas need a plan. Inventory them in Step 1 so nothing surprises you at launch.
When you should NOT migrate (yet)
Trust matters more than a conversion here, so let me be straight. Hold off if:
- Your Wix site works and you have no real design ambition. If “good enough” is genuinely good enough for your goals, migrating is effort without payoff.
- You lean heavily on a Wix-specific app (a deep bookings system, a full Wix store, a members area) with no easy equivalent, and you have not yet figured out the replacement. Solve that question before you commit.
- You are in your busiest season. A migration deserves a calm week where you can test properly, not a rushed weekend during a launch or a holiday rush.
Framer is the better design tool for most people who feel boxed in by Wix. But “most people” is not “everyone,” and a migration done at the wrong time or without a plan for a critical feature can cost more than it gives. Pick your moment.

Frequently asked questions
Can I import my Wix site directly into Framer?
No. There is no one-click importer. Wix is a closed platform and does not export a site that Framer can read. You rebuild the site in Framer, which is much faster than starting from nothing because you already have all your content, and the result is a better, more modern site.
Will I lose my Google rankings when I move from Wix to Framer?
Not if you protect your URLs. Keep each page’s path the same where you can, set up 301 redirects for any path that changes, copy over your meta titles and descriptions, and submit your new sitemap to Google Search Console. Rankings can wobble briefly during any migration, but a careful move usually recovers quickly and often improves, since Framer sites tend to be faster and better designed.
How long does a Wix to Framer migration take?
A simple portfolio can move in a day or two. A small business site of five to ten pages typically takes three to five days. A site with a large blog runs one to two weeks, mostly because of recreating posts as CMS items. Complex sites with stores or bookings take longer and need a plan for replacing those Wix apps.
Is Framer cheaper than Wix?
It depends on your plan and needs, so compare the current live pricing pages for your exact setup. Framer’s paid plans start at a low monthly rate with a free custom domain from the Basic tier, and it prices per site. What Framer clearly gives you over Wix is design quality and modern motion, which for many businesses is worth more than a small price difference.
Do my blog posts transfer automatically?
No. You recreate each post in Framer’s CMS, which generates dynamic pages from collections. The text and images move by copy and paste; the structure you rebuild once and then reuse. Prioritize the posts that actually get traffic, and consider this a chance to prune old ones.
What happens to my Wix forms and apps?
Forms do not carry over; you rebuild them in Framer and connect where submissions go. Wix apps like bookings, stores, and members areas are platform features, so you replace each with a Framer-native option or a third-party embed. Inventory these before you start so none of them surprise you.
Should I keep my Wix site running during the move?
Yes. Keep Wix live and paid until your new Framer site is fully published on your real domain, tested end to end, and stable. Only then cancel or downgrade Wix. The old site is your safety net, and it costs little to keep it a few extra weeks.
Can I use my own custom domain on Framer?
Yes. Framer supports custom domains from the Basic plan up (the free plan uses a framer.website subdomain). You point your domain’s DNS at Framer during launch, and Framer guides you through it.
The bottom line
Moving from Wix to Framer is a rebuild, not an import, and once you accept that, the whole project gets simpler. You are not converting data. You are re-housing content you already own into a far better-designed, better-animated, faster container. The design work is the fun part and the reason you are doing this. The part that actually decides whether the migration succeeds is boring and non-negotiable: audit your URLs, redirect every changed one, copy your metadata, and test everything before you point your domain.
Do those unglamorous steps properly and you will land on a site that looks like it cost far more than it did, keeps the traffic you worked for, and finally stops feeling like it is fighting you. For most people who have outgrown Wix’s template walls, that is exactly the upgrade they were looking for.
The best way to know if this is your move is to feel the tool your new site would live in.
Create your free Framer site and rebuild one page from your Wix site right now. Give it your real content, add one scroll animation, and publish it to the free subdomain. If that hour feels this good, you already have your answer, and you have started the migration without risking a thing.
Framer pricing, plan names, redirect availability, and marketplace details cited from Framer’s live pages, captured July 2026. Tiers and features change over time, so confirm current details on framer.com/pricing before you buy, and check your own Wix setup for platform-specific apps that need replacing.
You are not here to be talked into anything. You already run a WordPress site, it works, and yet you keep hitting the same three walls: it is slow, it needs constant babysitting, and making it look the way you want means fighting a theme, a page builder, and half a dozen plugins that all disagree with each other. So you typed “wordpress to framer” into Google, and now you want a straight answer: can you actually move, what breaks, and how do you do it without tanking the traffic you spent years earning?
I have migrated real WordPress sites into Framer, including a content-heavy marketing site with a blog, a contact form, and a stack of ranking pages I could not afford to lose. So this guide is not theory. It is the exact playbook, including the unglamorous parts nobody mentions: there is no magic one-click importer, you will rebuild your design by hand, and if you skip the redirect step you will watch your rankings dip for no reason. Do it in the right order, though, and the whole thing takes days, not weeks, and you come out the other side with a site that loads fast, needs zero maintenance, and finally looks like you meant it.
Let us walk through it properly.
Quick answer: how to move from WordPress to Framer
Here is the whole thing in one breath, so you can quote it or skim it.
There is no automatic one-click importer that turns a WordPress site into a Framer site. You migrate by rebuilding the design in Framer (much faster than from scratch, because you start from a template and reuse your existing text and images), then carrying your content over into Framer’s CMS, then setting up redirects and matching your SEO metadata so Google does not lose you, and finally pointing your domain at Framer once everything is tested. What transfers cleanly: your words, your images, your page structure, your domain, your meta titles and descriptions. What you recreate: the visual design, the layouts, the forms, and any plugin-driven functionality. For a typical small-business site, portfolio, or marketing site with a blog, budget two to five focused days. The payoff is a fully hosted, fast, no-code site with no plugins to update and no server to secure.
That is the map. The rest of this article is the terrain.
Before you read another 3,000 words, it helps to feel the tool with your own hands. Start a free Framer site and rebuild your homepage in the next hour. No credit card needed, and touching the canvas once will tell you more than any migration guide, including this one.
Why people actually move from WordPress to Framer
People rarely leave WordPress for one dramatic reason. They leave because of accumulated friction. Here are the real motivations I hear, and which ones Framer genuinely fixes.
Maintenance fatigue. A live WordPress site is a small ongoing job. Core updates, theme updates, plugin updates, PHP version bumps, security patches, backups, and the quiet dread that one update will white-screen the site. Framer is fully hosted. There is nothing to update, nothing to patch, and no server to secure, because you never touch a server at all. For a lot of people, this single change is worth the move.
Speed and the plugin tax. WordPress can be fast, but most real-world sites are not, because every feature arrived as a plugin, and every plugin loads its own scripts and styles. You end up installing a caching plugin to undo the slowness the other plugins caused. Framer publishes to a global CDN and optimizes image delivery by default, so a clean Framer build tends to be fast without you fighting for it.
Design frustration. This is the big one for founders and creatives. In WordPress, your design is constrained by your theme and your page builder, and the moment you want something custom you are editing CSS or wrestling a builder that was not made for it. Framer’s canvas feels like a design tool: you drag, you type inline, you drop in sections, and it looks polished because the defaults were designed by people who care about spacing and typography. If your WordPress site looks like a template because it is a template, Framer is where that stops.
Animation and modern feel. Scroll effects, smooth page transitions, appear-on-scroll motion, and hover states are built into Framer and mostly a matter of selecting an element and choosing an effect. In WordPress, that same polish usually means another plugin or custom code.
Now the honest counterweight, because I am not going to pretend Framer is right for everyone.
When WordPress is still the better home. If you run a real store with inventory, variants, and checkout, WordPress plus WooCommerce is a genuine e-commerce backend and Framer is not. If your site depends on membership logins, a learning-management system, complex directory functionality, a forum, or a database-driven web app, those live in WordPress’s plugin ecosystem and do not have a clean Framer equivalent. And if you are managing thousands of interrelated content items with complex relationships, that is a heavier CMS job than Framer is built for. Framer shines for marketing sites, portfolios, small-business sites, landing pages, and blogs of reasonable size. If that is you, keep reading. If you are running a 5,000-product store, this migration is not the move, and I would rather tell you now than after you have spent three days on it.
The truth about “importing” WordPress into Framer
Let me kill the fantasy first, because it will save you hours of searching for a plugin that does not exist.
There is no reliable one-click importer that recreates a WordPress site inside Framer. WordPress and Framer are built on completely different foundations. WordPress is a database of content rendered through PHP themes and plugins. Framer is a visual, design-first canvas that publishes static, hosted pages. There is no automatic bridge that reads your theme and rebuilds it pixel for pixel on the Framer side. Anyone promising that is overselling.
Here is why that is less scary than it sounds. You are not rebuilding from a blank page. You already have the three hardest inputs done: your content is written, your images exist, and your information architecture (which pages you need and how they connect) is already decided by your current site. Migration is not creation. It is reconstruction, and reconstruction from a finished reference is dramatically faster than designing from nothing. In practice, you start from a Framer template that is close to what you want, then pour your existing words and images into it, then adjust. The bottleneck in most website projects is deciding what to say, and you already decided.
So reframe the whole job. You are not “importing WordPress.” You are rebuilding a site you already fully understand, in a tool that makes the rebuild fast.
What transfers, and what you recreate
Before you touch anything, it helps to know exactly which parts of your WordPress site walk across the bridge easily and which parts you rebuild by hand. Here is the honest breakdown.
Transfers with little friction:
- Your written content. Every headline, paragraph, and blog post is just text. You copy it over. This is the bulk of the value on most sites and it moves with zero loss.
- Your images and media. Download them from your WordPress media library and upload them into Framer. Take the opportunity to right-size them while you are at it, since oversized images are the number-one speed mistake and this is a clean chance to fix it.
- Your page structure. Your existing sitemap tells you exactly which pages to build: home, about, services, contact, blog, and so on. You are copying a plan you already validated.
- Your domain. Your custom domain moves. You point it at Framer at the end. Your email, if it runs on that domain through a separate provider, is unaffected by a website move as long as you only change the web records and leave the mail records alone.
- Your SEO metadata. Your meta titles, meta descriptions, and Open Graph images are values you can read off your current pages (Yoast, Rank Math, or your theme are storing them) and re-enter in Framer’s page settings. Framer gives you full control over title, description, OG image, and alt text.
You recreate by hand:
- The visual design and layout. This is the real work, and honestly it is the point. You are rebuilding the look, ideally better than before, on Framer’s canvas.
- Forms. Your WordPress contact form (Contact Form 7, Gravity Forms, whatever you used) does not transfer. You rebuild the form in Framer and connect it to your email or a form endpoint.
- Plugin-driven functionality. Anything a plugin did (sliders, popups, booking widgets, custom post types) needs a Framer-native equivalent or a third-party embed. Some things have clean replacements. Some things do not, and that is part of your go or no-go decision.
- Comments, memberships, and dynamic user features. If your blog relies on native WordPress comments or gated member content, plan a different approach, because these are WordPress-native systems.
Read that list twice, because it is also your decision filter. If almost everything you have is in the “transfers easily” column, you are an ideal migration candidate. If half your site lives in the “recreate by hand” column and some of it has no clean equivalent, slow down and price the effort honestly before you start.
The step-by-step WordPress to Framer migration plan
Here is the sequence I actually follow. The order matters more than anything else in this article, because the single biggest way people hurt themselves is by pointing the domain at Framer before the redirects and SEO are ready. Do these in order and you protect your rankings. Do them out of order and you gift Google a pile of broken links.
Step 1: Audit your current WordPress site
Before you build anything, take inventory. Open a simple spreadsheet and list every page and post on your live site with its full URL, its meta title, and its meta description. Two easy ways to get the full list: export your XML sitemap (usually at yoursite.com/sitemap.xml or generated by Yoast or Rank Math), or use a free crawler to spider the site and dump every URL.
While you are in there, mark three things for each page: is it worth keeping, is it getting search traffic, and does it have backlinks pointing to it. Your goal is to know exactly which URLs must be preserved and redirected, because those are the ones carrying your SEO equity. A page that gets zero traffic and has no links can quietly be dropped. A page that ranks and earns links must be recreated and redirected without fail.
This audit is boring and it is the step people skip. Do not skip it. It is the map that keeps you from getting lost later.
Step 2: Pick your Framer starting point
Do not start from a blank canvas unless you enjoy pain. Open Framer’s Community templates (Community, then Templates) and find one whose structure is close to your site: a business template if you run a services site, a portfolio template if you are a creative, a startup template if it is a marketing site. The marketplace mixes free and paid options, real examples include a free template like Lando and paid ones like FF Architect at $49, and you can filter and search a niche visually before you commit. A template gives you professional layout, spacing, and typography as a foundation, so you spend your time on your content instead of reinventing a navbar.
Duplicate the template into your own Framer project. Now you have a polished skeleton, and the migration becomes a matter of swapping the template’s placeholder content for yours.
Step 3: Rebuild your pages and pour in your content
Go page by page, in priority order (home first, then your money pages, then supporting pages). For each one, replace the template’s placeholder text with your real copy, swap in your images, and adjust the layout using Framer’s Stacks to arrange sections and keep them responsive. Because you are working from a template, most of the design decisions are already made well, and you are mostly editing.
This is where you will feel the speed difference against WordPress. There is no theme fighting you, no builder lag, no shortcode soup. You select text, you type, it looks right. A homepage that would have taken an afternoon of theme-wrangling in WordPress often comes together in an hour or two here.
Step 4: Recreate your blog in Framer’s CMS
If you have a blog or any collection of similar pages (case studies, services, team members), use Framer’s CMS. You create a collection, define the fields you need (title, body, image, date, and so on), and Framer generates the dynamic pages from it, just as WordPress generated posts from your database.
One planning note that will save you a headache: check the CMS collection limits on your plan before you build. Straight from Framer’s live pricing page, the Basic plan includes 2 CMS collections and the Pro plan includes 10. For a normal marketing blog with one or two collections, Basic is fine. If your site has many content types (posts, authors, categories, case studies, jobs) each needing its own collection, plan for Pro so you do not hit a wall mid-migration.
Move your posts over by copying the content of each one into a new CMS item. For a handful of posts this is quick. For a large archive, prioritize: bring over the posts that get traffic and links first, and decide honestly whether the long tail of old, unread posts is worth the effort or better retired with a redirect.
Step 5: Rebuild your forms and any interactive pieces
Recreate your contact form on the Framer canvas and connect it so submissions reach you. Rebuild any other interactive elements you actually need: a newsletter signup, a booking embed, a testimonials section. This is also the moment to be ruthless. Every plugin-driven feature you were carrying on WordPress out of habit is a chance to ask “do I actually need this?” Most sites are carrying two or three features nobody uses. Leave them behind.
Step 6: Match your SEO metadata
Now go back to that audit spreadsheet from Step 1 and, page by page, enter the meta title, meta description, and Open Graph image into each Framer page’s settings so they match (or improve on) what you had. Set your alt text on images while you are there. This step is what tells Google “this is the same page, just at a better address and in a better tool.” Skipping it is how you accidentally throw away rankings during a move.
Step 7: Set up redirects from old URLs to new ones
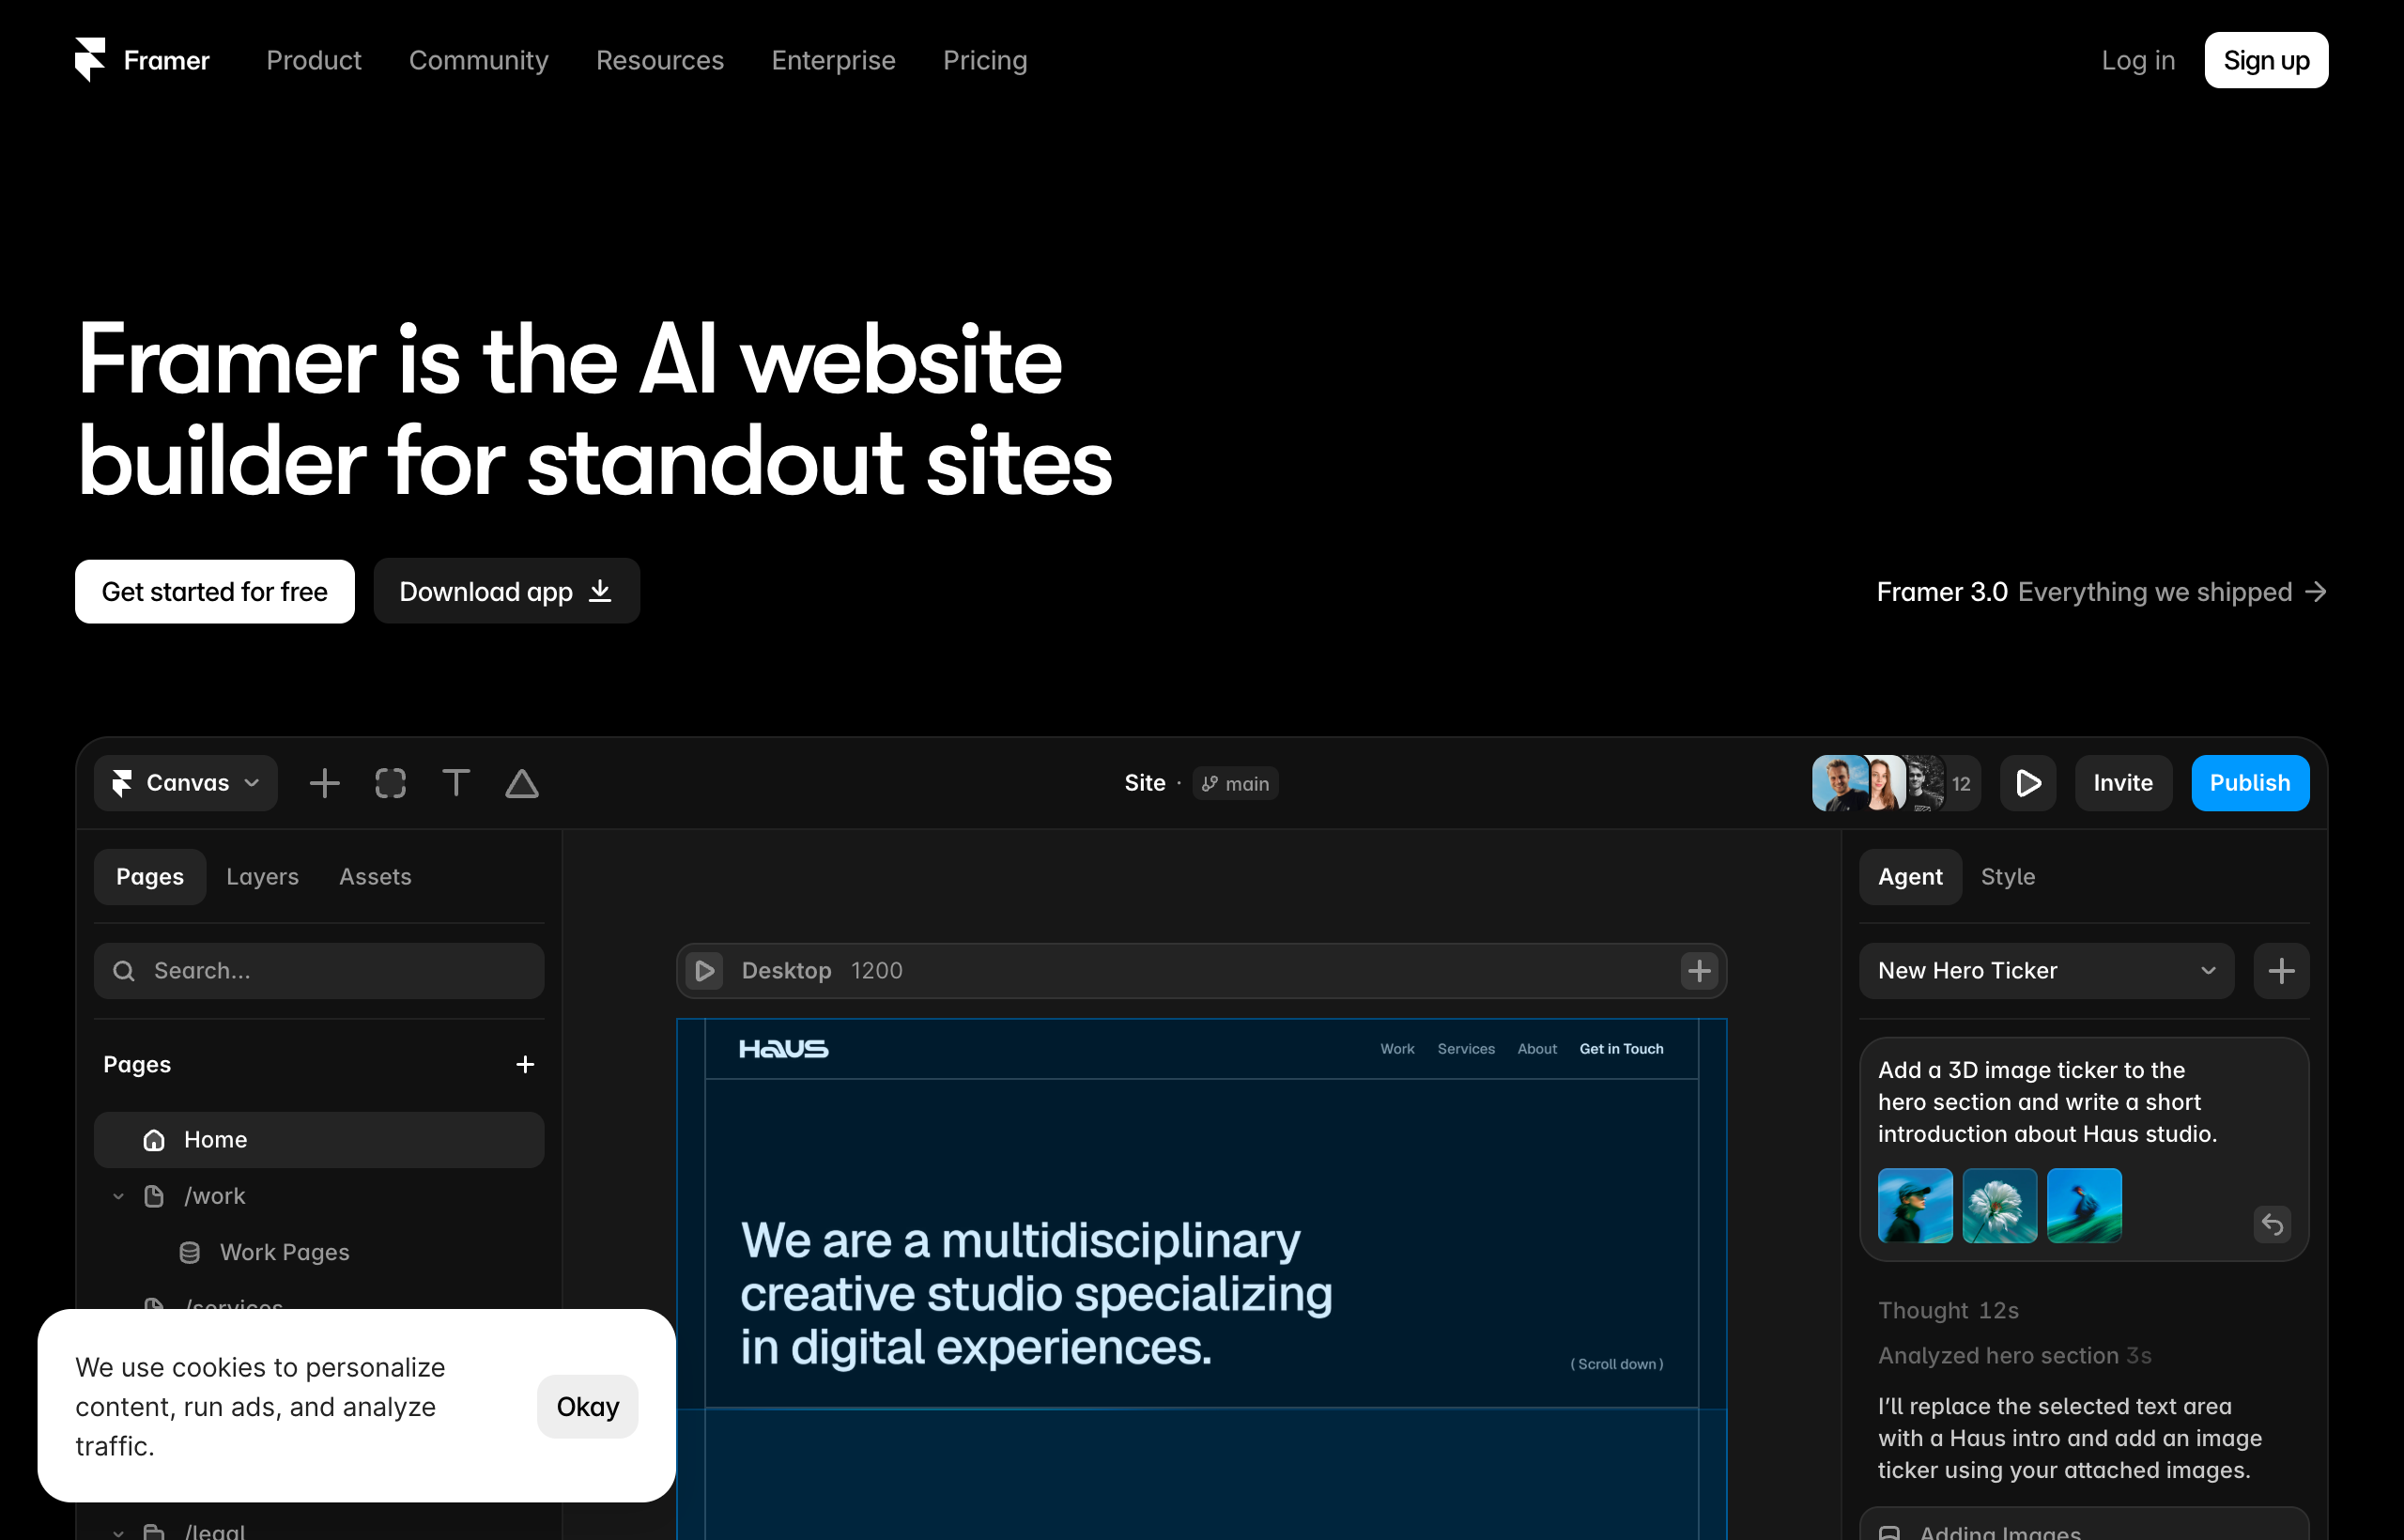
This is the step that protects everything you built. If your URL structure changes at all during the rebuild, you must redirect every important old URL to its new home, so that anyone (and any search engine) hitting the old address lands on the right page instead of a dead end. The cleanest approach is to keep your URL slugs identical where you can, so /about stays /about and /blog/my-post stays /blog/my-post, which minimizes the redirects you even need. Where a URL has to change, create a redirect from the old path to the new one. Framer’s Pro tier supports site redirects, which is exactly what this job needs.
Work straight down your audit list. Every URL that had traffic or backlinks gets a redirect to its equivalent new page. This is tedious and it is non-negotiable, because a redirect is the difference between Google smoothly transferring your ranking to the new page and Google finding a 404 and quietly demoting you.
Step 8: Test everything before you flip the switch
Before you point your domain, Framer gives you a free preview URL on a framer.website subdomain. Use it as a full dress rehearsal. Click every link. Submit the contact form and confirm the message arrives. View every page on a phone, a tablet, and a desktop, because Framer lets you check and fix each breakpoint. Read your text for anything that got mangled in the move. Confirm your redirects are mapped. The whole point is to catch problems while the site is still invisible to the public, not after your real domain is pointing at it.
Step 9: Point your domain at Framer
Only now, with everything built, tested, and redirected, do you connect your real custom domain. Framer includes a free custom domain from the Basic plan up, and connecting it is a matter of updating a couple of DNS records with your domain registrar, following Framer’s instructions for the exact values. Change only the records that control your website. Leave your email records (MX and related) untouched so your email keeps flowing. Within the DNS propagation window, your domain serves the new Framer site, and your WordPress version goes quietly offline.
Congratulations, you have moved. Keep the WordPress install and a full backup around for a few weeks in case you need to reference anything, then cancel the hosting once you are confident.
If that nine-step plan looks like a lot, remember most of it is just clicking through pages you already know by heart. Create your free Framer project and start with Step 2 right now. Duplicate a template that fits your site, and you have already done the hardest structural part.
WordPress vs Framer after the move: what actually changes
It helps to see the before and after side by side, so you know what you are trading for what.
| What | WordPress | Framer |
|---|---|---|
| Hosting | You rent and manage it | Fully hosted on a global CDN, included |
| Maintenance | Core, theme, plugin, and security updates | None, nothing to update or patch |
| Speed | Depends heavily on plugins and setup | Fast by default, optimized image delivery |
| Design control | Constrained by theme and page builder | Free-form visual canvas, high design quality |
| Animation | Usually needs a plugin or code | Built in (scroll, transitions, hover) |
| CMS | Powerful, unlimited, plugin-extensible | Capable, collection limits by plan (2 on Basic, 10 on Pro) |
| E-commerce | Full stores via WooCommerce | Not a store backend, position honestly |
| Learning curve | Familiar if you know WordPress | Gentle if you have used any design tool |
| Cost model | Hosting plus plugins, variable | Per-site plan, predictable |
The pattern is clear. You give up WordPress’s raw extensibility and its store and membership ecosystems. You gain speed, zero maintenance, real design freedom, and a predictable bill. For a marketing site or portfolio, that is a great trade. For a store or a membership platform, it is not, which is the same honest line from earlier, now with the receipts.
Pitfalls that quietly wreck a migration
I have seen every one of these go wrong. Avoid them and your move is smooth.
Pointing the domain before the redirects are ready. The cardinal sin. You get excited, you connect the domain, and now every old URL that changed is a 404 that Google is crawling. Build, test, redirect, then and only then point the domain.
Forgetting the redirects entirely. Even a perfect rebuild loses rankings if old URLs go nowhere. The redirect is the handoff that transfers your SEO equity to the new page. It is the highest-leverage tedious task in the whole project.
Changing every URL slug for no reason. If you needlessly rename /about to /about-us and /contact to /get-in-touch, you have created migration work and redirect debt with no benefit. Keep slugs identical wherever you can.
Not matching metadata. Titles and descriptions are part of how a page is identified. Rebuild them to match so the move reads as a relocation, not a brand-new unknown site.
Uploading giant images. Migration is a rare clean-slate moment. If you drag your original 4 MB hero images straight over, you inherit WordPress’s speed problems in a tool that did not have them. Right-size images on the way in.
Expecting a plugin feature to magically exist. Before you commit, list every plugin doing real work on your site and confirm each has a Framer equivalent or an acceptable substitute. Find the dealbreakers before you start, not on day two.
Deleting WordPress too early. Keep it live and backed up until the new site is confirmed working and indexed. It costs nothing to wait a few weeks and it is your safety net.
How long does it take, and what does it cost?
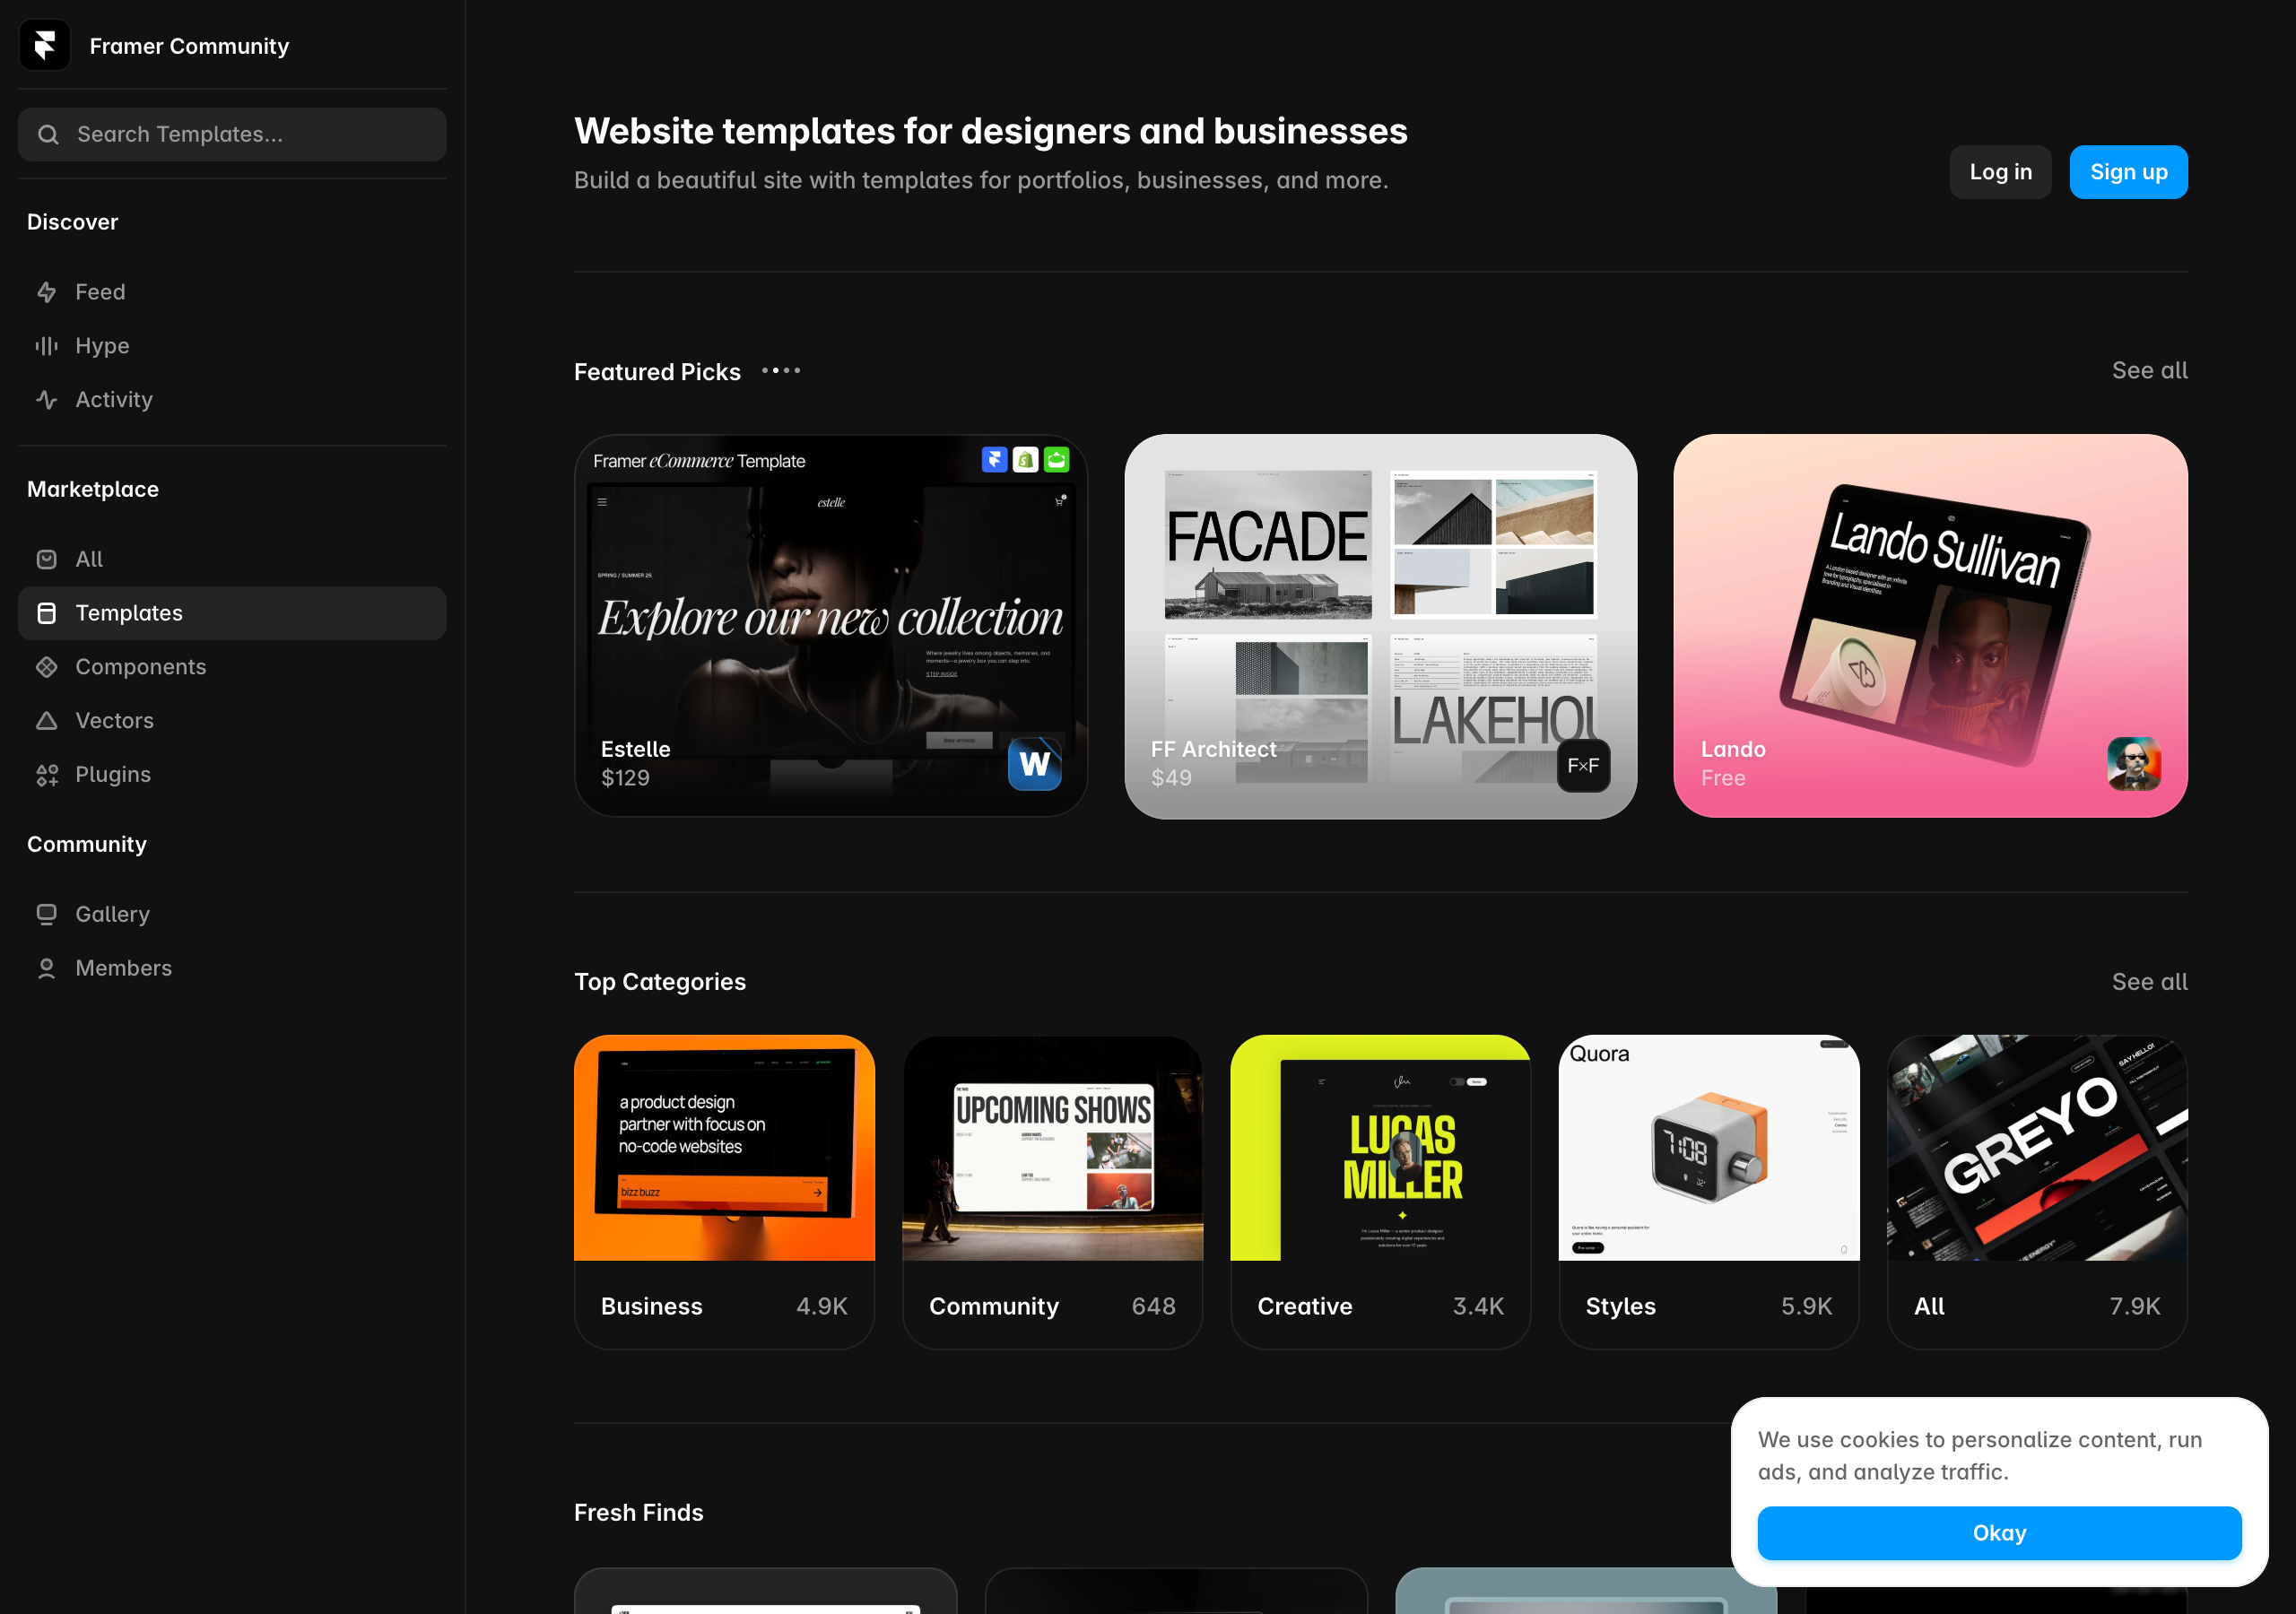
Timeline. For a straightforward site (home, about, services, contact, plus a small blog), a focused person moves in two to four days: roughly half a day to audit and pick a template, a day or two to rebuild pages and content, half a day for the blog CMS and forms, and half a day for metadata, redirects, testing, and the domain switch. A larger site with a big blog archive and more custom pieces stretches to a week or two, mostly because of content volume, not difficulty. The design rebuild is the fast part. The content carry-over is what scales with your site’s size.
Cost. Framer’s pricing is per site and predictable. From the live pricing page (yearly billing), captured July 2026:
| Plan | Price | What you get |
|---|---|---|
| Free | $0 | 500 credits to try, free framer.website domain, 1 GB bandwidth, design pages |
| Basic | $10/mo | Free custom domain, 2 CMS collections, 50 GB bandwidth |
| Pro | $30/mo | 10 CMS collections, 100 GB bandwidth, site redirects, staging environment, branching with previews |
| Enterprise | Custom | Custom limits, enterprise security, dedicated support |
For most WordPress migrations, Pro is the plan you want, because it includes site redirects (which you need for a clean move) and 10 CMS collections (headroom for a real blog). Compare that against what you were paying for WordPress: hosting, a premium theme, premium plugins, and possibly a maintenance service or your own time. Framer often comes out simpler and, once you count the hours you were spending on updates, cheaper in the way that matters.
Frequently asked questions
Can I import my WordPress site into Framer automatically? No. There is no reliable one-click importer. You rebuild the design in Framer, which is fast because you start from a template and reuse your existing content, then carry your text, images, and metadata across. Treat it as a guided reconstruction, not an import.
Will I lose my Google rankings when I move? Not if you do it correctly. The two things that protect your rankings are keeping your URL slugs the same where possible and setting up redirects from any old URL to its new page, plus matching your meta titles and descriptions. Skip the redirects and you will see a dip. Do them and Google transfers your equity to the new pages.
Does my domain and email transfer? Your domain moves: you point it at Framer at the end by updating DNS records. Your email is separate and stays put, as long as you only change the web-related DNS records and leave your mail records alone. A website migration does not touch your inbox.
Can I move my WordPress blog to Framer? Yes. You recreate the blog using Framer’s CMS, creating a collection and copying each post’s content into a CMS item. For large archives, prioritize the posts that earn traffic and links, and consider retiring dead posts with redirects. Watch the collection limits: Basic includes 2, Pro includes 10.
What about my WooCommerce store? Framer is not a full e-commerce backend, so a real store with inventory, variants, and checkout is the one case where I would not recommend leaving WordPress and WooCommerce. Framer is built for marketing sites, portfolios, and content sites, not for running a catalog and processing orders.
How long does the migration take? For a typical small-business or marketing site with a small blog, two to four focused days. Larger sites with big archives take a week or two, driven mostly by content volume rather than technical difficulty.
Do I need to know how to code? No. Framer is a no-code visual builder. If you have used any design tool, even Canva or Figma, the canvas will feel familiar within an hour. The migration is drag, type, and click, not code.
Should I delete my WordPress site right after moving? No. Keep it live and fully backed up for a few weeks until you have confirmed the Framer site works and is getting indexed. Once you are confident, cancel the hosting. The overlap is cheap insurance.
The bottom line
Moving from WordPress to Framer is not an import, it is a rebuild, and that reframe is the whole secret to doing it well. You are not starting over. You already have the words, the images, the page plan, and the domain. What you are trading away is the maintenance, the plugin drag, and the design frustration that sent you searching in the first place. What you gain is a fast, fully hosted, great-looking site that you never have to patch again.
Do it in the right order: audit, pick a template, rebuild, carry your content, match your SEO, set your redirects, test on the free preview, and only then point your domain. Follow that sequence and you protect every bit of the traffic you earned, and you finish in days with a site that finally looks the way you always wanted it to.
The one thing no article can do is show you how fast the rebuild actually feels. That part you have to touch.
Start your free Framer site now, duplicate a template that matches your WordPress site, and rebuild your homepage in the next hour. If the first hour feels this fast and this good, you already have your answer, and the migration is just repeating that hour a few more times.
Pricing, plan names, CMS limits, and marketplace details cited from Framer’s live pricing and Community pages, captured July 2026. Tiers and numbers change over time, so confirm the current details on framer.com/pricing before you commit to a migration.