

You are not here to be talked into anything. You already run a WordPress site, it works, and yet you keep hitting the same three walls: it is slow, it needs constant babysitting, and making it look the way you want means fighting a theme, a page builder, and half a dozen plugins that all disagree with each other. So you typed “wordpress to framer” into Google, and now you want a straight answer: can you actually move, what breaks, and how do you do it without tanking the traffic you spent years earning?
I have migrated real WordPress sites into Framer, including a content-heavy marketing site with a blog, a contact form, and a stack of ranking pages I could not afford to lose. So this guide is not theory. It is the exact playbook, including the unglamorous parts nobody mentions: there is no magic one-click importer, you will rebuild your design by hand, and if you skip the redirect step you will watch your rankings dip for no reason. Do it in the right order, though, and the whole thing takes days, not weeks, and you come out the other side with a site that loads fast, needs zero maintenance, and finally looks like you meant it.
Let us walk through it properly.
Quick answer: how to move from WordPress to Framer
Here is the whole thing in one breath, so you can quote it or skim it.
There is no automatic one-click importer that turns a WordPress site into a Framer site. You migrate by rebuilding the design in Framer (much faster than from scratch, because you start from a template and reuse your existing text and images), then carrying your content over into Framer’s CMS, then setting up redirects and matching your SEO metadata so Google does not lose you, and finally pointing your domain at Framer once everything is tested. What transfers cleanly: your words, your images, your page structure, your domain, your meta titles and descriptions. What you recreate: the visual design, the layouts, the forms, and any plugin-driven functionality. For a typical small-business site, portfolio, or marketing site with a blog, budget two to five focused days. The payoff is a fully hosted, fast, no-code site with no plugins to update and no server to secure.
That is the map. The rest of this article is the terrain.
Before you read another 3,000 words, it helps to feel the tool with your own hands. Start a free Framer site and rebuild your homepage in the next hour. No credit card needed, and touching the canvas once will tell you more than any migration guide, including this one.
Why people actually move from WordPress to Framer
People rarely leave WordPress for one dramatic reason. They leave because of accumulated friction. Here are the real motivations I hear, and which ones Framer genuinely fixes.
Maintenance fatigue. A live WordPress site is a small ongoing job. Core updates, theme updates, plugin updates, PHP version bumps, security patches, backups, and the quiet dread that one update will white-screen the site. Framer is fully hosted. There is nothing to update, nothing to patch, and no server to secure, because you never touch a server at all. For a lot of people, this single change is worth the move.
Speed and the plugin tax. WordPress can be fast, but most real-world sites are not, because every feature arrived as a plugin, and every plugin loads its own scripts and styles. You end up installing a caching plugin to undo the slowness the other plugins caused. Framer publishes to a global CDN and optimizes image delivery by default, so a clean Framer build tends to be fast without you fighting for it.
Design frustration. This is the big one for founders and creatives. In WordPress, your design is constrained by your theme and your page builder, and the moment you want something custom you are editing CSS or wrestling a builder that was not made for it. Framer’s canvas feels like a design tool: you drag, you type inline, you drop in sections, and it looks polished because the defaults were designed by people who care about spacing and typography. If your WordPress site looks like a template because it is a template, Framer is where that stops.
Animation and modern feel. Scroll effects, smooth page transitions, appear-on-scroll motion, and hover states are built into Framer and mostly a matter of selecting an element and choosing an effect. In WordPress, that same polish usually means another plugin or custom code.
Now the honest counterweight, because I am not going to pretend Framer is right for everyone.
When WordPress is still the better home. If you run a real store with inventory, variants, and checkout, WordPress plus WooCommerce is a genuine e-commerce backend and Framer is not. If your site depends on membership logins, a learning-management system, complex directory functionality, a forum, or a database-driven web app, those live in WordPress’s plugin ecosystem and do not have a clean Framer equivalent. And if you are managing thousands of interrelated content items with complex relationships, that is a heavier CMS job than Framer is built for. Framer shines for marketing sites, portfolios, small-business sites, landing pages, and blogs of reasonable size. If that is you, keep reading. If you are running a 5,000-product store, this migration is not the move, and I would rather tell you now than after you have spent three days on it.
The truth about “importing” WordPress into Framer
Let me kill the fantasy first, because it will save you hours of searching for a plugin that does not exist.
There is no reliable one-click importer that recreates a WordPress site inside Framer. WordPress and Framer are built on completely different foundations. WordPress is a database of content rendered through PHP themes and plugins. Framer is a visual, design-first canvas that publishes static, hosted pages. There is no automatic bridge that reads your theme and rebuilds it pixel for pixel on the Framer side. Anyone promising that is overselling.
Here is why that is less scary than it sounds. You are not rebuilding from a blank page. You already have the three hardest inputs done: your content is written, your images exist, and your information architecture (which pages you need and how they connect) is already decided by your current site. Migration is not creation. It is reconstruction, and reconstruction from a finished reference is dramatically faster than designing from nothing. In practice, you start from a Framer template that is close to what you want, then pour your existing words and images into it, then adjust. The bottleneck in most website projects is deciding what to say, and you already decided.
So reframe the whole job. You are not “importing WordPress.” You are rebuilding a site you already fully understand, in a tool that makes the rebuild fast.
What transfers, and what you recreate
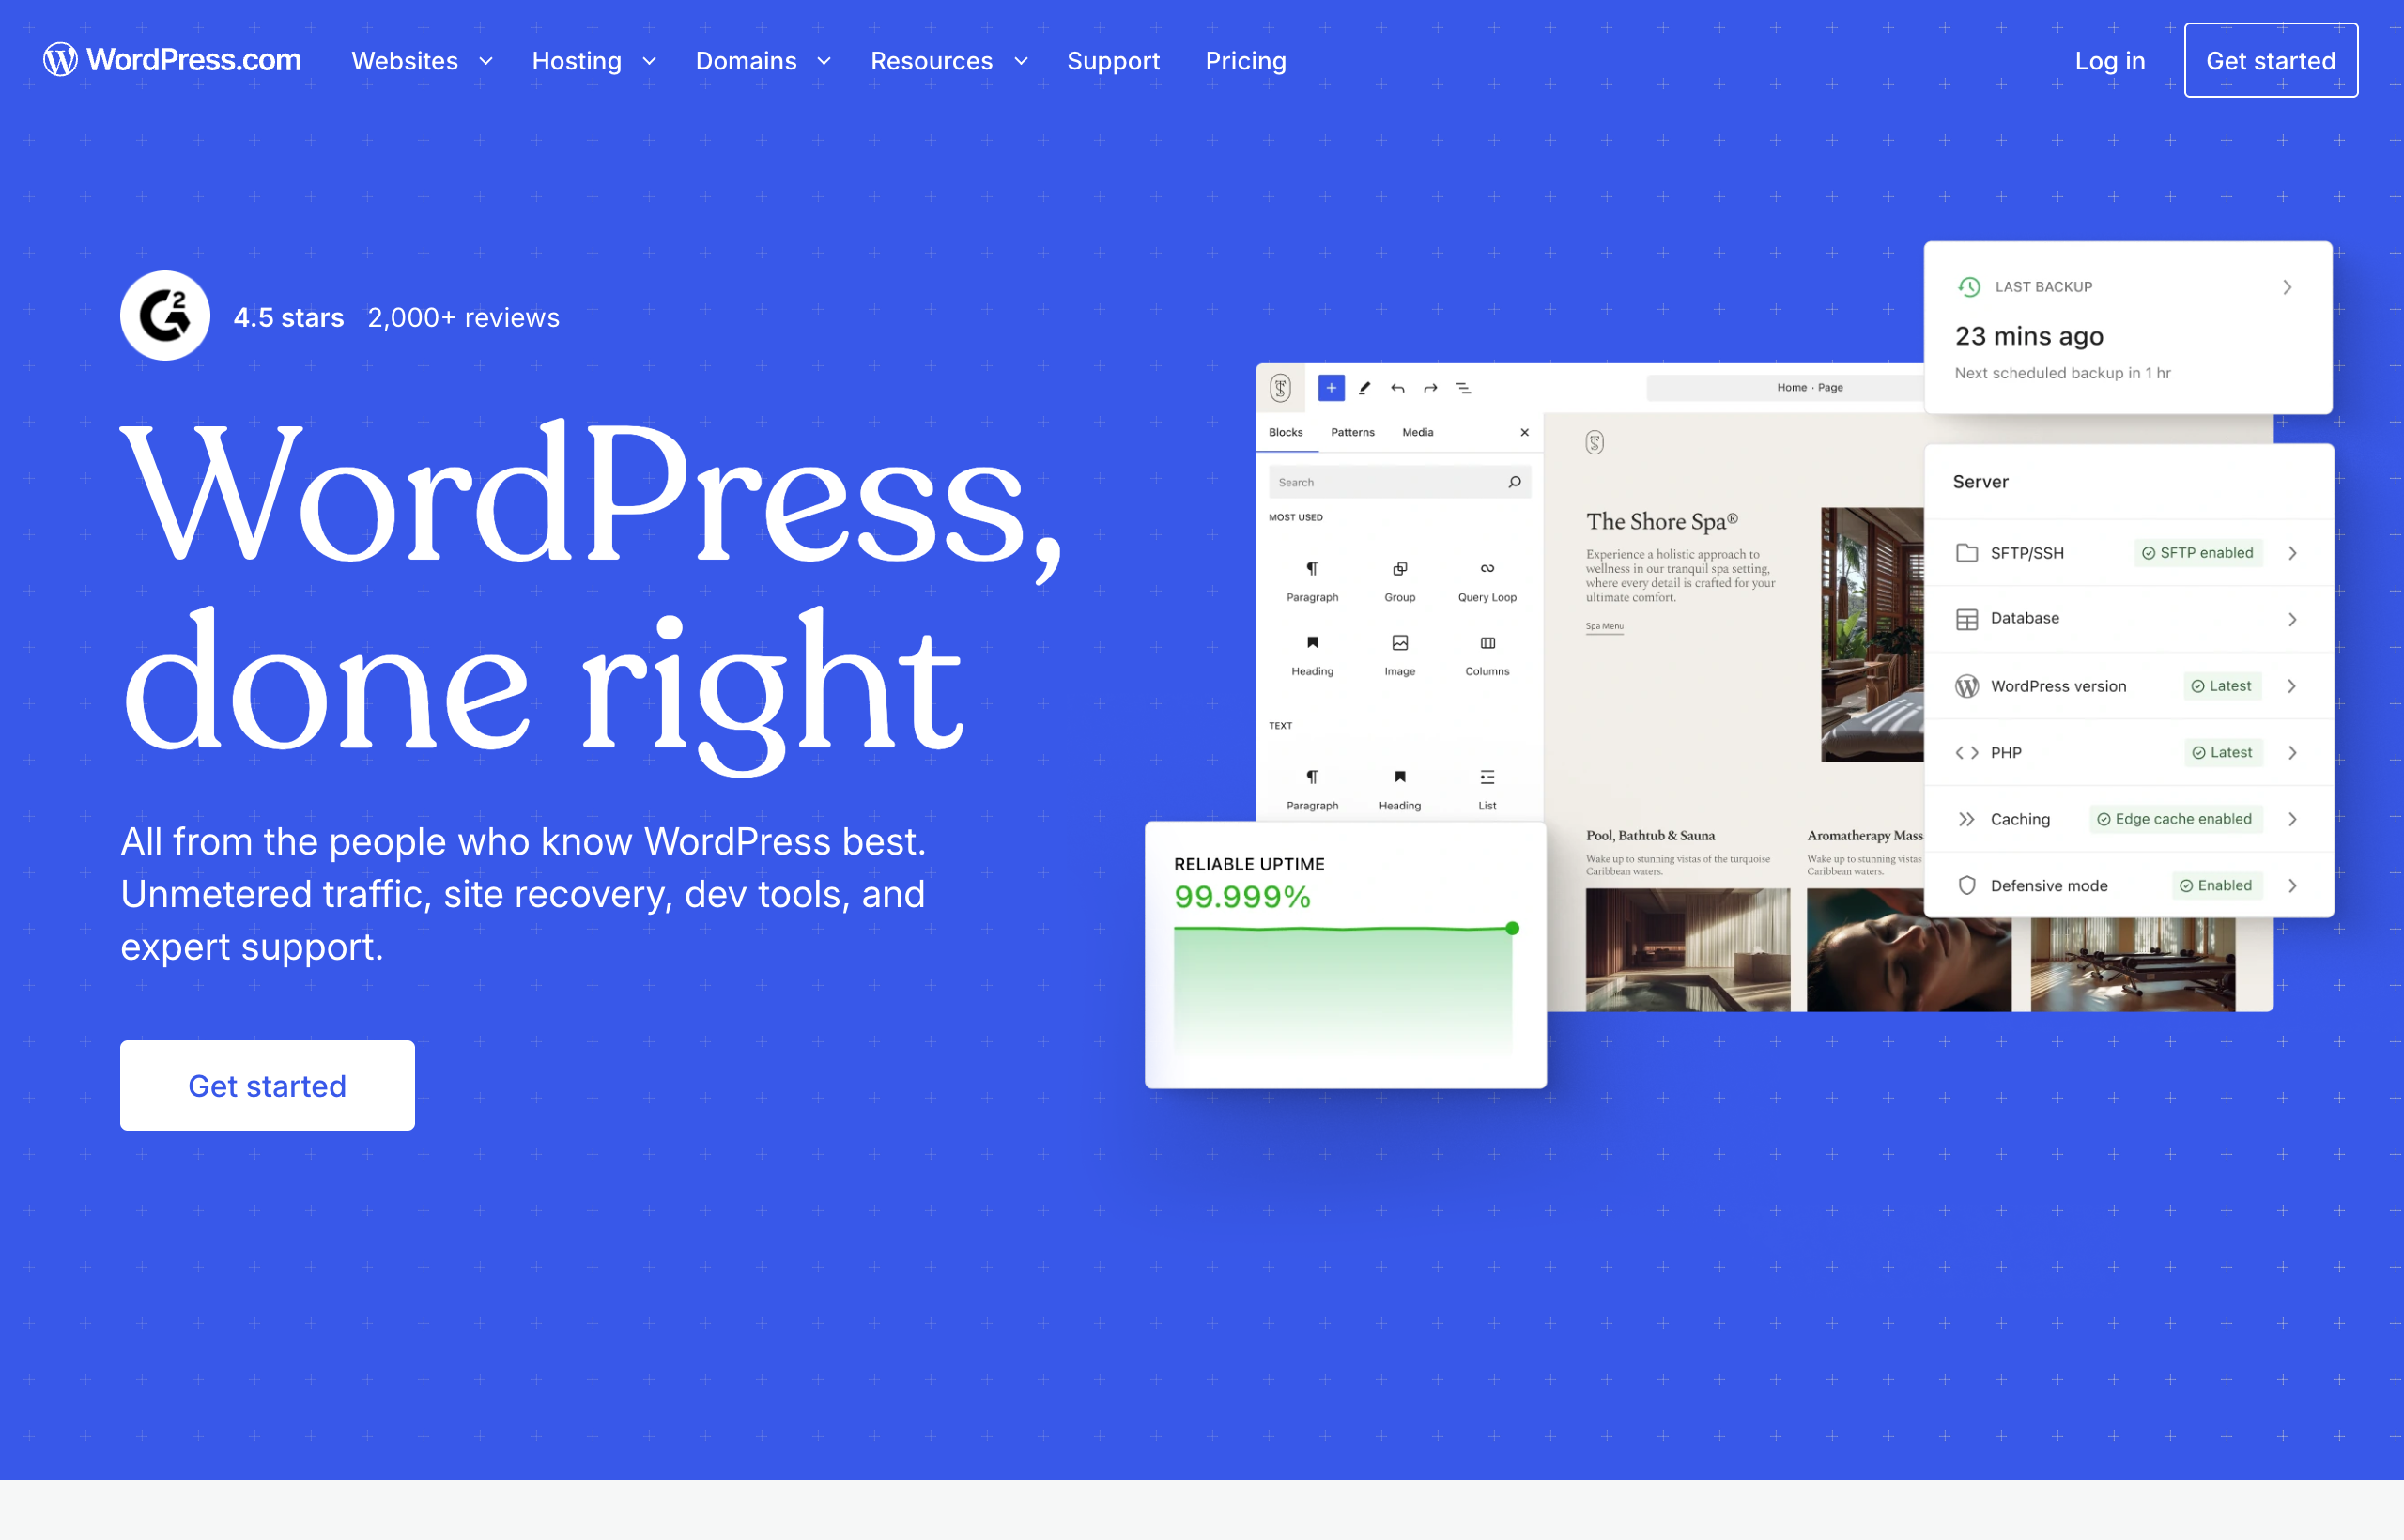
Before you touch anything, it helps to know exactly which parts of your WordPress site walk across the bridge easily and which parts you rebuild by hand. Here is the honest breakdown.
Transfers with little friction:
- Your written content. Every headline, paragraph, and blog post is just text. You copy it over. This is the bulk of the value on most sites and it moves with zero loss.
- Your images and media. Download them from your WordPress media library and upload them into Framer. Take the opportunity to right-size them while you are at it, since oversized images are the number-one speed mistake and this is a clean chance to fix it.
- Your page structure. Your existing sitemap tells you exactly which pages to build: home, about, services, contact, blog, and so on. You are copying a plan you already validated.
- Your domain. Your custom domain moves. You point it at Framer at the end. Your email, if it runs on that domain through a separate provider, is unaffected by a website move as long as you only change the web records and leave the mail records alone.
- Your SEO metadata. Your meta titles, meta descriptions, and Open Graph images are values you can read off your current pages (Yoast, Rank Math, or your theme are storing them) and re-enter in Framer’s page settings. Framer gives you full control over title, description, OG image, and alt text.
You recreate by hand:
- The visual design and layout. This is the real work, and honestly it is the point. You are rebuilding the look, ideally better than before, on Framer’s canvas.
- Forms. Your WordPress contact form (Contact Form 7, Gravity Forms, whatever you used) does not transfer. You rebuild the form in Framer and connect it to your email or a form endpoint.
- Plugin-driven functionality. Anything a plugin did (sliders, popups, booking widgets, custom post types) needs a Framer-native equivalent or a third-party embed. Some things have clean replacements. Some things do not, and that is part of your go or no-go decision.
- Comments, memberships, and dynamic user features. If your blog relies on native WordPress comments or gated member content, plan a different approach, because these are WordPress-native systems.
Read that list twice, because it is also your decision filter. If almost everything you have is in the “transfers easily” column, you are an ideal migration candidate. If half your site lives in the “recreate by hand” column and some of it has no clean equivalent, slow down and price the effort honestly before you start.
The step-by-step WordPress to Framer migration plan
Here is the sequence I actually follow. The order matters more than anything else in this article, because the single biggest way people hurt themselves is by pointing the domain at Framer before the redirects and SEO are ready. Do these in order and you protect your rankings. Do them out of order and you gift Google a pile of broken links.
Step 1: Audit your current WordPress site
Before you build anything, take inventory. Open a simple spreadsheet and list every page and post on your live site with its full URL, its meta title, and its meta description. Two easy ways to get the full list: export your XML sitemap (usually at yoursite.com/sitemap.xml or generated by Yoast or Rank Math), or use a free crawler to spider the site and dump every URL.
While you are in there, mark three things for each page: is it worth keeping, is it getting search traffic, and does it have backlinks pointing to it. Your goal is to know exactly which URLs must be preserved and redirected, because those are the ones carrying your SEO equity. A page that gets zero traffic and has no links can quietly be dropped. A page that ranks and earns links must be recreated and redirected without fail.
This audit is boring and it is the step people skip. Do not skip it. It is the map that keeps you from getting lost later.
Step 2: Pick your Framer starting point
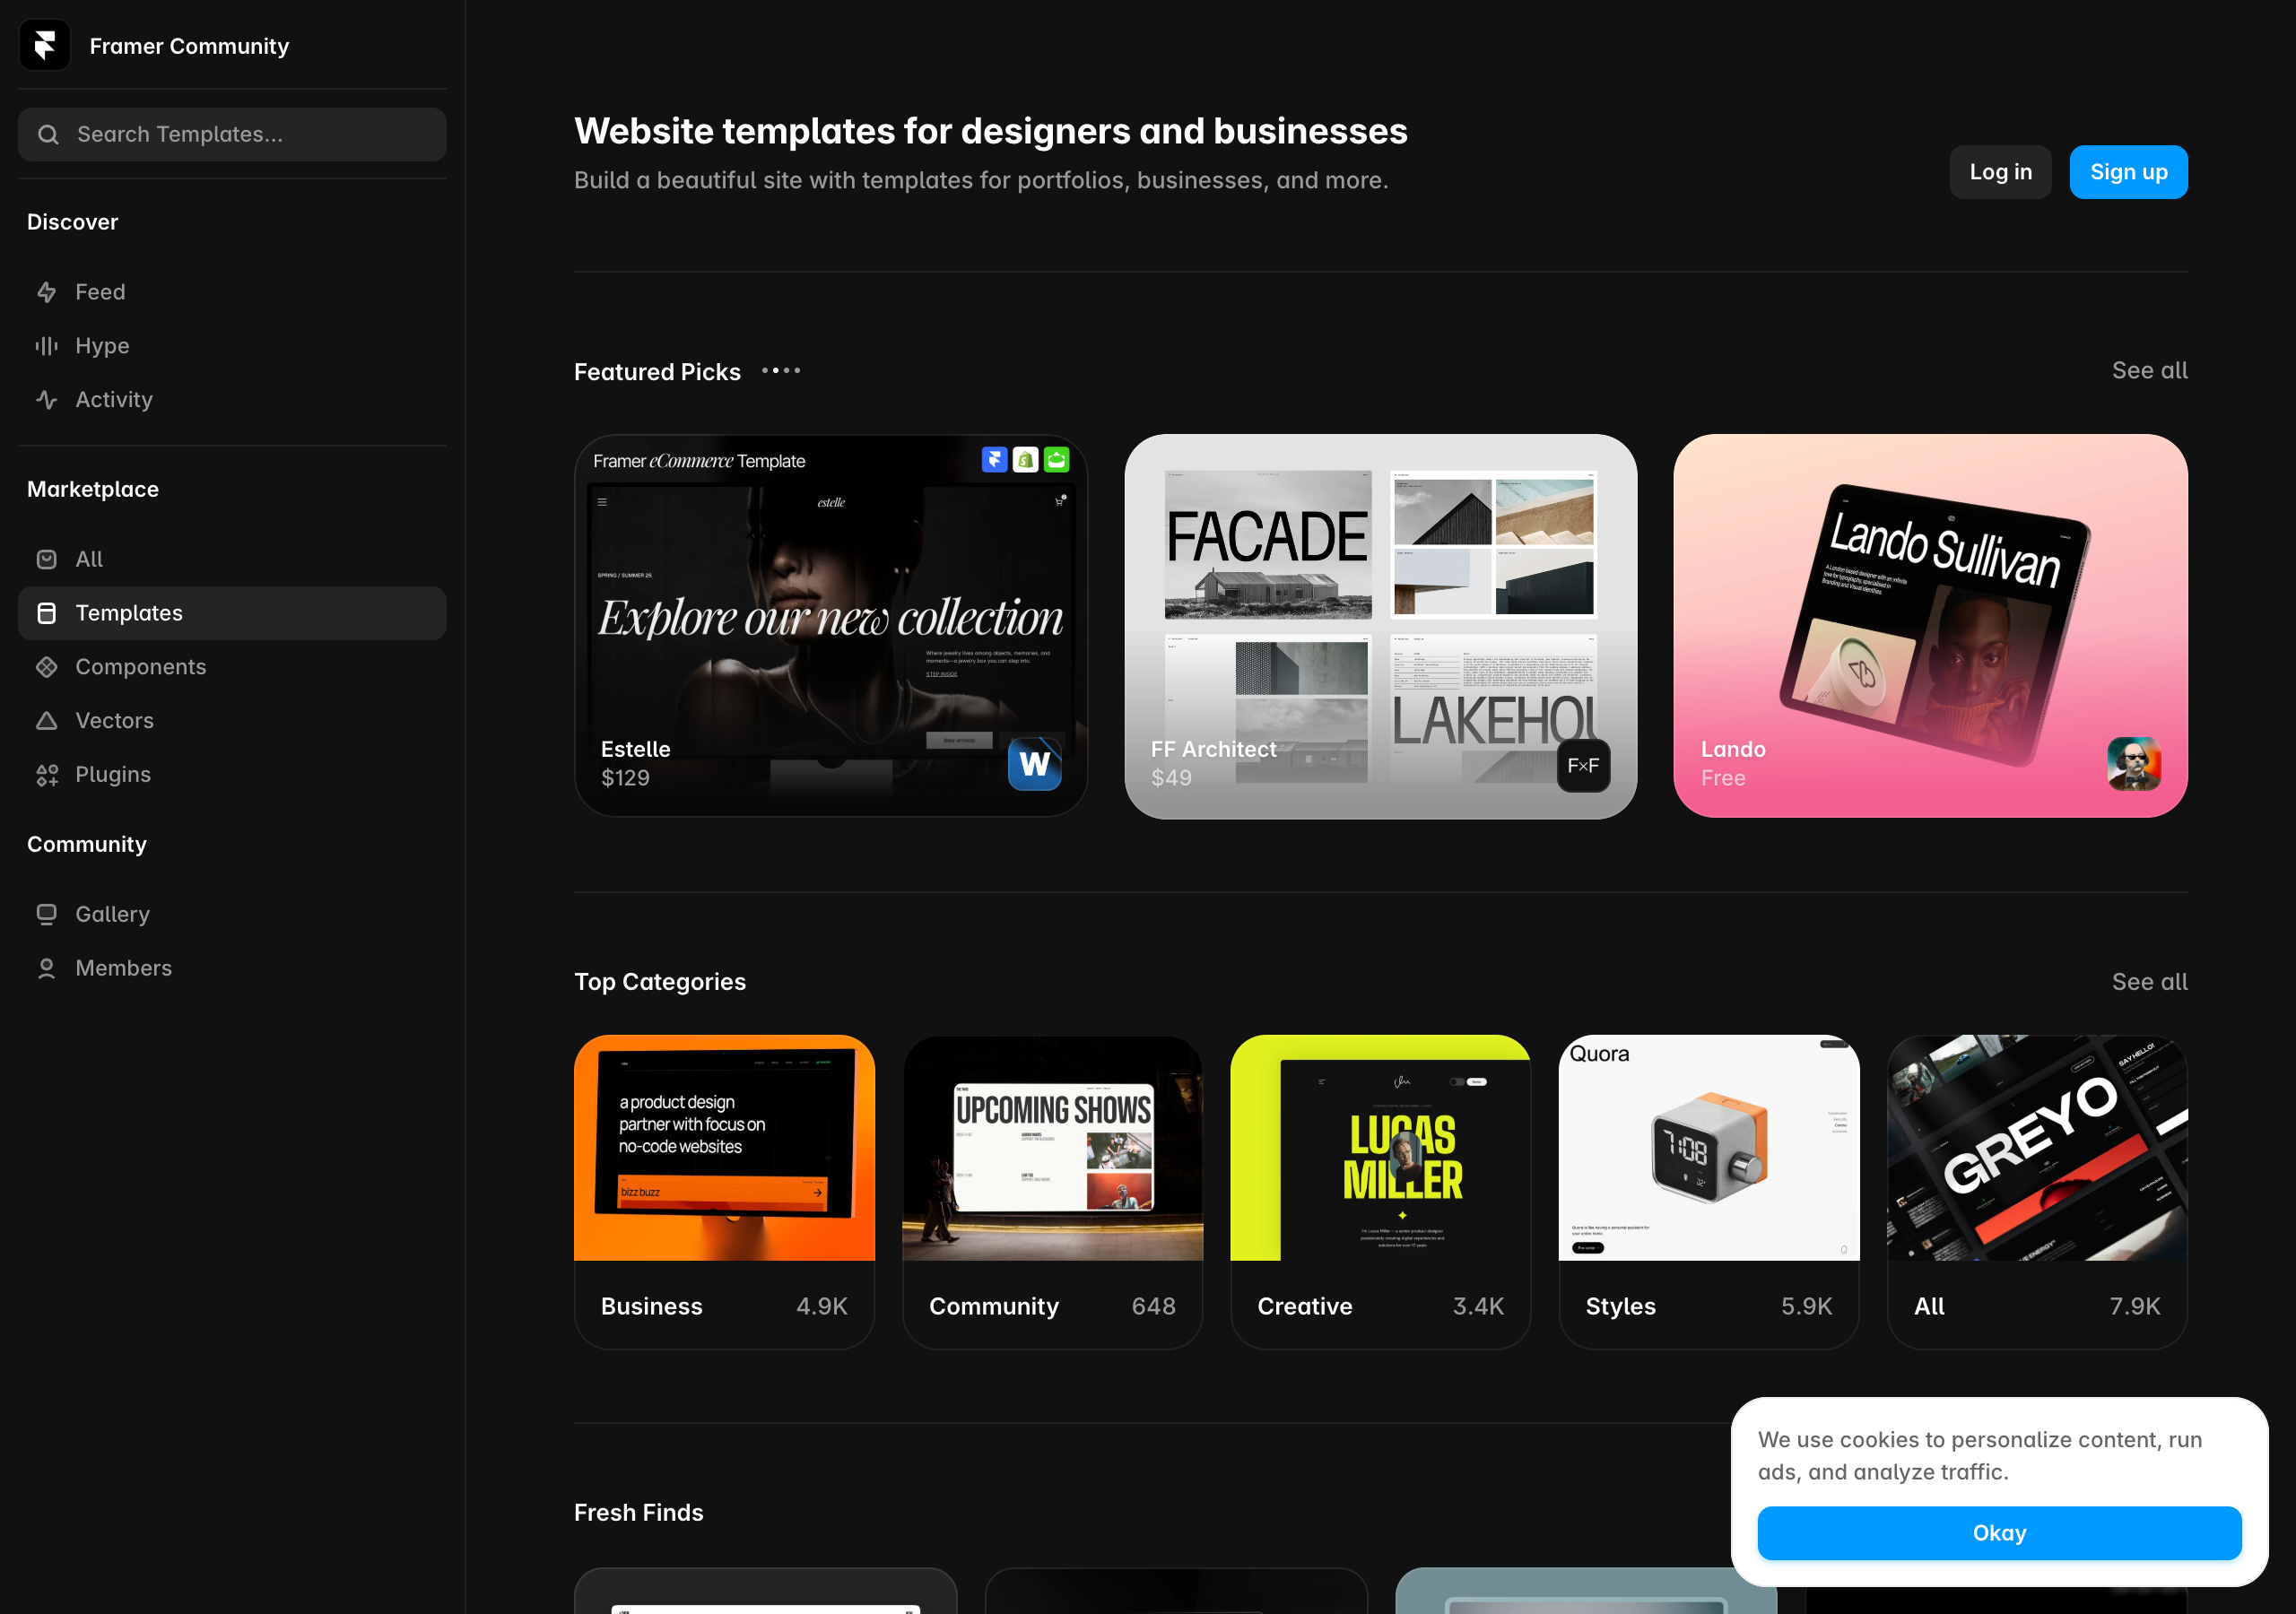
Do not start from a blank canvas unless you enjoy pain. Open Framer’s Community templates (Community, then Templates) and find one whose structure is close to your site: a business template if you run a services site, a portfolio template if you are a creative, a startup template if it is a marketing site. The marketplace mixes free and paid options, real examples include a free template like Lando and paid ones like FF Architect at $49, and you can filter and search a niche visually before you commit. A template gives you professional layout, spacing, and typography as a foundation, so you spend your time on your content instead of reinventing a navbar.
Duplicate the template into your own Framer project. Now you have a polished skeleton, and the migration becomes a matter of swapping the template’s placeholder content for yours.
Step 3: Rebuild your pages and pour in your content
Go page by page, in priority order (home first, then your money pages, then supporting pages). For each one, replace the template’s placeholder text with your real copy, swap in your images, and adjust the layout using Framer’s Stacks to arrange sections and keep them responsive. Because you are working from a template, most of the design decisions are already made well, and you are mostly editing.
This is where you will feel the speed difference against WordPress. There is no theme fighting you, no builder lag, no shortcode soup. You select text, you type, it looks right. A homepage that would have taken an afternoon of theme-wrangling in WordPress often comes together in an hour or two here.
Step 4: Recreate your blog in Framer’s CMS
If you have a blog or any collection of similar pages (case studies, services, team members), use Framer’s CMS. You create a collection, define the fields you need (title, body, image, date, and so on), and Framer generates the dynamic pages from it, just as WordPress generated posts from your database.
One planning note that will save you a headache: check the CMS collection limits on your plan before you build. Straight from Framer’s live pricing page, the Basic plan includes 2 CMS collections and the Pro plan includes 10. For a normal marketing blog with one or two collections, Basic is fine. If your site has many content types (posts, authors, categories, case studies, jobs) each needing its own collection, plan for Pro so you do not hit a wall mid-migration.
Move your posts over by copying the content of each one into a new CMS item. For a handful of posts this is quick. For a large archive, prioritize: bring over the posts that get traffic and links first, and decide honestly whether the long tail of old, unread posts is worth the effort or better retired with a redirect.
Step 5: Rebuild your forms and any interactive pieces
Recreate your contact form on the Framer canvas and connect it so submissions reach you. Rebuild any other interactive elements you actually need: a newsletter signup, a booking embed, a testimonials section. This is also the moment to be ruthless. Every plugin-driven feature you were carrying on WordPress out of habit is a chance to ask “do I actually need this?” Most sites are carrying two or three features nobody uses. Leave them behind.
Step 6: Match your SEO metadata
Now go back to that audit spreadsheet from Step 1 and, page by page, enter the meta title, meta description, and Open Graph image into each Framer page’s settings so they match (or improve on) what you had. Set your alt text on images while you are there. This step is what tells Google “this is the same page, just at a better address and in a better tool.” Skipping it is how you accidentally throw away rankings during a move.
Step 7: Set up redirects from old URLs to new ones
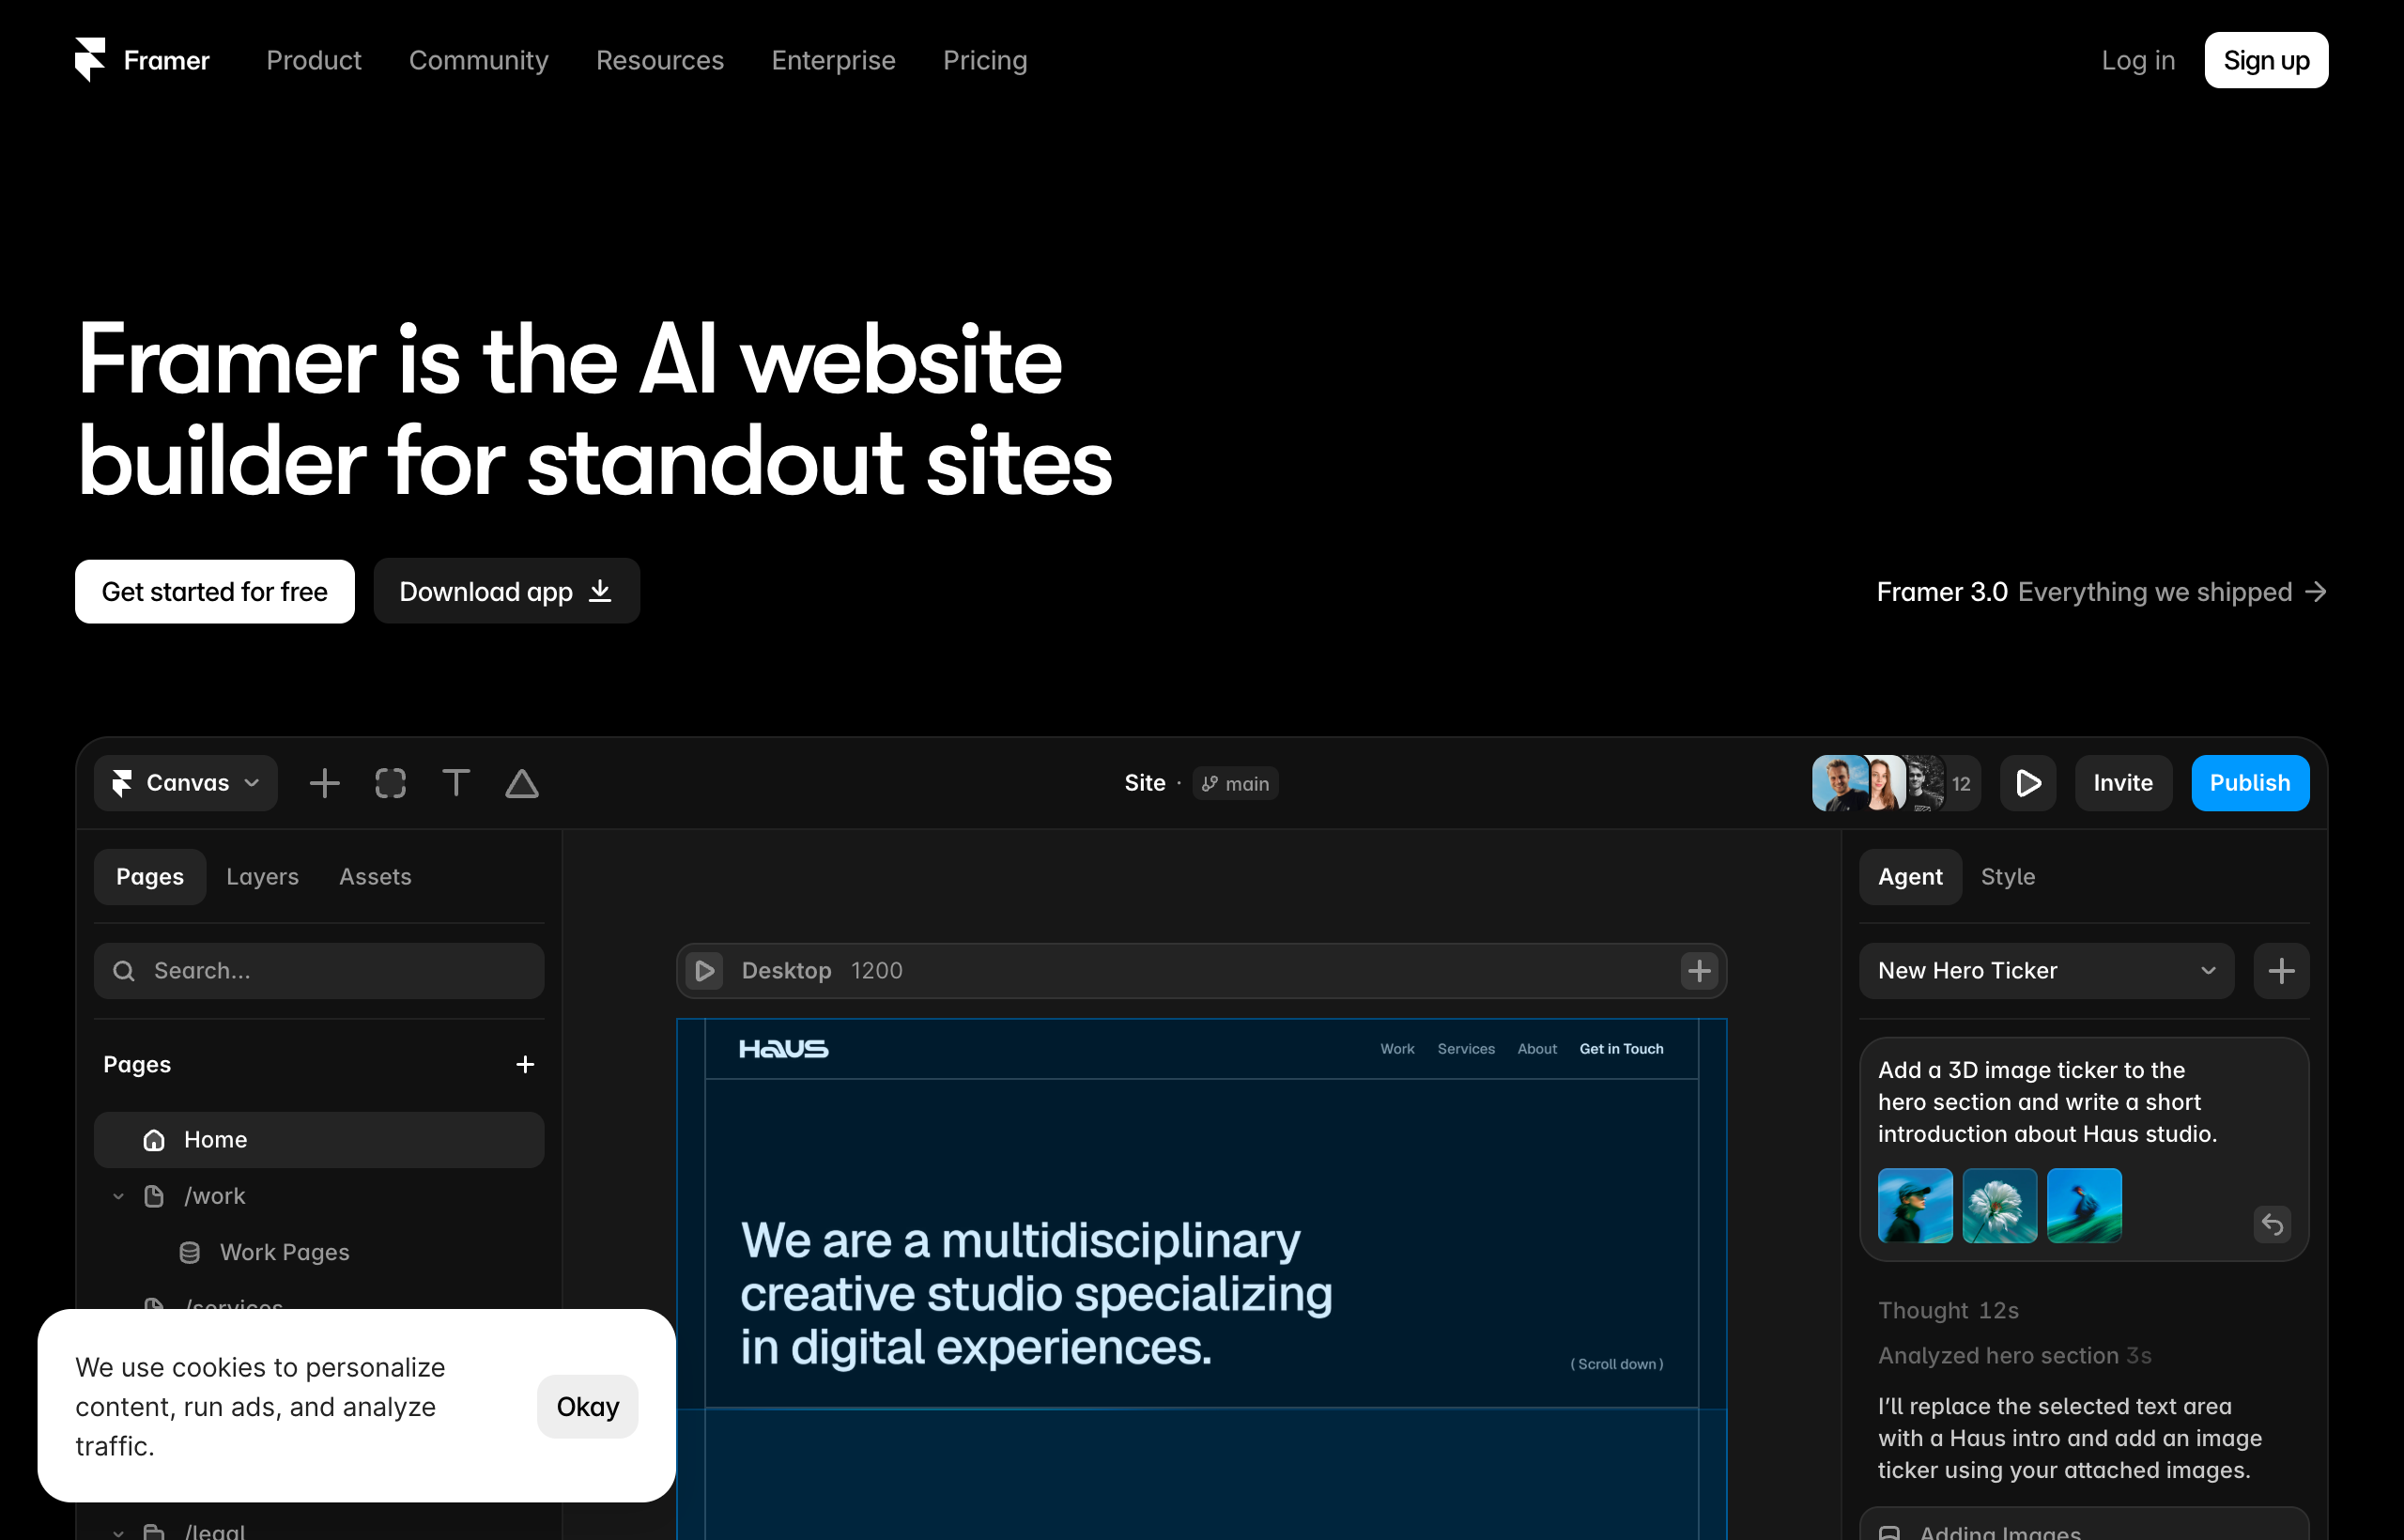
This is the step that protects everything you built. If your URL structure changes at all during the rebuild, you must redirect every important old URL to its new home, so that anyone (and any search engine) hitting the old address lands on the right page instead of a dead end. The cleanest approach is to keep your URL slugs identical where you can, so /about stays /about and /blog/my-post stays /blog/my-post, which minimizes the redirects you even need. Where a URL has to change, create a redirect from the old path to the new one. Framer’s Pro tier supports site redirects, which is exactly what this job needs.
Work straight down your audit list. Every URL that had traffic or backlinks gets a redirect to its equivalent new page. This is tedious and it is non-negotiable, because a redirect is the difference between Google smoothly transferring your ranking to the new page and Google finding a 404 and quietly demoting you.
Step 8: Test everything before you flip the switch
Before you point your domain, Framer gives you a free preview URL on a framer.website subdomain. Use it as a full dress rehearsal. Click every link. Submit the contact form and confirm the message arrives. View every page on a phone, a tablet, and a desktop, because Framer lets you check and fix each breakpoint. Read your text for anything that got mangled in the move. Confirm your redirects are mapped. The whole point is to catch problems while the site is still invisible to the public, not after your real domain is pointing at it.
Step 9: Point your domain at Framer
Only now, with everything built, tested, and redirected, do you connect your real custom domain. Framer includes a free custom domain from the Basic plan up, and connecting it is a matter of updating a couple of DNS records with your domain registrar, following Framer’s instructions for the exact values. Change only the records that control your website. Leave your email records (MX and related) untouched so your email keeps flowing. Within the DNS propagation window, your domain serves the new Framer site, and your WordPress version goes quietly offline.
Congratulations, you have moved. Keep the WordPress install and a full backup around for a few weeks in case you need to reference anything, then cancel the hosting once you are confident.
If that nine-step plan looks like a lot, remember most of it is just clicking through pages you already know by heart. Create your free Framer project and start with Step 2 right now. Duplicate a template that fits your site, and you have already done the hardest structural part.
WordPress vs Framer after the move: what actually changes
It helps to see the before and after side by side, so you know what you are trading for what.
| What | WordPress | Framer |
|---|---|---|
| Hosting | You rent and manage it | Fully hosted on a global CDN, included |
| Maintenance | Core, theme, plugin, and security updates | None, nothing to update or patch |
| Speed | Depends heavily on plugins and setup | Fast by default, optimized image delivery |
| Design control | Constrained by theme and page builder | Free-form visual canvas, high design quality |
| Animation | Usually needs a plugin or code | Built in (scroll, transitions, hover) |
| CMS | Powerful, unlimited, plugin-extensible | Capable, collection limits by plan (2 on Basic, 10 on Pro) |
| E-commerce | Full stores via WooCommerce | Not a store backend, position honestly |
| Learning curve | Familiar if you know WordPress | Gentle if you have used any design tool |
| Cost model | Hosting plus plugins, variable | Per-site plan, predictable |
The pattern is clear. You give up WordPress’s raw extensibility and its store and membership ecosystems. You gain speed, zero maintenance, real design freedom, and a predictable bill. For a marketing site or portfolio, that is a great trade. For a store or a membership platform, it is not, which is the same honest line from earlier, now with the receipts.
Pitfalls that quietly wreck a migration
I have seen every one of these go wrong. Avoid them and your move is smooth.
Pointing the domain before the redirects are ready. The cardinal sin. You get excited, you connect the domain, and now every old URL that changed is a 404 that Google is crawling. Build, test, redirect, then and only then point the domain.
Forgetting the redirects entirely. Even a perfect rebuild loses rankings if old URLs go nowhere. The redirect is the handoff that transfers your SEO equity to the new page. It is the highest-leverage tedious task in the whole project.
Changing every URL slug for no reason. If you needlessly rename /about to /about-us and /contact to /get-in-touch, you have created migration work and redirect debt with no benefit. Keep slugs identical wherever you can.
Not matching metadata. Titles and descriptions are part of how a page is identified. Rebuild them to match so the move reads as a relocation, not a brand-new unknown site.
Uploading giant images. Migration is a rare clean-slate moment. If you drag your original 4 MB hero images straight over, you inherit WordPress’s speed problems in a tool that did not have them. Right-size images on the way in.
Expecting a plugin feature to magically exist. Before you commit, list every plugin doing real work on your site and confirm each has a Framer equivalent or an acceptable substitute. Find the dealbreakers before you start, not on day two.
Deleting WordPress too early. Keep it live and backed up until the new site is confirmed working and indexed. It costs nothing to wait a few weeks and it is your safety net.
How long does it take, and what does it cost?
Timeline. For a straightforward site (home, about, services, contact, plus a small blog), a focused person moves in two to four days: roughly half a day to audit and pick a template, a day or two to rebuild pages and content, half a day for the blog CMS and forms, and half a day for metadata, redirects, testing, and the domain switch. A larger site with a big blog archive and more custom pieces stretches to a week or two, mostly because of content volume, not difficulty. The design rebuild is the fast part. The content carry-over is what scales with your site’s size.
Cost. Framer’s pricing is per site and predictable. From the live pricing page (yearly billing), captured July 2026:
| Plan | Price | What you get |
|---|---|---|
| Free | $0 | 500 credits to try, free framer.website domain, 1 GB bandwidth, design pages |
| Basic | $10/mo | Free custom domain, 2 CMS collections, 50 GB bandwidth |
| Pro | $30/mo | 10 CMS collections, 100 GB bandwidth, site redirects, staging environment, branching with previews |
| Enterprise | Custom | Custom limits, enterprise security, dedicated support |
For most WordPress migrations, Pro is the plan you want, because it includes site redirects (which you need for a clean move) and 10 CMS collections (headroom for a real blog). Compare that against what you were paying for WordPress: hosting, a premium theme, premium plugins, and possibly a maintenance service or your own time. Framer often comes out simpler and, once you count the hours you were spending on updates, cheaper in the way that matters.
Frequently asked questions
Can I import my WordPress site into Framer automatically? No. There is no reliable one-click importer. You rebuild the design in Framer, which is fast because you start from a template and reuse your existing content, then carry your text, images, and metadata across. Treat it as a guided reconstruction, not an import.
Will I lose my Google rankings when I move? Not if you do it correctly. The two things that protect your rankings are keeping your URL slugs the same where possible and setting up redirects from any old URL to its new page, plus matching your meta titles and descriptions. Skip the redirects and you will see a dip. Do them and Google transfers your equity to the new pages.
Does my domain and email transfer? Your domain moves: you point it at Framer at the end by updating DNS records. Your email is separate and stays put, as long as you only change the web-related DNS records and leave your mail records alone. A website migration does not touch your inbox.
Can I move my WordPress blog to Framer? Yes. You recreate the blog using Framer’s CMS, creating a collection and copying each post’s content into a CMS item. For large archives, prioritize the posts that earn traffic and links, and consider retiring dead posts with redirects. Watch the collection limits: Basic includes 2, Pro includes 10.
What about my WooCommerce store? Framer is not a full e-commerce backend, so a real store with inventory, variants, and checkout is the one case where I would not recommend leaving WordPress and WooCommerce. Framer is built for marketing sites, portfolios, and content sites, not for running a catalog and processing orders.
How long does the migration take? For a typical small-business or marketing site with a small blog, two to four focused days. Larger sites with big archives take a week or two, driven mostly by content volume rather than technical difficulty.
Do I need to know how to code? No. Framer is a no-code visual builder. If you have used any design tool, even Canva or Figma, the canvas will feel familiar within an hour. The migration is drag, type, and click, not code.
Should I delete my WordPress site right after moving? No. Keep it live and fully backed up for a few weeks until you have confirmed the Framer site works and is getting indexed. Once you are confident, cancel the hosting. The overlap is cheap insurance.
The bottom line
Moving from WordPress to Framer is not an import, it is a rebuild, and that reframe is the whole secret to doing it well. You are not starting over. You already have the words, the images, the page plan, and the domain. What you are trading away is the maintenance, the plugin drag, and the design frustration that sent you searching in the first place. What you gain is a fast, fully hosted, great-looking site that you never have to patch again.
Do it in the right order: audit, pick a template, rebuild, carry your content, match your SEO, set your redirects, test on the free preview, and only then point your domain. Follow that sequence and you protect every bit of the traffic you earned, and you finish in days with a site that finally looks the way you always wanted it to.
The one thing no article can do is show you how fast the rebuild actually feels. That part you have to touch.
Start your free Framer site now, duplicate a template that matches your WordPress site, and rebuild your homepage in the next hour. If the first hour feels this fast and this good, you already have your answer, and the migration is just repeating that hour a few more times.
Pricing, plan names, CMS limits, and marketplace details cited from Framer’s live pricing and Community pages, captured July 2026. Tiers and numbers change over time, so confirm the current details on framer.com/pricing before you commit to a migration.


